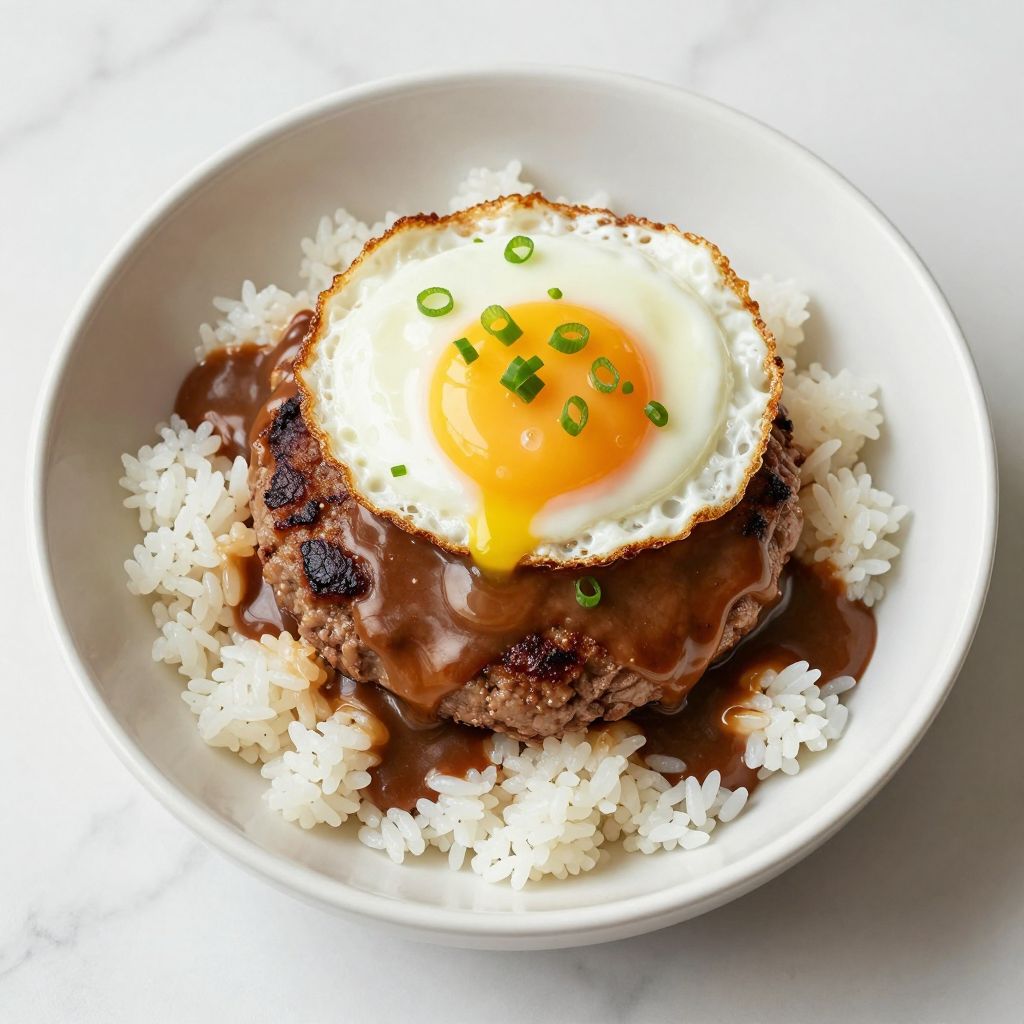
Loco moco delivers everything you want on a plate: a juicy seasoned beef patty, rich brown gravy, a runny fried egg, and a bed of sticky white rice that soaks up every drop. This Hawaiian comfort food classic turns pantry staples into a meal that feels like a warm hug from the islands. If you have never made it at home, you are about to discover how simple and satisfying it can be.
What Makes This Recipe Worth Your Time
This dish gives you maximum comfort with minimum fuss. You can have a restaurant quality loco moco on the table in under 30 minutes using ingredients you probably already have.
- One pan gravy that tastes like it simmered for hours but comes together in five minutes
- Perfectly seasoned patties with a caramelized crust that holds up under the gravy
- Weeknight friendly timing that works even when you walk in the door hungry and tired
- Customizable protein so you can swap in turkey, pork, or plant based alternatives without losing the soul of the dish
- Kid approved flavor profile that brings everyone to the table without complaints
A Little Background on This Dish
Loco moco was born in Hilo, Hawaii in 1949 at the Lincoln Grill restaurant. A group of hungry teenagers wanted something filling, fast, and cheap, so the owners stacked rice, a hamburger patty, gravy, and a fried egg into one bowl and created a legend.
The name reportedly came from one of those teenagers whose nickname was “Crazy,” which translates to “loco” in Spanish. The “moco” was added because it rhymed and sounded fun. What started as a quick bite for broke kids became a beloved Hawaiian staple served everywhere from diners to fine dining restaurants.
My Experience With This Recipe
I first tried loco moco at a tiny Hawaiian plate lunch spot in Austin and immediately knew I needed to figure out how to make it at home. The combination of textures and flavors hit every craving I did not even know I had.
My first few attempts produced gravy that tasted like flour paste and patties that fell apart under the egg. I kept adding more beef drippings and realized the secret was patience with the roux and not overworking the meat.
The night I finally nailed it, my kids scraped their bowls clean and asked when we were having it again. The smell of that savory gravy mixed with the sizzle of the eggs told me I had cracked the code, and this version has been in our regular rotation ever since.
Before You Start: Key Things to Know
This recipe suits any home cook comfortable with basic stovetop skills. The biggest challenge is timing everything so the rice, patties, gravy, and eggs all come together hot.
- Difficulty level: Easy to intermediate, perfect for confident beginners
- Active vs passive time: 25 minutes active cooking, no passive waiting except rice
- Most important equipment: A large cast iron or heavy bottomed skillet for proper searing
- Step requiring most attention: The gravy roux needs constant whisking to prevent lumps and burning
Recipe at a Glance
- Recipe Name: Loco Moco
- Yield: 4 servings
- Prep Time: 10 minutes
- Cook Time: 20 minutes
- Total Time: 30 minutes
- Resting Time: 2 minutes for patties
- Difficulty: Easy
- Course: Main dish
- Cuisine: Hawaiian
- Calories per Serving: 685
How to Source the Best Ingredients
The quality of your beef and eggs will make or break this dish. Spend an extra minute choosing wisely at the store and you will taste the difference in every bite.
- Ground beef: Look for 80/20 blend with bright red color and no gray spots; the fat content creates flavor and keeps patties moist
- Eggs: Choose fresh eggs with firm yolks that sit high; older eggs spread thin and break easily
- Beef broth: Select low sodium broth so you control the salt; check for brands listing beef as the first ingredient
- White rice: Short or medium grain gives the sticky texture traditional to this dish; jasmine works but feels less authentic
- Worcestershire sauce: The original Lea and Perrins brand has the most complex fermented flavor
Ingredients for Loco Moco
For the Rice
- 2 cups short grain white rice
- 2 1/2 cups water
- 1/2 teaspoon salt
For the Beef Patties
- 1 1/2 pounds ground beef (80/20 blend)
- 1 teaspoon garlic powder
- 1 teaspoon onion powder
- 1/2 teaspoon black pepper
- 1 teaspoon salt
- 1 tablespoon Worcestershire sauce
- 1 tablespoon vegetable oil
For the Gravy
- 3 tablespoons butter
- 3 tablespoons all purpose flour
- 2 cups beef broth (low sodium)
- 1 tablespoon Worcestershire sauce
- 1/2 teaspoon black pepper
- Salt to taste
For the Eggs
- 4 large eggs
- 1 tablespoon butter
- Salt and pepper to taste
For Garnish
- 2 green onions, thinly sliced
Smart Substitutions and Swaps
- Ground beef: Provides the rich, savory base and fat for flavor; substitute ground turkey or plant based crumbles but add an extra tablespoon of oil to compensate for lower fat content
- Butter: Creates the roux base and adds richness; use olive oil for dairy free but expect a slightly different flavor profile
- All purpose flour: Thickens the gravy and creates body; use cornstarch mixed with cold water for gluten free, adding it at the end instead of making a roux
- Beef broth: Delivers the savory depth of the gravy; vegetable broth works for vegetarian versions but add a splash of soy sauce for umami
- White rice: Provides the sticky, absorbent base; cauliflower rice works for low carb but will not soak up gravy the same way
- Eggs: Adds protein and that classic runny yolk; skip entirely for egg allergies or use a vegan fried egg product
Tools and Equipment You Will Need
Get everything out and within reach before you start cooking. This recipe moves fast once you begin, and searching for tools mid cook leads to burnt gravy.
- Large cast iron or heavy bottomed skillet (retains heat for proper searing)
- Medium saucepan with lid for rice
- Small saucepan for gravy
- Nonstick skillet for eggs (prevents sticking without excess fat)
- Whisk (prevents lumpy gravy)
- Spatula
- Measuring cups and spoons
- Mixing bowl
- Instant read thermometer (ensures safe internal temperature)
How to Make Loco Moco
Read through all the steps before you start so you understand the flow. Start your rice first since it needs the most passive time, then prep your patties while it cooks.
Step 1: Rinse and Start the Rice
Place the rice in a fine mesh strainer and rinse under cold water until the water runs clear, about 1 minute. Add the rinsed rice, water, and salt to a medium saucepan and bring to a boil over high heat.
Rinsing removes excess surface starch that makes rice gummy and clumpy. This step is the difference between fluffy separate grains and a sticky mess.
Watch for the water to reach a rolling boil with large bubbles breaking the surface before moving to the next step.
Step 2: Simmer the Rice
Once boiling, reduce heat to the lowest setting, cover with a tight fitting lid, and cook for 18 minutes. Do not lift the lid during cooking.
The trapped steam does the actual cooking work, and every time you lift the lid you release that steam and extend the cook time. Trust the process.
You will know the rice is done when all the water has been absorbed and small steam holes appear on the surface when you finally remove the lid.
Step 3: Mix the Beef Patty Seasoning
In a large bowl, combine the ground beef, garlic powder, onion powder, black pepper, salt, and Worcestershire sauce. Mix gently with your hands until the seasonings are just combined, about 30 seconds.
Overmixing develops the proteins in the meat and creates a dense, tough patty instead of a tender, juicy one. Think of it like gently folding, not kneading bread dough.
The mixture is ready when you can no longer see distinct pockets of seasoning but the meat still looks loose and crumbly.
Step 4: Form the Patties
Divide the mixture into 4 equal portions and shape each into a patty about 3/4 inch thick and slightly wider than your eventual serving bowl. Press a shallow dimple into the center of each patty with your thumb.
Patties shrink and puff up in the center as they cook due to protein contraction. The dimple counteracts this and keeps your patty flat so it sits nicely under the egg.
Your patties should hold together when you pick them up but not feel compressed or dense in your hand.
Step 5: Sear the Patties
Heat the vegetable oil in a large cast iron skillet over medium high heat until it shimmers and a drop of water sizzles immediately. Add the patties and cook without moving for 4 minutes.
The high heat creates the Maillard reaction, which builds that caramelized, savory crust that makes the patty taste like more than just seasoned beef. Moving the patties interrupts this process.
Look for deep brown color on the bottom edge of the patty and juices pooling on the top surface before flipping.
Step 6: Finish Cooking the Patties
Flip each patty and cook for another 3 to 4 minutes until the internal temperature reaches 160°F. Transfer to a plate and let rest for 2 minutes while you make the gravy.
Resting allows the juices to redistribute throughout the meat instead of running out onto your plate the moment you cut in. Skipping this step means dry patties.
The patties should feel firm when pressed but not rock hard, and clear juices should pool on the plate after resting.
Step 7: Start the Gravy Roux
In a small saucepan, melt the butter over medium heat. Add the flour and whisk constantly for 2 minutes until the mixture turns light golden and smells nutty.
This cooked flour and fat mixture is called a roux, and it gives the gravy body without that raw flour taste. Cooking it to golden color removes the starchy flavor entirely.
Watch for the roux to bubble evenly across the surface and shift from pale white to a light tan color before adding liquid.
Step 8: Build the Gravy
Slowly pour in the beef broth while whisking constantly, adding about 1/2 cup at a time. Once all the broth is incorporated, add the Worcestershire sauce and pepper.
Adding liquid slowly prevents lumps from forming because each addition gets fully incorporated before more liquid shocks the roux. Dumping it all in at once creates paste pockets that never dissolve.
The gravy will look thin at first but will thicken as it heats; keep whisking until it coats the back of a spoon and a finger swipe leaves a clean line.
Step 9: Simmer and Season the Gravy
Bring the gravy to a gentle simmer and cook for 3 to 4 minutes, whisking occasionally, until it thickens enough to coat a spoon. Taste and add salt as needed.
Simmering allows the starch to fully hydrate and the flavors to meld together. This is where the gravy goes from good to great.
The gravy is ready when it clings to your spoon without immediately dripping off and tastes rich and savory without any floury notes.
Step 10: Fry the Eggs
Heat the butter in a nonstick skillet over medium low heat until melted and foamy. Crack each egg into the pan, leaving space between them, and cook for 2 to 3 minutes.
Low heat is critical for eggs because high heat creates rubbery whites and overcooked yolks. You want tender whites that still jiggle when you move the pan.
The eggs are done when the whites are fully set and opaque but the yolks still move freely when you gently shake the pan.
Step 11: Assemble the Loco Moco
Fluff the rice with a fork and divide it among 4 bowls or plates. Place one beef patty on top of each rice portion, then ladle gravy generously over the patty and rice.
Building in this order ensures the rice absorbs some gravy while the patty stays distinct. The gravy connects all the components into one cohesive dish.
You should see the gravy pooling around the edges and soaking into the rice within seconds of ladling.
Step 12: Top and Serve
Place one fried egg on top of each patty, letting the yolk sit centered. Garnish with sliced green onions and serve immediately while everything is hot.
The runny yolk acts as a second sauce that enriches the gravy and adds richness when the diner breaks into it. Serving immediately preserves the yolk texture.
Your finished plate should show a golden yolk, glossy gravy, and bright green onions creating contrast against the brown patty and white rice.
Pro Tip: Break the yolk with your fork and let it run down into the gravy before your first bite; mixing the yolk into the gravy creates a sauce richer than either component alone.
The Science Behind the Technique
The gravy roux is the technical heart of loco moco. When you heat flour in fat, the starch granules swell and eventually burst, releasing amylose molecules that create the thick, glossy texture you want.
Cooking the roux before adding liquid also converts the raw starch flavor into complex, toasty notes through a process similar to what happens when you toast bread. This is why a properly made roux tastes fundamentally different from just adding flour to liquid.
Chef Note: The longer you cook your roux, the darker and more flavorful it becomes, but it also loses thickening power, so a light golden roux works best for loco moco gravy.
Tips for Getting It Right Every Time
- Room temperature beef forms better patties and cooks more evenly; pull it from the fridge 15 minutes before cooking
- Preheat your skillet for at least 3 minutes before adding patties so you get proper searing from the first second of contact
- Make extra gravy because people always want more; double the gravy recipe and freeze leftovers for next time
- Use a lid for steam if you want firmer egg whites; cover the pan for the last 30 seconds of egg cooking
- Season at every stage instead of just at the end; salt the beef, the gravy, and the eggs individually for layered flavor
- Keep the gravy warm in the pan over the lowest heat while you fry eggs; it thickens as it sits so add a splash of broth to loosen
Mistakes That Will Ruin Your Dish
- Overworking the beef creates dense, tough patties that feel more like meatloaf than a juicy burger
- Adding broth too fast to the roux forms lumps that no amount of whisking will dissolve
- Cooking eggs on high heat produces rubbery whites with crispy edges that fight against the tender gravy texture
- Underseasoning the gravy makes the entire dish taste flat since the gravy touches every component
- Serving lukewarm allows the gravy to congeal and the rice to harden; everything must be piping hot at assembly
Make Ahead and Meal Prep Tips
This recipe works well for meal prep if you store components separately. The key is keeping textures distinct until you reheat and assemble.
- Beef patties: Form and refrigerate up to 24 hours ahead, cooking them fresh when ready to serve
- Gravy: Make up to 3 days ahead and store in an airtight container; reheat gently with a splash of broth to restore consistency
- Rice: Cook up to 4 days ahead and refrigerate; microwave with a damp paper towel to restore moisture
- Eggs: Always fry fresh; there is no good way to store and reheat a runny fried egg
What to Serve With Loco Moco
Loco moco is a complete meal in one bowl, but adding a fresh side can brighten up the richness. Think of sides that add crunch or acidity to contrast the gravy.
- Macaroni salad: The classic Hawaiian plate lunch pairing; the creamy, tangy pasta balances the savory gravy
- Pickled vegetables: Quick pickled cucumbers or carrots add bright acidity that cuts through the richness
- Steamed broccoli: Simple and healthy; the mild flavor does not compete while adding color and nutrients
- Fresh pineapple: A few slices add Hawaiian authenticity and sweet contrast
- Simple green salad: Dressed with a light vinaigrette, it provides freshness without overwhelming the main dish
Drink Pairings
A crisp lager is the perfect match for loco moco because the carbonation and light bitterness cleanse your palate between rich, savory bites. The beer refreshes without competing with the gravy’s depth.
- Wine: A light Pinot Noir with low tannins and bright acidity complements the beef without overwhelming the eggs
- Beer: A Japanese rice lager like Asahi or Kirin stays clean and crisp against the heavy gravy
- Non alcoholic: Iced barley tea or cold brew coffee both have enough body to stand up to the savory flavors
- Hot drink: Green tea served alongside the meal aids digestion and refreshes the palate
Flavour Variations Worth Trying
- Spam loco moco: Replace the beef patty with pan fried slices of Spam for an even more Hawaiian vibe. The salty, crispy edges add a different texture that plays beautifully with runny yolk.
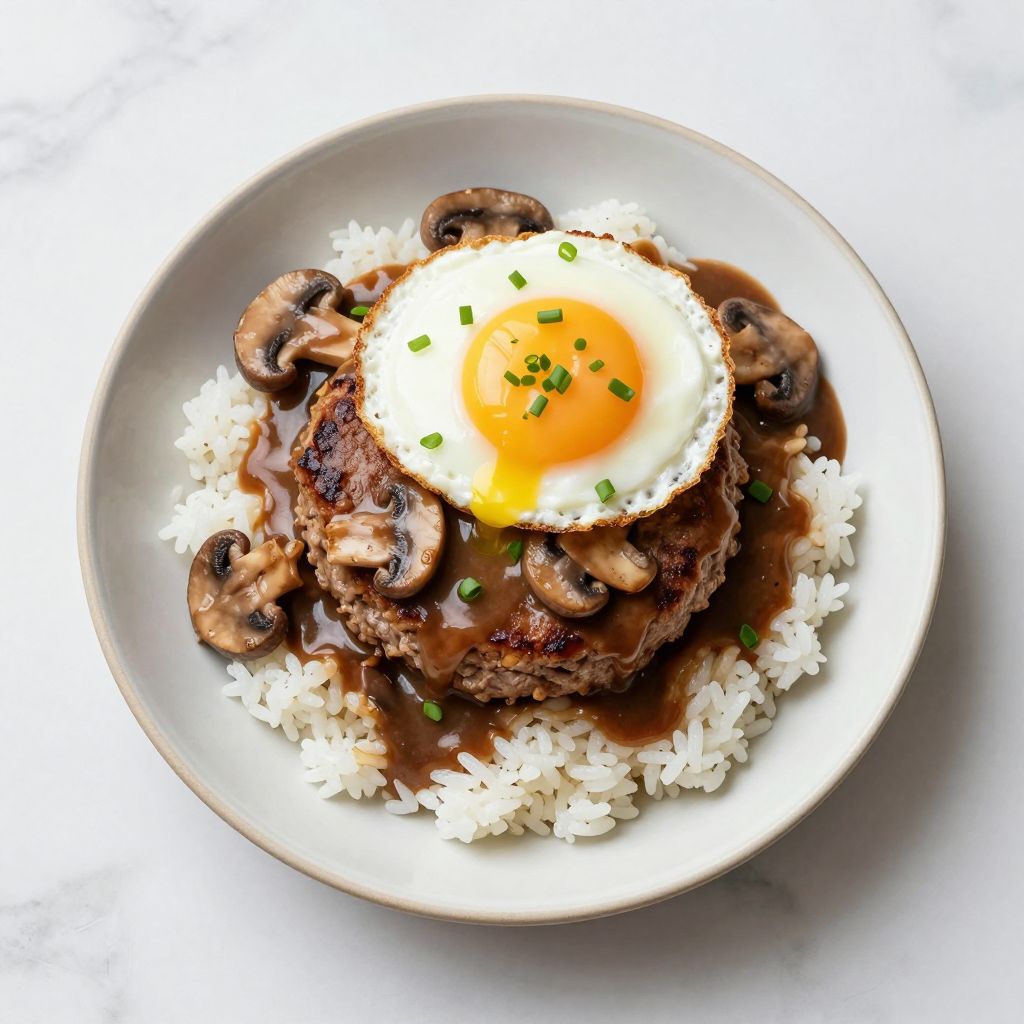
- Mushroom lovers: Add sautéed mushrooms to the gravy for earthy depth. The mushrooms absorb gravy and become little flavor bombs throughout the bowl.
- Spicy Korean style: Mix gochujang into the gravy and top with kimchi for a fusion twist. The fermented heat adds complexity without changing the core dish.
- Breakfast loco moco: Use breakfast sausage patties instead of beef and serve with hash browns instead of rice. The sweeter sausage pairs surprisingly well with the savory gravy.
- Teriyaki glazed: Brush the patties with teriyaki sauce during the last minute of cooking for a sweet, caramelized crust. The glaze adds another layer of umami under the gravy.
How to Adapt This Recipe for Your Diet
- Gluten free: Use cornstarch mixed with cold water instead of flour roux, adding 2 tablespoons at the end of gravy cooking; the texture will be slightly more glossy but equally thick
- Dairy free: Replace butter with olive oil or vegan butter throughout; the flavor shifts slightly but remains satisfying
- Vegetarian: Use a plant based burger patty and vegetable broth; add soy sauce to the gravy for umami depth
- Low carb: Serve over cauliflower rice instead of white rice; the gravy soaks in less but the flavors still work together
- High protein: Double the egg count and use 93% lean ground beef; you lose some richness but gain significant protein
How to Store and Reheat
In the Refrigerator
Store each component separately in airtight containers to maintain texture. Patties, gravy, and rice all keep well for up to 4 days refrigerated.
- Place a piece of plastic wrap directly on the gravy surface to prevent a skin from forming
- Store rice in a container with the lid slightly cracked for the first hour to prevent condensation from making it soggy
In the Freezer
Cooked patties and gravy freeze well for up to 3 months. Rice freezes acceptably but texture suffers slightly upon reheating.
- Freeze gravy in ice cube trays for easy portioning, then transfer cubes to a freezer bag
- Wrap individual patties in plastic wrap, then foil, to prevent freezer burn
Reheating
The stovetop produces the best results for all components. Oven reheating works well for patties if you are serving a crowd.
- Oven reheating: Place patties on a baking sheet at 350°F for 10 minutes; this preserves the crust better than other methods
- Stovetop reheating: Warm gravy over medium low heat with a splash of broth; reheat rice in a covered pan with a tablespoon of water
- Microwave reheating: Use only for rice with a damp paper towel; avoid microwaving patties as they become rubbery
Cost Breakdown
Making loco moco at home costs a fraction of restaurant prices while delivering a more generous portion. This recipe feeds four people for less than most fast food combo meals.
| Ingredient | Estimated Cost |
|---|---|
| Ground beef (1.5 lbs) | $7.50 |
| Short grain rice (2 cups) | $1.00 |
| Eggs (4 large) | $1.20 |
| Beef broth (2 cups) | $1.50 |
| Butter | $0.60 |
| Seasonings and aromatics | $0.50 |
| Total Per Serving | $3.08 |
Nutrition Information
| Nutrient | Amount |
|---|---|
| Calories | 685 |
| Total Fat | 32g |
| Saturated Fat | 14g |
| Trans Fat | 1g |
| Cholesterol | 285mg |
| Sodium | 890mg |
| Total Carbohydrates | 52g |
| Dietary Fiber | 1g |
| Total Sugars | 2g |
| Added Sugars | 0g |
| Protein | 42g |
| Vitamin D | 1mcg |
| Calcium | 65mg |
| Iron | 5mg |
| Potassium | 620mg |
Nutritional values are estimates based on standard ingredients and may vary depending on specific brands and portion sizes used.
Frequently Asked Questions
Can I use ground turkey instead of beef?
Yes, ground turkey works well but add an extra tablespoon of oil when cooking since turkey has less fat. The flavor will be milder, so season the patties a bit more aggressively.
Can I make the gravy ahead of time?
The gravy keeps refrigerated for up to 3 days and reheats beautifully. Add a splash of broth when reheating to restore the proper consistency.
How long will leftovers last in the fridge?
Stored separately, all components last 4 days refrigerated. The eggs should always be made fresh since reheated fried eggs lose their runny yolk appeal.
Why is my gravy lumpy?
Lumps form when you add liquid too quickly or stop whisking during the roux stage. Prevent this by adding broth slowly and whisking constantly until smooth.
Can I double this recipe for a crowd?
Double everything except the timing, which stays the same. You may need to cook patties in batches to avoid crowding the pan.
What if I do not have short grain rice?
Long grain rice like jasmine or basmati works but absorbs gravy differently and feels less sticky. The flavor will still be great, just less traditional.
Can I make this with a poached egg instead?
A poached egg works beautifully and creates an even runnier yolk experience. The texture difference is subtle, so choose based on your egg cooking confidence.
My Final Word
This loco moco recipe delivers exactly what it promises: pure, unpretentious comfort food that satisfies on every level. The combination of crispy edged patty, silky gravy, and runny egg over sticky rice creates something greater than its simple parts.
I have made this dish dozens of times now and it never disappoints. The technique is forgiving, the ingredients are accessible, and the results impress every single time.
Give this recipe a try this week and let me know how it turns out. Drop a comment below or tag me on social media with your loco moco creation. I love seeing what comes out of your kitchen.
Loco Moco
Ingredients
Equipment
Method
- Place the rice in a fine mesh strainer and rinse under cold water until the water runs clear, about 1 minute. Add the rinsed rice, water, and salt to a medium saucepan and bring to a boil over high heat.
- Once boiling, reduce heat to the lowest setting, cover with a tight fitting lid, and cook for 18 minutes. Do not lift the lid during cooking.
- In a large bowl, combine the ground beef, garlic powder, onion powder, black pepper, salt, and Worcestershire sauce. Mix gently with your hands until the seasonings are just combined, about 30 seconds.
- Divide the mixture into 4 equal portions and shape each into a patty about 3/4 inch thick and slightly wider than your eventual serving bowl. Press a shallow dimple into the center of each patty with your thumb.
- Heat the vegetable oil in a large cast iron skillet over medium high heat until it shimmers. Add the patties and cook without moving for 4 minutes.
- Flip each patty and cook for another 3 to 4 minutes until the internal temperature reaches 160°F. Transfer to a plate and let rest for 2 minutes while you make the gravy.
- In a small saucepan, melt the butter over medium heat. Add the flour and whisk constantly for 2 minutes until the mixture turns light golden and smells nutty.
- Slowly pour in the beef broth while whisking constantly, adding about 1/2 cup at a time. Once all the broth is incorporated, add the Worcestershire sauce and pepper.
- Bring the gravy to a gentle simmer and cook for 3 to 4 minutes, whisking occasionally, until it thickens enough to coat a spoon. Taste and add salt as needed.
- Heat the butter in a nonstick skillet over medium low heat until melted and foamy. Crack each egg into the pan, leaving space between them, and cook for 2 to 3 minutes until the whites are fully set but the yolks still move freely.
- Fluff the rice with a fork and divide it among 4 bowls or plates. Place one beef patty on top of each rice portion, then ladle gravy generously over the patty and rice.
- Place one fried egg on top of each patty, letting the yolk sit centered. Garnish with sliced green onions and serve immediately while everything is hot.


