Egg wash is the secret weapon that separates bakery-quality golden crusts from pale, dull pastries. This simple mixture of egg and liquid takes thirty seconds to make and transforms everything from pie crusts to dinner rolls into glossy, professional-looking baked goods. Master this one technique and you will never serve another lackluster loaf again.
What Makes This Recipe Worth Your Time
A proper egg wash does more than make food look pretty. It creates a protective barrier that helps baked goods brown evenly while adding subtle richness to every bite.
- Instant polish that turns homemade pastries into bakery-worthy showstoppers
- Better browning control so you can achieve exactly the shade of golden you want
- Improved texture on crusts that become crisp rather than soft and pale
- Universal application works on breads, pies, pastries, and savory baked goods
- Zero extra cost using ingredients you already have in your refrigerator
A Little Background on This Dish
Egg wash has been a baker’s tool for centuries, appearing in European pastry traditions long before modern ovens existed. French patissiers refined the technique, developing different washes for different effects.
The protein and fat in eggs react with oven heat through the Maillard reaction, creating that coveted golden sheen. Different cultures have adapted the basic concept, with some traditions using milk alone and others preferring cream for extra richness.
My Experience With This Recipe
I started paying attention to egg wash when my homemade pie crusts kept coming out looking like cardboard compared to my grandmother’s gleaming masterpieces. She finally let me in on her secret: a well-made egg wash applied at exactly the right moment.
My early attempts were disasters. I would slap on too much wash and end up with puddles that turned into dark, bitter spots, or I would brush so lightly that nothing happened at all.
The first time I got it right, my daughter asked if I had bought the dinner rolls from a bakery. That golden, crackling crust was worth every failed attempt that came before it.
Before You Start: Key Things to Know
This technique suits absolute beginners but still trips up experienced bakers who rush the application. The biggest challenge is using the right amount and achieving even coverage.
- Difficulty level: Beginner friendly with room to refine your technique over time
- Active time vs passive time: About 2 minutes active, then the oven does all the work
- Most important equipment: A soft pastry brush that will not tear delicate doughs
- Step requiring most attention: The straining step, which removes chalazae and creates a smooth, streak-free finish
Recipe at a Glance
- Recipe Name: Classic Egg Wash
- Yield: Enough for 1 to 2 standard pies or 12 to 18 rolls
- Prep Time: 2 minutes
- Cook Time: Varies by application
- Total Time: 2 minutes plus baking time
- Resting Time: None required
- Difficulty: Easy
- Course: Baking component
- Cuisine: Universal
- Calories per Serving: Approximately 15 per tablespoon applied
How to Source the Best Ingredients
The quality of your egg directly affects the color and shine of your final wash. Fresh, high-quality eggs produce richer golden tones than older, pale-yolked eggs.
- Eggs: Look for bright orange yolks, which indicate higher beta-carotene content and produce deeper golden color
- Water: Use filtered water if your tap water has a strong mineral taste or chlorine smell
- Milk: Whole milk gives best results; the fat adds shine and promotes browning
- Cream: Heavy cream creates the richest, most golden finish for special occasion baking
- Salt: Fine table salt dissolves faster and distributes more evenly than coarse varieties
Ingredients for Egg Wash
For Basic Egg Wash
- 1 large egg, at room temperature
- 1 tablespoon water, milk, or cream
- 1 pinch salt (optional, helps thin the mixture)
For Yolk Only Wash (Deeper Color)
- 1 large egg yolk
- 1 teaspoon cream or milk
For White Only Wash (Crisp, Matte Finish)
- 1 large egg white
- 1 teaspoon water
Smart Substitutions and Swaps
- Whole egg: Provides balanced color and shine through both protein and fat; substitute with 2 yolks for deeper gold or 2 whites for lighter, crisper finish
- Water: Thins the mixture for easier application; swap with milk for more browning or cream for richest color
- Milk: Adds lactose sugars that caramelize during baking; use plant milk as a dairy-free alternative with slightly less browning
- Cream: Creates the most golden, glossy finish; substitute with half and half for similar but less intense results
- Egg-free option: Brush with melted butter, maple syrup thinned with water, or aquafaba for vegan baking
Tools and Equipment You Will Need
Having your tools ready before you start prevents scrambling while your dough warms up. A proper brush makes the difference between smooth application and torn pastry.
- Small bowl for mixing (a ramekin works perfectly)
- Fork or small whisk for beating
- Soft pastry brush (silicone brushes are easier to clean but natural bristles give smoother coverage)
- Fine mesh strainer (removes lumps and chalazae for streak-free finish)
- Paper towel for removing excess wash from brush
How to Make Egg Wash
Read through all steps before you begin and have your baked goods ready to brush. The egg wash should be made fresh and used within an hour for best results.
Step 1: Bring Egg to Room Temperature
Remove the egg from the refrigerator 15 to 20 minutes before you plan to make your wash. A room temperature egg beats more smoothly and combines with liquid more easily than a cold one.
Cold eggs resist mixing and can create a stringy, uneven wash. The proteins relax as the egg warms, allowing for better emulsification.
The egg should feel neutral to the touch, not cold. If pressed for time, place the whole egg in a bowl of warm water for 5 minutes.
Step 2: Crack the Egg Into a Small Bowl
Tap the egg firmly on a flat surface rather than the bowl edge to reduce shell fragments. Crack it into a clean, dry bowl small enough that your fork or whisk can move freely.
Cracking on a flat surface creates a cleaner break with fewer shell shards. A small bowl concentrates the egg, making whisking more efficient.
Check for any shell pieces now before you start mixing. A fragment in your wash will scratch delicate pastry surfaces.
Step 3: Add Your Liquid
Add 1 tablespoon of water, milk, or cream depending on the finish you want. Water gives a lighter shine, milk adds moderate browning, and cream produces the deepest golden color.
The liquid thins the egg to a brushable consistency. Without it, pure egg creates a thick coating that bakes unevenly and can crack.
The mixture should look slightly thin but not watery. Add liquid gradually if you prefer a thicker application.
Step 4: Add a Pinch of Salt
Sprinkle a tiny pinch of fine salt into the mixture. The salt breaks down the egg proteins, making the wash thinner and easier to spread evenly.
Salt acts as a tenderizer on the protein strands, preventing the stringy texture that makes egg wash difficult to apply smoothly. It also enhances browning slightly.
You should not taste the salt in your final baked good. Use restraint; a true pinch is all you need.
Step 5: Beat Until Completely Smooth
Use a fork or small whisk to beat the mixture vigorously for 30 to 45 seconds. The goal is a completely homogenous liquid with no visible streaks of white or yolk.
Unbeaten egg wash applies unevenly, leaving light and dark spots on your crust. Thorough mixing ensures consistent color across the entire surface.
Tilt the bowl and check for any unmixed bits. The liquid should flow smoothly with a uniform pale yellow color throughout.
Step 6: Strain Through a Fine Mesh Sieve
Pour the beaten egg through a fine mesh strainer into a second small bowl. Use the back of a spoon to push it through if needed.
The chalazae, those stringy bits attached to the yolk, do not break down no matter how hard you beat. Straining removes them along with any small lumps that would create streaks.
Your strained wash should be silky smooth with no visible particles. This step separates amateur egg wash from professional quality.
Step 7: Prepare Your Pastry Brush
If using a natural bristle brush, dampen it slightly with water and blot dry. If using silicone, ensure the bristles are completely clean and free of any residue from previous use.
A damp brush picks up egg wash more evenly and releases it more smoothly onto dough. A dry brush absorbs too much wash initially and then releases it in blobs.
The brush should be just barely moist, not wet. Excess water will dilute your wash unevenly.
Step 8: Apply the First Thin Coat
Dip just the tip of the brush into the wash and tap off excess on the bowl rim. Apply in long, smooth strokes moving in one direction, starting from the center and working outward.
Thin, even coats dry quickly and create a smooth base for browning. Thick globs pool in crevices and create dark, sometimes bitter spots during baking.
The surface should look wet but not dripping. If you see pooling in any creases, use a dry brush corner to absorb the excess.
Step 9: Cover All Exposed Surfaces
Work methodically around edges, crimped areas, and any decorative elements. Pay special attention to braided sections or lattice work where multiple surfaces meet.
Missed spots will bake pale and stand out against the golden washed areas. Consistent coverage ensures professional, uniform browning.
Hold the item at eye level and rotate it to check for any dull spots. They will appear matte against the wet, shiny washed areas.
Step 10: Allow to Set Briefly
Let the washed item sit for 2 to 3 minutes before placing in the oven. This brief rest allows the wash to begin setting, reducing the chance of drips during baking.
The proteins start to bond with the dough surface during this rest. Rushing to the oven can cause the wash to slide off curved surfaces.
The surface should transition from wet and shiny to tacky and slightly matte. This indicates the wash has adhered properly.
Step 11: Apply Second Coat If Desired
For the deepest golden color and highest shine, apply a second thin coat after the first has set. This works especially well for special occasion pastries like croissants or brioche.
Multiple thin coats build up a more even, more lustrous finish than one thick coat. Each layer adds depth to the final color.
The second coat should look slightly more golden than the first as the colors layer. Stop at two coats; more than that risks a thick, rubbery skin.
Step 12: Bake According to Your Recipe
Place the washed item in your preheated oven and bake as your recipe directs. Watch carefully during the last third of baking time, as egg wash promotes faster browning.
The Maillard reaction between the egg proteins and heat accelerates surface browning. Items with egg wash typically need slightly lower temperatures or shorter times than unwashed equivalents.
The crust should progress from pale to golden to deep amber. Remove when you reach your desired shade, remembering that color will deepen slightly as the item cools.
Pro Tip: For the ultimate shine, brush on a second coat of egg wash during the final 5 minutes of baking. The fresh wash seals in moisture and creates an almost lacquered finish that rivals any bakery.
The Science Behind the Technique
Egg wash works through two simultaneous chemical processes: the Maillard reaction and protein coagulation. The proteins and sugars in the egg react with dry oven heat to create hundreds of flavor compounds and brown pigments called melanoidins.
The fat in the yolk creates shine by forming a smooth, reflective surface as it heats. When you add cream or milk, the extra fats and lactose sugars intensify both effects, producing deeper color and higher gloss.
Chef Note: Yolk-only wash browns faster because yolks contain more fat and less water than whites, so reduce your oven temperature by 15 to 25 degrees when using straight yolk wash.
Tips for Getting It Right Every Time
- Strain every time because even one stringy bit of chalazae will leave a visible line on your finished crust
- Use a light hand and remember that two thin coats always beat one thick coat for even coverage
- Work quickly on delicate doughs like puff pastry because the warmth of your hands and the moisture of the wash can soften butter layers
- Match your wash to your goal: whole egg for all-purpose, yolk for deep gold, white for crisp and light
- Keep a paper towel nearby to blot your brush between strokes and prevent pooling in crevices
- Make it fresh for each baking session because egg wash loses effectiveness after an hour at room temperature
Mistakes That Will Ruin Your Dish
- Applying too thick: Heavy egg wash pools in creases and bakes into dark, bitter patches that ruin appearance and flavor
- Skipping the strainer: Those stringy bits bake into visible white lines that make your pastry look homemade in the worst way
- Brushing torn dough: Egg wash seeps into tears and creates a wet, gummy layer that never crisps properly
- Using cold egg: Cold wash goes on streaky because the fat stays in clumps rather than dispersing evenly
- Washing too early: Egg wash applied to dough waiting to be baked dries out and loses its ability to brown properly
Make Ahead and Meal Prep Tips
Egg wash works best when made fresh, but you can prepare it up to an hour ahead if needed. Cover tightly and store at room temperature; refrigeration causes the mixture to thicken and apply unevenly.
- Pre-measured eggs: Crack eggs into a container and refrigerate up to 24 hours before beating and using
- Batch prep: Make a double batch of wash when baking multiple items, keeping it covered between applications
- Leftover wash: Use within the hour or scramble it for a quick snack; it does not store well for later baking
- Frozen dough: Apply egg wash to frozen items just before baking, not before freezing, as the wash degrades during storage
What to Serve With Egg Wash
Egg wash is not a standalone dish but a finishing technique that elevates dozens of baked goods. It transforms everything from simple weeknight rolls to elaborate holiday pastries.
- Pie crusts: Both sweet and savory pies benefit from the golden, professional finish
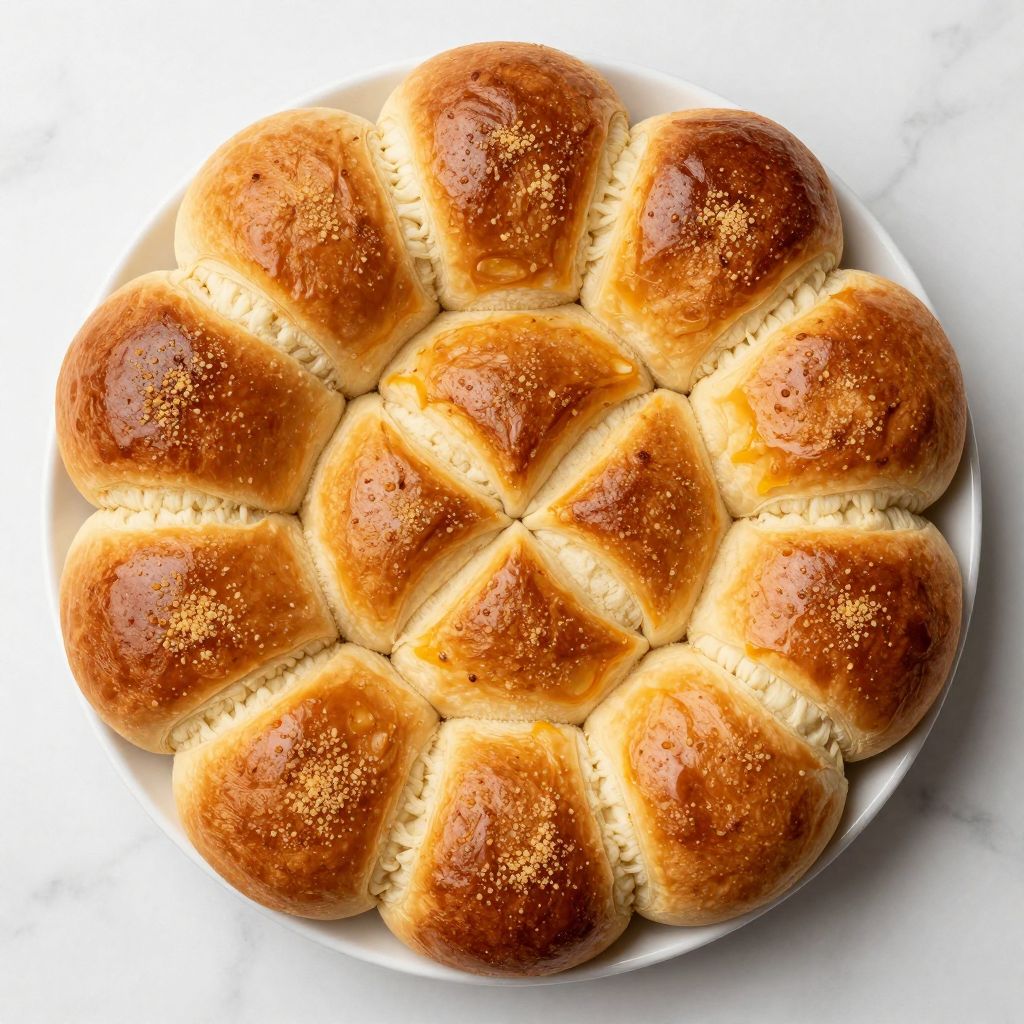
- Dinner rolls: Soft rolls become bakery-worthy with a simple brush before baking
- Croissants and pastries: Laminated doughs achieve their characteristic gleam through careful washing
- Savory hand pies: Empanadas, pasties, and turnovers look and taste better with proper egg wash
- Braided breads: Challah and other braided loaves show off their intricate patterns best with a good wash
Drink Pairings
Since egg wash enhances baked goods across the sweet and savory spectrum, pairings depend on the final dish. A perfectly golden croissant with morning coffee becomes a complete experience.
- Wine: A buttery Chardonnay complements rich, egg-washed croissants and brioche at brunch
- Beer: A malty amber ale pairs beautifully with golden dinner rolls and savory pastries
- Non-alcoholic: Hot tea with milk echoes the richness of well-browned pastries
- Hot drink: Strong espresso cuts through the buttery sweetness of glazed breakfast pastries
Flavour Variations Worth Trying
- Honey wash: Add half a teaspoon of honey to your egg wash for a subtle sweetness and deeper caramelization on breakfast breads
- Herb-infused: Steep fresh thyme or rosemary in the cream before mixing for savory pastries with an aromatic golden crust
- Everything bagel finish: Apply egg wash then immediately sprinkle with sesame, poppy, garlic, and salt for restaurant-style toppings that actually stick
- Milk wash: Skip the egg entirely and brush with plain whole milk for a softer, more matte finish on tender rolls
- Butter finish: Brush with melted butter immediately after baking while still hot for a soft, rich crust rather than a crisp one
How to Adapt This Recipe for Your Diet
- Gluten-free: Egg wash works identically on gluten-free pastry doughs with no modifications needed
- Dairy-free: Replace milk or cream with water, unsweetened oat milk, or coconut milk for similar results with slightly less browning
- Vegan: Brush with aquafaba (chickpea brine), maple syrup thinned with water, or a commercial vegan egg wash; expect a matte rather than glossy finish
- Low-carb: Egg wash itself is nearly carb-free; apply it to your almond flour or coconut flour baked goods as usual
- High-protein: Use only egg whites for a slightly higher protein ratio with a crisper, less golden finish
How to Store and Reheat
In the Refrigerator
Egg wash should be used fresh within one hour of making. Do not refrigerate prepared egg wash as it thickens and separates, creating streaky application.
- Leftover wash can be scrambled immediately rather than discarded
- Uncracked eggs store for 3 to 5 weeks refrigerated for future batches
In the Freezer
Prepared egg wash does not freeze well; the emulsion breaks down during thawing. Make fresh wash for each baking session.
- Whole eggs can be frozen beaten in ice cube trays for up to 6 months
- Thaw frozen eggs overnight in the refrigerator before using in wash
Reheating
Egg wash is applied before baking and is not a dish that gets reheated. However, baked goods finished with egg wash reheat beautifully.
- Oven method: Rewarm egg-washed pastries at 325°F for 5 to 8 minutes to restore crispness without overbrowning
- Stovetop method: Not recommended as it cannot restore the crisp texture of the washed crust
- Microwave method: Use with caution as it softens the crisp egg wash finish; best for soft rolls where texture matters less
Cost Breakdown
Egg wash costs almost nothing to make and dramatically improves the appearance of every baked good you create. This is one of the best value-for-effort techniques in any kitchen.
| Ingredient | Estimated Cost |
|---|---|
| Large egg (1) | $0.25 |
| Milk or cream (1 tbsp) | $0.05 |
| Salt (pinch) | $0.01 |
| Total Per Batch | $0.31 |
Nutrition Information
| Nutrient | Amount |
|---|---|
| Calories | 72 |
| Total Fat | 5g |
| Saturated Fat | 1.5g |
| Trans Fat | 0g |
| Cholesterol | 186mg |
| Sodium | 71mg |
| Total Carbohydrates | 0.4g |
| Dietary Fiber | 0g |
| Total Sugars | 0.2g |
| Added Sugars | 0g |
| Protein | 6g |
| Vitamin D | 1mcg |
| Calcium | 28mg |
| Iron | 0.9mg |
| Potassium | 69mg |
Values are estimates based on one whole egg plus one tablespoon of milk. Actual nutrition per serving varies based on how much wash transfers to your baked goods.
Frequently Asked Questions
Can I use just egg whites or just egg yolks?
Absolutely. Whites alone give a crisp, matte finish while yolks alone produce deep golden color and high shine. Choose based on your desired outcome.
Can I make egg wash ahead of time?
Make it no more than one hour before using. Beyond that, the mixture begins to break down and applies unevenly.
How long do egg-washed baked goods stay fresh?
The egg wash does not affect storage time. Follow your recipe’s guidelines for the base item, typically 2 to 3 days at room temperature for breads.
Why is my egg wash streaky?
Either you did not beat it long enough or you skipped straining. Always strain through a fine mesh sieve for smooth, even coverage.
Can I double or halve this recipe?
One egg makes enough wash for most home baking projects. Halving is tricky; just make a full batch and scramble the excess.
Does egg wash add flavor to baked goods?
It adds subtle richness but the primary contribution is appearance. The thin coating caramelizes rather than tasting distinctly eggy.
Can I add toppings over egg wash?
Egg wash is the perfect glue for seeds, sugar, salt, or herbs. Apply the wash, add toppings immediately, then bake as directed.
My Final Word
A good egg wash is one of those tiny details that separates home baking from professional results. Once you nail the technique, you will never go back to pale, dull crusts.
I have tested this method on everything from quick weeknight rolls to elaborate holiday pies. The technique works every time if you follow the steps, especially that straining step most people skip.
Give it a try on your next baking project and let me know how it turns out. Drop a comment below or tag Recipe Papa on social media; I love seeing your golden, gleaming results.

Classic Egg Wash
Ingredients
Equipment
Method
- Bring the egg to room temperature by removing it from the refrigerator 15-20 minutes before making the wash. If pressed for time, place the whole egg in a bowl of warm water for 5 minutes.
- Crack the egg into a small, clean, dry bowl by tapping it firmly on a flat surface. Check for any shell pieces.
- Add 1 tablespoon of water, milk, or cream depending on the finish you want. Water gives lighter shine, milk adds moderate browning, and cream produces the deepest golden color.
- Sprinkle a tiny pinch of fine salt into the mixture to help thin it and create a smoother consistency.
- Beat vigorously with a fork or small whisk for 30-45 seconds until completely smooth with no visible streaks of white or yolk.
- Pour the beaten egg through a fine mesh strainer into a second small bowl, using the back of a spoon to push it through. This removes chalazae and lumps for a streak-free finish.
- Prepare your pastry brush by dampening it slightly with water and blotting dry if using natural bristles.
- Dip just the tip of the brush into the wash, tap off excess on the bowl rim, and apply in long, smooth strokes moving in one direction from center outward.
- Cover all exposed surfaces methodically, paying special attention to edges, crimped areas, and decorative elements.
- Allow the washed item to set for 2-3 minutes before placing in the oven to let the wash adhere properly.
- For deeper color, apply a second thin coat after the first has set. Bake according to your recipe's directions.


