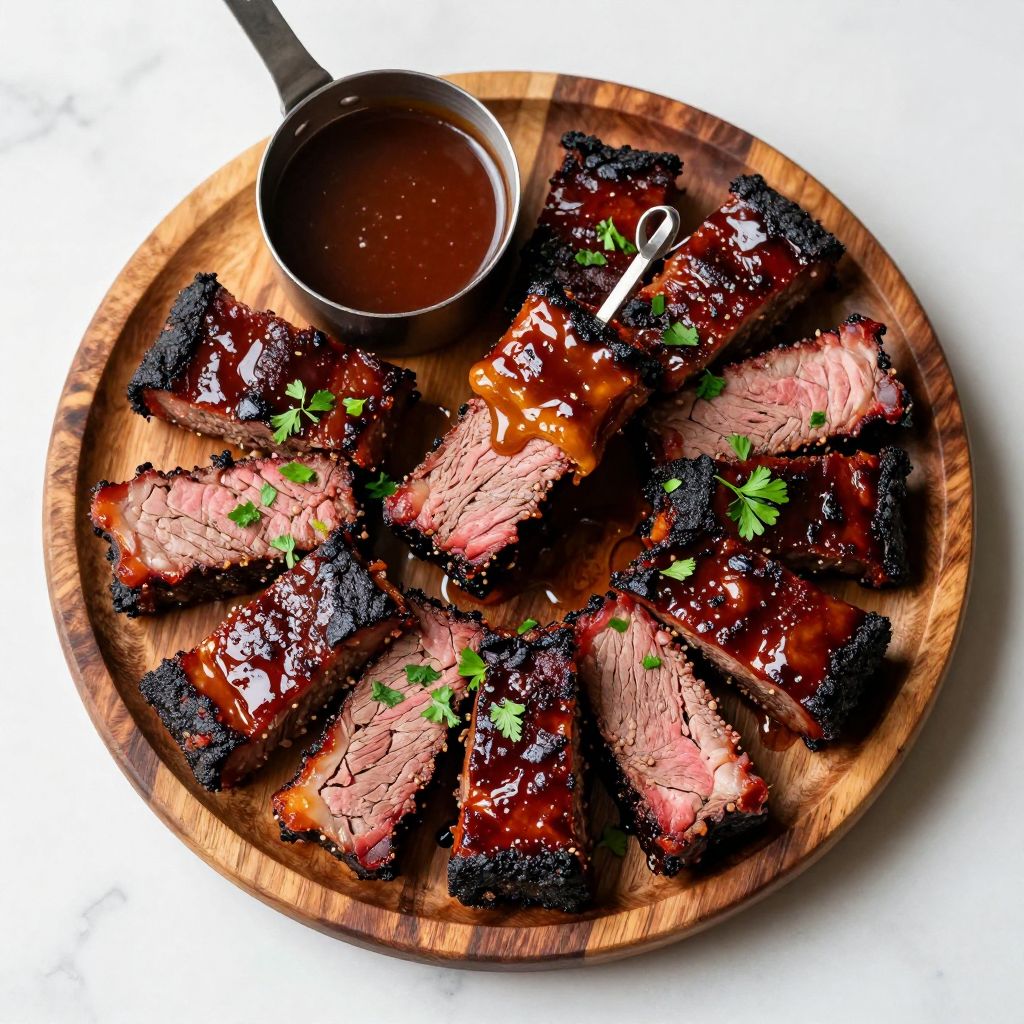
Burnt ends are the crown jewels of barbecue, those crispy, caramelized cubes of beef brisket that pit masters fight over before they ever reach a plate. This burnt ends recipe turns an ordinary point cut into sticky, smoky meat candy that melts on your tongue.
Once you master this technique, you will never look at brisket the same way again. Let me show you how to make restaurant quality burnt ends in your own backyard.
What Makes This Recipe Worth Your Time
These burnt ends deliver an unmatched combination of bark, smoke, and tenderness that you simply cannot buy at most restaurants. The double cook method creates layers of flavor that single smoke approaches miss entirely.
- Intense bark formation on every single cube gives you maximum caramelized surface area in every bite
- Foolproof timing means you can plan your cookout without babysitting the smoker for eighteen hours straight
- Versatile serving options let you pile them on sandwiches, top mac and cheese, or eat them straight off the cutting board
- Impressive presentation turns you into the neighborhood pit master without requiring competition level skills
- Make ahead friendly so you can smoke on Saturday and serve perfect burnt ends at Sunday’s game day party
A Little Background on This Dish
Burnt ends were born in Kansas City, where pit masters at legendary joints like Arthur Bryant’s would slice off the fatty point end of smoked briskets and toss them back in the pit. These scraps, charred and dripping with rendered fat, became the secret menu item that locals knew to request.
What started as pit master snacks evolved into a standalone dish in the 1970s. Today, burnt ends command premium prices and inspire fierce debate about whether cubing before or after the initial smoke produces superior results.
My Experience With This Recipe
I stumbled into burnt ends after ruining a whole brisket at a Fourth of July cookout about fifteen years ago. The flat came out dry and tough, but when I separated the point and threw it back on the smoker with some sauce, something magical happened.
My early attempts looked like charcoal briquettes because I ran the smoker too hot during the second cook. I also made the rookie mistake of cubing too small, which gave me burnt pebbles instead of burnt ends.
The first time I nailed the technique, my kids gathered around the cutting board like hungry wolves and the platter was empty before dinner even started. That smoky, sweet aroma still hits me every time I open the smoker lid on a burnt ends cook.
Before You Start: Key Things to Know
This recipe suits intermediate home cooks who have some experience managing a smoker or charcoal grill. The biggest challenge is maintaining consistent temperature during two separate smoking sessions without letting the meat dry out.
- Difficulty level: Intermediate with some smoker experience recommended
- Active time vs passive time: About 45 minutes of hands on work spread across 8 to 10 hours of smoking
- Most important equipment: A smoker or kettle grill that can hold 250°F steadily for several hours
- Step requiring most attention: The wrap and second smoke phase where burnt ends can go from perfect to overcooked quickly
Recipe at a Glance
- Recipe Name: Classic Kansas City Burnt Ends
- Yield: 8 servings
- Prep Time: 30 minutes
- Cook Time: 8 to 10 hours
- Total Time: 10 to 12 hours including rest
- Resting Time: 15 minutes after second smoke
- Difficulty: Intermediate
- Course: Main dish or appetizer
- Cuisine: American barbecue, Kansas City style
- Calories per Serving: 485
How to Source the Best Ingredients
The quality of your burnt ends depends almost entirely on starting with the right cut of beef. A well marbled point cut with thick fat seams will render down into something spectacular while a lean piece will turn into jerky.
- Brisket point: Look for USDA Choice or Prime grade with visible white marbling throughout and a thick fat cap on one side
- Brown sugar: Use dark brown sugar for deeper molasses flavor and stickier bark formation
- Paprika: Choose smoked paprika rather than sweet Hungarian for an extra layer of smoke flavor
- Beef broth: Select low sodium varieties so you control the salt level in your final glaze
- Barbecue sauce: Pick a Kansas City style sauce with tomato and molasses notes rather than vinegar forward Carolina styles
Ingredients for Burnt Ends
For the Brisket
- 5 to 6 pounds beef brisket point, trimmed to 1/4 inch fat cap
- 2 tablespoons yellow mustard, as a binder
For the Dry Rub
- 3 tablespoons dark brown sugar
- 2 tablespoons smoked paprika
- 2 tablespoons coarse black pepper
- 1 tablespoon kosher salt
- 1 tablespoon garlic powder
- 1 tablespoon onion powder
- 1 teaspoon cayenne pepper
- 1 teaspoon cumin
For the Glaze
- 1 cup barbecue sauce, Kansas City style
- 4 tablespoons unsalted butter, cubed
- 1/4 cup honey
- 1/4 cup beef broth
- 2 tablespoons apple cider vinegar
Smart Substitutions and Swaps
- Brisket point: This cut provides the fat content needed for tender burnt ends. Chuck roast works as a substitute but produces a slightly different texture and requires 2 hours less cooking time.
- Dark brown sugar: Provides moisture and molasses depth to the bark. Light brown sugar or coconut sugar substitutes adequately but gives a milder sweetness.
- Smoked paprika: Adds smoke flavor that reinforces the wood smoke from your cooker. Sweet paprika works but add an extra 30 minutes of smoke time to compensate.
- Yellow mustard: Acts as a binder for the rub without adding noticeable flavor. Olive oil or mayonnaise work equally well as binders.
- Barbecue sauce: Contributes sweetness and tang to the glaze. Make a quick substitute by mixing ketchup, brown sugar, vinegar, and Worcestershire sauce.
- Honey: Aids caramelization during the second smoke phase. Maple syrup or agave nectar substitute one to one with slight flavor variations.
- Beef broth: Adds moisture and savory depth to the braising liquid. Water with a teaspoon of soy sauce provides similar umami.
Tools and Equipment You Will Need
Having your equipment ready and your smoker preheated before you unwrap the brisket saves stress and prevents temperature fluctuations. Burnt ends require precise heat control, so gather everything before you start.
- Smoker or charcoal grill with lid (must hold steady temperature for hours)
- Instant read meat thermometer (critical for hitting exact internal temperatures)
- Disposable aluminum pan, 9×13 inch (for the second smoke phase)
- Sharp chef’s knife or brisket knife
- Large cutting board
- Heat resistant gloves or silicone mitts
- Spray bottle filled with apple cider vinegar and water
- Wood chunks or chips (hickory, oak, or pecan)
- Aluminum foil or butcher paper
- Tongs
How to Make Burnt Ends
Read through all steps before firing up your smoker. Bring the brisket point to room temperature for 30 minutes before cooking and mix your dry rub ingredients in a bowl so they are ready to apply.
Step 1: Trim the Brisket Point
Place the brisket point fat side up on your cutting board and trim the fat cap to an even 1/4 inch thickness using long, smooth strokes with a sharp knife. Remove any hard pieces of fat or silver skin from the meat side.
Proper trimming allows smoke to penetrate the meat while leaving enough fat to keep everything moist during the long cook. The fat you remove now would not render properly and would create chewy, unpleasant bites in your finished burnt ends.
Look for a relatively uniform thickness across the top with no thick fat deposits remaining. The meat underneath should be visible through a thin, even fat layer.
Step 2: Apply the Binder and Rub
Coat the entire brisket point with a thin layer of yellow mustard, working it into all the crevices and edges. Combine all dry rub ingredients in a bowl and mix thoroughly before applying generously to all surfaces of the meat.
The mustard creates a sticky surface that holds the rub in place and helps form a superior bark during smoking. The acid in the mustard also begins gently tenderizing the outer layer of meat.
Watch for complete, even coverage with no bare spots showing pink meat through the rub. The surface should look heavily coated, almost crusted with spices.
Step 3: Preheat Your Smoker
Set up your smoker for indirect heat and bring the temperature to 250°F. Add two or three fist sized chunks of hickory or oak wood to your coals or smoker box.
Stable temperature matters more than exact temperature for brisket. A smoker running consistently at 250°F produces better results than one swinging between 225°F and 275°F.
Your smoker is ready when thin blue smoke rises from the exhaust and the temperature holds steady for at least 15 minutes. Heavy white smoke indicates incomplete combustion and will make your meat taste bitter.
Step 4: Smoke the Brisket Point
Place the seasoned brisket point fat side up on the smoker grate, positioning it away from direct heat. Close the lid and resist the urge to open it for at least two hours.
Fat side up allows the rendering fat to baste the meat continuously throughout the cook. The point cut has enough intramuscular fat that it stays moist even with the fat cap facing the heat source.
After three hours, you should see a dark mahogany bark forming on all exposed surfaces. The meat will look dry on the outside but will feel firm with slight give when pressed.
Step 5: Spritz and Monitor
After the first three hours, spritz the brisket every 45 minutes with a mixture of equal parts apple cider vinegar and water. Continue smoking until the internal temperature reaches 165°F to 170°F.
Spritzing adds moisture to the surface and helps build layers in the bark without washing away your rub. The vinegar also aids in breaking down the tough collagen in the meat.
This phase typically takes 5 to 6 hours total. The bark should be deeply colored and set firmly to the touch, and your probe thermometer should slide in with moderate resistance.
Step 6: Wrap the Brisket
Remove the brisket point from the smoker and wrap it tightly in a double layer of aluminum foil or pink butcher paper. Return it to the smoker and continue cooking until the internal temperature reaches 195°F.
Wrapping pushes the meat through the stall, that frustrating plateau where evaporative cooling fights against temperature rise. This stage is where collagen breaks down into gelatin and transforms tough meat into something tender.
The wrapped brisket will take another 1 to 2 hours to climb from 170°F to 195°F. You will know it is ready when a probe slides into the meat like a knife through warm butter.
Step 7: Rest and Cube the Meat
Remove the wrapped brisket from the smoker and let it rest for 20 minutes at room temperature. Unwrap carefully, saving any collected juices, and cut the meat into 1 to 1.5 inch cubes.
Resting allows the muscle fibers to relax and reabsorb some of the liquid that was pushed to the surface during cooking. Cubing while slightly warm is easier than cubing cold meat and gives you cleaner cuts.
Your cubes should be roughly uniform in size for even cooking in the next phase. Irregular pieces will finish at different times and some will overcook.
Step 8: Prepare the Glaze
Combine the barbecue sauce, butter, honey, beef broth, and apple cider vinegar in a saucepan over medium heat. Stir until the butter melts and all ingredients combine into a smooth, pourable glaze.
The butter adds richness and helps the glaze adhere to the meat during the final smoke. The vinegar balances the sweetness and prevents the burnt ends from tasting cloying.
The glaze is ready when it coats the back of a spoon evenly. If it seems too thick, add another splash of broth to thin it.
Step 9: Sauce and Arrange the Cubes
Pour about half the glaze into the bottom of a disposable aluminum pan. Add the cubed brisket in a single layer and pour the remaining glaze over the top, tossing gently to coat every piece.
The pan holds moisture around the meat while allowing the tops of the cubes to caramelize in the smoker’s heat. A single layer ensures every piece gets direct exposure to heat and smoke.
Each cube should glisten with glaze on all sides. Add any reserved juices from the wrapping stage to the pan for extra flavor.
Step 10: Second Smoke
Return the pan of glazed cubes to the smoker uncovered at 275°F. Smoke for 1.5 to 2 hours, stirring gently every 30 minutes to redistribute the glaze.
The higher temperature during this phase promotes caramelization and creates that signature sticky, candied exterior. The sauce reduces and concentrates, intensifying the sweet and savory flavors.
Watch for the glaze to become thick and tacky, coating each piece in a glossy shell. The edges of the cubes should look slightly charred and the aroma should be intensely sweet and smoky.
Step 11: Check for Doneness
Test a piece by pressing gently with tongs. The cube should yield easily and almost fall apart but still hold its shape. The internal temperature should read between 200°F and 205°F.
At this temperature, all the remaining collagen has converted to gelatin and the meat has reached maximum tenderness. Going higher risks drying out the cubes despite all that rendered fat.
A properly finished burnt end will have a caramelized, slightly crispy exterior that gives way to meltingly tender meat inside. If the outside is sticky but the inside still feels firm, give them another 20 minutes.
Step 12: Rest and Serve
Remove the pan from the smoker and let the burnt ends rest for 10 minutes before serving. Transfer to a platter or serve directly from the pan with extra sauce on the side.
This final rest allows the glaze to set slightly and the internal juices to redistribute one last time. Serving immediately from the smoker means the glaze will run off onto the plate.
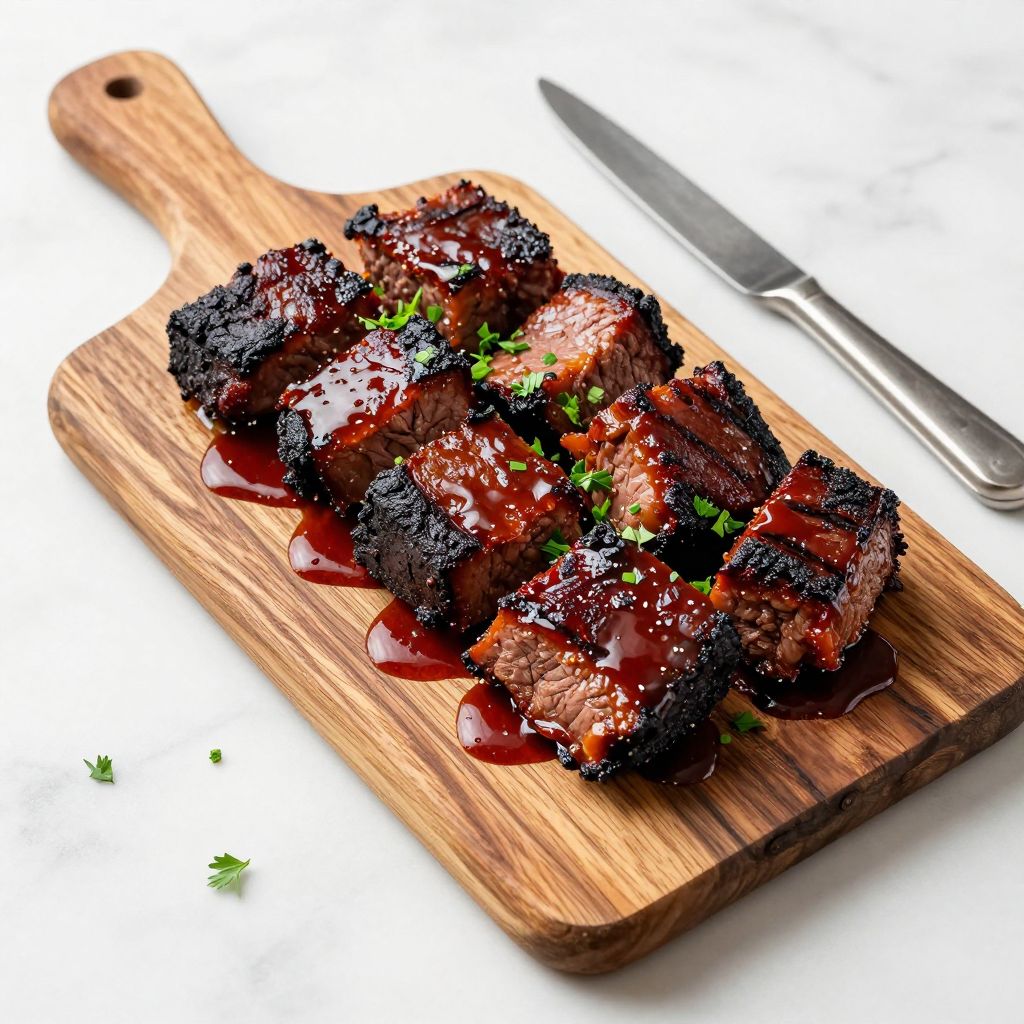
Perfect burnt ends will have a slight pull when you bite through the bark, followed by meat that dissolves on your tongue. The exterior should be mahogany colored with dark, almost black edges.
Pro Tip: Do not skip the second smoke in the pan. That final braising and caramelization transforms ordinary smoked brisket cubes into the sticky, candied meat candy that makes burnt ends legendary.
The Science Behind the Technique
Burnt ends work because of a process called the Maillard reaction combined with caramelization. The sugars in your rub and glaze react with amino acids in the meat proteins at temperatures above 280°F, creating hundreds of new flavor compounds and that deep brown color.
The double cook method gives you two opportunities for bark development. The first smoke builds a foundation of rendered fat and seasoned crust while the second smoke takes the caramelization further than a single cook ever could.
Chef Note: The point cut contains more collagen and fat than the flat, which is why it works so well for burnt ends. All that connective tissue needs time to break down into gelatin, and cubing increases surface area for maximum flavor development.
Tips for Getting It Right Every Time
- Buy a whole packer brisket if you cannot find point cuts sold separately. Separate the point from the flat yourself and freeze the flat for another use.
- Keep your smoker closed during the first three hours to build a stable cooking environment. Every time you open the lid, you add 15 minutes to your cook time.
- Trust the probe over the clock because every piece of meat cooks differently. Time ranges are guidelines but internal temperature tells the real story.
- Cut against the grain when cubing the meat. The grain direction changes across the point, so adjust your knife angle as you work.
- Stir gently during the second smoke to avoid breaking apart the cubes. Use a folding motion rather than aggressive tossing.
- Save extra glaze for serving because guests always want more sauce on the side. Make a double batch of the glaze and set half aside untouched.
Mistakes That Will Ruin Your Dish
- Using the flat instead of the point: The flat lacks sufficient fat marbling and will dry out during the second smoke, leaving you with expensive beef jerky.
- Cubing too small: Pieces under one inch will overcook and dry out before the sauce caramelizes properly, giving you burnt pebbles instead of burnt ends.
- Skipping the wrap: Without wrapping, the meat stalls at 165°F for hours and the exterior dries out while you wait for the interior to come up to temperature.
- Running the smoker too hot: Temperatures above 300°F during the first smoke will seize the proteins before the fat renders, creating tough meat with burned edges.
- Drowning in sauce: Too much glaze creates steamed burnt ends instead of caramelized ones. The goal is a coating, not a swimming pool.
Make Ahead and Meal Prep Tips
Burnt ends are ideal for make ahead cooking because they actually improve after sitting in their glaze overnight. I often smoke on Saturday and serve on Sunday with results that taste even better than straight from the smoker.
- Smoked point: Complete the first smoke through the wrap stage, then refrigerate the wrapped brisket for up to 3 days before cubing and finishing.
- Cubed meat: Cut and refrigerate the cubes in an airtight container for up to 2 days before the second smoke.
- Glaze: Make the sauce up to 1 week ahead and refrigerate. Warm gently before using.
- Finished burnt ends: Store completed burnt ends in their glaze in the refrigerator for up to 4 days. Reheat gently in a 275°F oven covered with foil.
What to Serve With Burnt Ends
Burnt ends shine as the centerpiece of a casual backyard barbecue spread or as a hearty game day appetizer. They work equally well piled on a plate with sides or served on slider buns for a party.
- Creamy coleslaw: The cool, tangy crunch cuts through the rich, fatty meat and refreshes your palate between bites.
- Mac and cheese: The classic pairing works because sharp cheddar and smoky meat are a proven combination that satisfies everyone.
- Pickled onions: The acidity and crunch provide contrast to the sticky sweetness of the glaze.
- Cornbread: A slightly sweet, crumbly slice soaks up extra sauce and balances the protein heavy plate.
- Baked beans: The smoky, molasses notes in good baked beans echo the flavors in the burnt ends and tie the whole meal together.
Drink Pairings
A bold California Zinfandel with ripe dark fruit and peppery notes stands up to the intense flavors of burnt ends without getting lost. The wine’s natural sweetness complements the caramelized glaze beautifully.
- Wine: Zinfandel, Malbec, or an oaked Cabernet Sauvignon with enough tannin to cut through the fat
- Beer: An American brown ale or porter with roasted malt character that echoes the smoky, charred notes
- Non alcoholic: Sweet tea with lemon or a tart lemonade to refresh between rich, meaty bites
- Hot drink: Black coffee with a splash of bourbon (or without) for morning after leftover sessions
Flavour Variations Worth Trying
- Spicy Korean: Replace the glaze with gochujang, sesame oil, and rice vinegar for a sweet and fiery variation. The fermented chile paste adds depth and heat that builds with each bite.
- Maple bourbon: Swap honey for maple syrup and add 2 tablespoons of bourbon to the glaze. The result is richer and more complex with a subtle boozy warmth.
- Coffee crusted: Add 2 tablespoons of finely ground espresso to the dry rub. The coffee intensifies the smoky notes and creates an incredibly deep bark.
- Carolina gold: Use a mustard based barbecue sauce instead of Kansas City style for a tangier, sharper finish. The vinegar tang makes the meat taste lighter.
- Asian fusion: Glaze with a mixture of hoisin, soy sauce, and Chinese five spice for a completely different flavor profile. Serve with pickled vegetables and steamed buns.
How to Adapt This Recipe for Your Diet
- Gluten free: Verify your barbecue sauce contains no wheat based thickeners. Most quality brands are naturally gluten free but always check labels.
- Dairy free: Replace the butter in the glaze with refined coconut oil. You lose some richness but the smoke and sweetness still carry the dish.
- Low carb or keto: Use a sugar free brown sugar substitute in the rub and a low carb barbecue sauce. Skip the honey or use a sugar free syrup. Total carbs drop significantly.
- High protein: This recipe is already protein rich at nearly 40 grams per serving. Serve with protein packed sides like black beans for even more.
- Whole30 compliant: Make your own glaze with tomato paste, coconut aminos, and date paste instead of store bought sauce. Use compliant spices in your rub.
How to Store and Reheat
In the Refrigerator
Store burnt ends in an airtight container with any extra glaze poured over the top to keep them moist. They keep well for 4 to 5 days in the coldest part of your refrigerator.
- Transfer to a shallow container rather than a deep one so they cool quickly and evenly
- Press plastic wrap directly onto the surface of the meat before sealing the container to prevent drying
In the Freezer
Burnt ends freeze exceptionally well for up to 3 months when properly packaged. The high fat content protects them from freezer burn better than leaner meats.
- Portion into meal sized amounts before freezing so you only thaw what you need
- Use freezer bags with all air pressed out or vacuum seal for best results
Reheating
The oven produces the best reheated burnt ends because it gently warms them through while refreshing the bark. Allow refrigerated burnt ends to come to room temperature for 20 minutes before reheating.
- Oven method: Spread in a single layer on a sheet pan, cover loosely with foil, and heat at 275°F for 15 to 20 minutes until warmed through
- Stovetop method: Warm in a covered skillet over low heat with a splash of broth to prevent sticking. Stir gently every few minutes.
- Microwave method: Use only as a last resort because it softens the bark. Cover loosely and heat in 30 second intervals at 50% power.
Cost Breakdown
Making burnt ends at home costs roughly one third of what you would pay at a quality barbecue restaurant. A pound of burnt ends at a respected joint runs $25 to $35 while home production comes in around $8 per generous serving.
| Ingredient | Estimated Cost |
|---|---|
| Beef brisket point (5.5 lbs) | $38.50 |
| Barbecue sauce | $4.00 |
| Butter | $1.00 |
| Honey | $2.00 |
| Spices and seasonings | $3.00 |
| Wood chunks | $2.00 |
| Miscellaneous (vinegar, broth, mustard) | $2.50 |
| Total Per Serving (8 servings) | $6.63 |
Nutrition Information
| Nutrient | Amount |
|---|---|
| Calories | 485 |
| Total Fat | 32g |
| Saturated Fat | 14g |
| Trans Fat | 0g |
| Cholesterol | 125mg |
| Sodium | 680mg |
| Total Carbohydrates | 18g |
| Dietary Fiber | 1g |
| Total Sugars | 15g |
| Added Sugars | 12g |
| Protein | 38g |
| Vitamin D | 0mcg |
| Calcium | 35mg |
| Iron | 4.5mg |
| Potassium | 520mg |
Nutritional values are estimates based on standard ingredients and serving sizes. Actual values may vary based on specific brands used and portion sizes served.
Frequently Asked Questions
Can I use chuck roast instead of brisket point?
Chuck roast works as a budget friendly alternative and produces tender, flavorful results. Reduce your total cook time by about 2 hours since chuck is smaller and has different fat distribution.
Can I smoke the brisket point a day ahead and finish the burnt ends the next day?
Absolutely, and many competition cooks prefer this method. Complete the first smoke, wrap tightly, refrigerate overnight, then cube and finish the second smoke the following day.
How long do burnt ends stay good in the refrigerator?
Properly stored burnt ends keep for 4 to 5 days in the refrigerator. They actually taste better after a day because the flavors continue to meld in the glaze.
Why are my burnt ends tough instead of tender?
Tough burnt ends usually result from not cooking long enough during the wrapped phase. Make sure the meat reaches 195°F to 200°F before cubing so the collagen fully converts to gelatin.
Can I double this recipe for a party?
Yes, but you may need to work in batches depending on your smoker size. Keep finished burnt ends warm in a low oven while you complete additional batches.
Should I trim all the fat off the brisket point?
No, leave about 1/4 inch of fat cap intact. This fat renders during smoking and keeps the meat moist. Trimming too close results in dry, tough burnt ends.
Can I make burnt ends in the oven instead of a smoker?
You can, but you will miss the signature smoky flavor. Add liquid smoke to your rub and glaze, roast at 250°F following the same temperature targets, and accept that the result will taste different.
My Final Word
Great burnt ends are about patience, temperature control, and trusting the process. That moment when you pull back the foil and see glossy, caramelized cubes of meat candy makes every hour of tending the smoker worthwhile.
I have tested this recipe through Texas summers and chilly fall evenings, and it delivers consistently every time. Make it once following these steps exactly, then adjust the spice levels and glaze sweetness to match your family’s tastes.
I would love to hear how your burnt ends turn out. Drop a comment below with your results or tag us on social media with your photos. Nothing makes my day like seeing another home cook nail a recipe that took me years to perfect.
Classic Kansas City Burnt Ends
Ingredients
Equipment
Method
- Place the brisket point fat side up on your cutting board and trim the fat cap to an even 1/4 inch thickness using long, smooth strokes with a sharp knife. Remove any hard pieces of fat or silver skin from the meat side.
- Coat the entire brisket point with a thin layer of yellow mustard, working it into all the crevices and edges. Combine all dry rub ingredients in a bowl and mix thoroughly before applying generously to all surfaces of the meat.
- Set up your smoker for indirect heat and bring the temperature to 250°F. Add two or three fist sized chunks of hickory or oak wood to your coals or smoker box. Wait until thin blue smoke rises and temperature holds steady for at least 15 minutes.
- Place the seasoned brisket point fat side up on the smoker grate, positioning it away from direct heat. Close the lid and resist the urge to open it for at least two hours.
- After the first three hours, spritz the brisket every 45 minutes with a mixture of equal parts apple cider vinegar and water. Continue smoking until the internal temperature reaches 165°F to 170°F, about 5 to 6 hours total.
- Remove the brisket point from the smoker and wrap it tightly in a double layer of aluminum foil or pink butcher paper. Return it to the smoker and continue cooking until the internal temperature reaches 195°F, about 1 to 2 hours more.
- Remove the wrapped brisket from the smoker and let it rest for 20 minutes at room temperature. Unwrap carefully, saving any collected juices, and cut the meat into 1 to 1.5 inch cubes.
- Combine the barbecue sauce, butter, honey, beef broth, and apple cider vinegar in a saucepan over medium heat. Stir until the butter melts and all ingredients combine into a smooth, pourable glaze.
- Pour about half the glaze into the bottom of a disposable aluminum pan. Add the cubed brisket in a single layer and pour the remaining glaze over the top, tossing gently to coat every piece.
- Return the pan of glazed cubes to the smoker uncovered at 275°F. Smoke for 1.5 to 2 hours, stirring gently every 30 minutes to redistribute the glaze.
- Test a piece by pressing gently with tongs. The cube should yield easily and almost fall apart but still hold its shape. The internal temperature should read between 200°F and 205°F.
- Remove the pan from the smoker and let the burnt ends rest for 10 minutes before serving. Transfer to a platter or serve directly from the pan with extra sauce on the side.


