Bourbon chicken hits differently than any other mall food court memory. This sticky, caramelized chicken thigh recipe delivers that perfect balance of sweet, savory, and just enough heat to keep things interesting. Whether you need a quick weeknight dinner or want to impress without breaking a sweat, this is the recipe that earns a permanent spot in your rotation.
What Makes This Recipe Worth Your Time
This bourbon chicken beats the takeout version because you control the quality of every ingredient and can adjust the sweetness to your family’s taste. The sauce alone is worth the 30 minutes of active cooking.
- Restaurant quality at a fraction of the cost with ingredients already in your pantry
- One pan means minimal cleanup on a busy Tuesday night
- Kid approved sweetness with grown up depth from real bourbon
- Leftovers reheat beautifully and taste even better the next day as the flavors meld
- Infinitely customizable heat level from mild to mouth tingling based on your preference
A Little Background on This Dish
Bourbon chicken originated in the 1970s at a small Chinese restaurant on Bourbon Street in New Orleans. The dish blends Southern American flavors with Chinese stir fry technique, creating something entirely unique to American food court culture.
The name comes from the street, not necessarily the whiskey, though most recipes today include actual bourbon for depth. This fusion dish spread through mall food courts across America during the 1980s and became a staple of quick service Chinese American cuisine.
My Experience With This Recipe
I first made bourbon chicken after my kids kept begging me to recreate the mall food court version at home. They thought I was some kind of wizard when I nailed it on the third attempt.
The first two tries were disasters. I used chicken breast (dry as cardboard) and added the bourbon too early (burned off all the flavor before the sauce even came together).
When I finally got it right with thighs and proper timing, the kitchen smelled like the best parts of a state fair. My youngest asked if we could have it every week, which is about the highest compliment a ten year old gives to anything that is not pizza.
Before You Start: Key Things to Know
This recipe suits home cooks of any skill level, but the biggest challenge is managing the caramelization without burning the sauce. Get your mise en place ready and stay at the stove once the cooking starts.
- Difficulty level: Easy to intermediate with attention to heat control
- Active time vs passive time: 25 minutes active, 5 minutes resting
- Most important equipment: A large skillet or wok with high sides for proper sauce reduction
- Step requiring most attention: The final sauce reduction where caramelization can turn to burning in seconds
Recipe at a Glance
- Recipe Name: Bourbon Chicken
- Yield: 4 servings
- Prep Time: 15 minutes
- Cook Time: 20 minutes
- Total Time: 35 minutes
- Resting Time: 5 minutes
- Difficulty: Easy
- Course: Main dish
- Cuisine: Chinese American fusion
- Calories per Serving: 385
How to Source the Best Ingredients
The difference between good bourbon chicken and great bourbon chicken comes down to chicken quality and bourbon selection. Spend an extra dollar on better thighs and you will taste it in every bite.
- Chicken thighs: Look for boneless skinless thighs that are uniform in size with pinkish red color and no gray spots or off odors
- Bourbon: Use a mid range bourbon you would actually drink; avoid cooking bourbon or bottom shelf options that add harsh notes
- Soy sauce: Choose naturally brewed soy sauce (check the label) rather than hydrolyzed versions for deeper umami
- Fresh ginger: Select firm roots with smooth skin; wrinkled or soft ginger has lost its punch
- Brown sugar: Dark brown sugar adds more molasses depth than light; make sure it is soft and clump free
Ingredients for Bourbon Chicken
For the Chicken
- 2 pounds boneless skinless chicken thighs, cut into 1.5 inch pieces
- 3 tablespoons vegetable oil, divided
- 1 teaspoon kosher salt
- 1/2 teaspoon black pepper
- 2 tablespoons cornstarch
For the Sauce
- 1/2 cup bourbon
- 1/2 cup low sodium soy sauce
- 1/3 cup dark brown sugar, packed
- 2 tablespoons apple cider vinegar
- 1 tablespoon ketchup
- 4 cloves garlic, minced
- 1 tablespoon fresh ginger, minced
- 1/2 teaspoon red pepper flakes
- 1/4 cup water
- 1 tablespoon cornstarch mixed with 2 tablespoons cold water
For Garnish
- 2 green onions, thinly sliced
- 1 tablespoon sesame seeds
Smart Substitutions and Swaps
- Bourbon: Adds caramel notes and depth through its vanilla and oak undertones. Substitute with apple juice plus 1 teaspoon vanilla extract for a non alcoholic version, though the flavor will be sweeter and less complex.
- Chicken thighs: Provide fat and moisture that prevent drying during high heat cooking. Chicken breast works but requires precise timing and will never be as tender.
- Dark brown sugar: Creates the signature sticky glaze through its molasses content. Light brown sugar or coconut sugar substitutes fine with slightly less depth.
- Soy sauce: Delivers umami backbone and salinity to balance the sweetness. Coconut aminos work for soy free diets but use 25 percent more and add a pinch of salt.
- Apple cider vinegar: Cuts through richness and brightens the overall flavor profile. Rice vinegar or white wine vinegar substitute equally well.
- Ketchup: Adds tomato sweetness and helps emulsify the sauce. Tomato paste (1 teaspoon) plus a pinch of sugar works in a pinch.
- Fresh ginger: Provides sharp heat and aromatic brightness that dried ginger cannot match. Use 1/2 teaspoon ground ginger only if fresh is unavailable.
Tools and Equipment You Will Need
Having everything within arm’s reach before you start makes this recipe almost foolproof. The cooking moves fast once you begin, so prep your workspace like a professional line cook.
- Large 12 inch skillet or wok (high sides prevent sauce splatter during reduction)
- Sharp chef’s knife
- Cutting board
- Measuring cups and spoons
- Small mixing bowl for sauce
- Small bowl for cornstarch slurry
- Wooden spoon or heat safe spatula
- Meat thermometer (ensures chicken reaches safe internal temperature)
- Paper towels for patting chicken dry
How to Make Bourbon Chicken
Read through all the steps before you start cooking and have every ingredient measured and ready. The chicken should be at room temperature for 10 minutes before cooking for even browning.
Step 1: Prepare the Chicken
Pat the chicken thigh pieces completely dry with paper towels. Season evenly with salt and pepper, then toss with the 2 tablespoons cornstarch until every piece is lightly coated.
Dry chicken sears rather than steams, which is how you get those golden edges that hold sauce beautifully. The cornstarch creates a barrier that promotes browning and helps the sauce cling to every piece.
Your chicken pieces should look matte and slightly dusty, not wet or clumpy. If you see wet spots, add a bit more cornstarch.
Step 2: Mix the Sauce
Whisk together the bourbon, soy sauce, brown sugar, apple cider vinegar, ketchup, and water in a medium bowl until the sugar dissolves. Set this mixture next to your stove for quick access.
Combining the sauce ingredients in advance allows the sugar to dissolve fully and ensures you can add everything at once during the critical moment. Rushing this step leads to pockets of undissolved sugar that burn rather than caramelize.
The mixture should look uniform in color with no sugar granules visible at the bottom of the bowl.
Step 3: Prepare the Cornstarch Slurry
Mix 1 tablespoon cornstarch with 2 tablespoons cold water in a small bowl and stir until completely smooth. Keep this next to your sauce bowl.
Cold water prevents cornstarch from clumping immediately, giving you a smooth slurry that thickens evenly when added to hot liquid. Warm or hot water creates instant lumps that never fully dissolve.
Give the slurry a quick stir right before using it since cornstarch settles quickly.
Step 4: Sear the Chicken in Batches
Heat 2 tablespoons of vegetable oil in your large skillet over medium high heat until shimmering. Add half the chicken pieces in a single layer without crowding and cook undisturbed for 3 minutes.
Working in batches maintains high heat so the chicken sears rather than steams. Crowding the pan drops the temperature and releases moisture, giving you gray rubbery chicken instead of golden caramelized edges.
The chicken is ready to flip when it releases easily from the pan and shows deep golden browning on the bottom. If it sticks, it needs another 30 seconds.
Step 5: Flip and Finish the First Batch
Flip each piece and cook for another 2 to 3 minutes until golden on the second side. Transfer to a clean plate and repeat with the remaining oil and chicken.
The chicken does not need to be cooked through at this stage since it will finish in the sauce. You are building flavor through the Maillard reaction and creating texture that will hold up during simmering.
Look for consistent golden color on both sides and edges that are starting to crisp slightly.
Step 6: Sauté the Aromatics
Reduce heat to medium and add the minced garlic, ginger, and red pepper flakes to the same skillet. Stir constantly for 45 to 60 seconds until fragrant but not browned.
Garlic and ginger burn quickly over high heat, turning bitter and acrid. Medium heat coaxes out their aromatic oils and creates the flavor base for your sauce without any charring.
You will smell a wave of fragrance that shifts from raw and sharp to mellow and sweet. That transition happens fast, so stay attentive.
Step 7: Deglaze with the Sauce
Pour the prepared sauce mixture into the skillet and use your wooden spoon to scrape up any browned bits from the bottom. Bring to a simmer and let it bubble for 2 minutes.
Those browned bits (called fond) contain concentrated flavor from the chicken searing. Deglazing incorporates this flavor into your sauce, adding depth you cannot get any other way.
The sauce should bubble actively and begin reducing, with the alcohol smell softening as the bourbon cooks off.
Step 8: Return the Chicken to the Pan
Add all the seared chicken pieces back to the skillet along with any juices that collected on the plate. Stir to coat every piece with sauce.
Returning the chicken now allows it to finish cooking gently while absorbing sauce flavor. The resting juices add another layer of chicken essence to the sauce.
Every piece should be submerged or coated in the simmering liquid.
Step 9: Simmer Until Cooked Through
Reduce heat to medium low and simmer for 6 to 8 minutes, stirring occasionally, until the chicken reaches an internal temperature of 165 degrees Fahrenheit. The sauce will reduce and concentrate during this time.
Gentle simmering allows the cornstarch coating on the chicken to absorb sauce while the protein finishes cooking. Aggressive boiling toughens the meat and causes the sauce to break.
Check the thickest piece with your thermometer. The chicken should feel firm but springy when pressed.
Step 10: Thicken the Sauce
Stir the cornstarch slurry one more time, then pour it into the simmering sauce while stirring constantly. Cook for 1 to 2 minutes until the sauce thickens and turns glossy.
Cornstarch activates at simmering temperatures and needs constant motion to distribute evenly. Adding it all at once without stirring creates lumps that never smooth out.
The sauce should coat the back of your spoon thickly and slowly drip off rather than running like water.
Step 11: Check Consistency and Adjust
Taste the sauce and adjust seasoning if needed. If the sauce is too thick, add a splash of water. If too thin, simmer another minute.
Sauce continues to thicken as it cools, so pull it slightly looser than your ideal final consistency. The resting period will bring it to perfect texture.
The sauce should cling to the chicken without pooling excessively at the bottom of the pan.
Step 12: Rest and Garnish
Remove the skillet from heat and let it rest for 5 minutes. Garnish with sliced green onions and sesame seeds just before serving.
Resting allows the sauce to set slightly and the chicken fibers to relax and reabsorb moisture. Cutting into it immediately releases juices that should stay in the meat.
The sauce will look slightly more set and the chicken will appear glazed and glossy after the rest period.
Pro Tip: For the stickiest, most caramelized bourbon chicken, spread the finished pieces on a sheet pan and broil for 2 to 3 minutes until the edges char slightly and the sauce gets tacky. This mimics the food court steam table effect where the chicken sits and glazes.
The Science Behind the Technique
The magic of bourbon chicken comes from the Maillard reaction during searing and controlled caramelization of the sauce sugars. When you sear cornstarch coated chicken over high heat, the proteins and sugars undergo a complex series of reactions that create hundreds of new flavor compounds.
The bourbon contributes more than just alcohol. Its barrel aging process creates vanillin, lactones, and tannins that deepen the sauce complexity in ways that other spirits cannot replicate. As the alcohol cooks off, these compounds remain and concentrate.
Chef Note: The brown sugar caramelizes at around 320 degrees Fahrenheit, which is why medium heat during sauce reduction gives you control over that sweet spot between sticky glaze and burnt sugar.
Tips for Getting It Right Every Time
- Dry your chicken thoroughly since surface moisture is the enemy of browning and causes dangerous oil splatter
- Do not skip the batches even if it takes longer because crowded chicken steams instead of sears
- Use a timer for the aromatic sauté since garlic goes from perfect to burnt in about 15 seconds
- Keep the cornstarch slurry moving as you pour it in or you will spend minutes fishing out lumps
- Taste before serving and add a splash of vinegar if the sauce tastes flat or one dimensional
- Let the dish rest because serving immediately means watery sauce and dry chicken
Mistakes That Will Ruin Your Dish
- Using chicken breast results in dry, stringy meat since breasts have no fat to keep them moist during cooking
- Adding bourbon to a flaming hot dry pan can ignite and creates a dangerous flare that also burns off all the flavor instantly
- Skipping the cornstarch coating means chicken that will not brown properly and sauce that slides right off
- Boiling instead of simmering toughens the chicken proteins and breaks the sauce emulsion
- Adding the slurry to cold sauce creates gummy clumps that never dissolve no matter how long you cook
Make Ahead and Meal Prep Tips
Bourbon chicken is an ideal meal prep candidate because the flavors actually improve overnight as the sauce penetrates the meat. I make a double batch most Sundays and portion it out for the week.
- The sauce can be mixed up to 3 days ahead and stored in the refrigerator, just whisk before using to recombine
- Cut and seasoned chicken keeps for 24 hours refrigerated, though add cornstarch only right before cooking
- Fully cooked bourbon chicken refrigerates beautifully for 4 days in an airtight container
- Prepped vegetables and garnishes can be sliced 2 days ahead and stored separately for quick assembly
What to Serve With Bourbon Chicken
This dish works best as part of a simple weeknight dinner with sides that soak up the extra sauce. I keep the accompaniments neutral to let the bourbon chicken shine as the star.
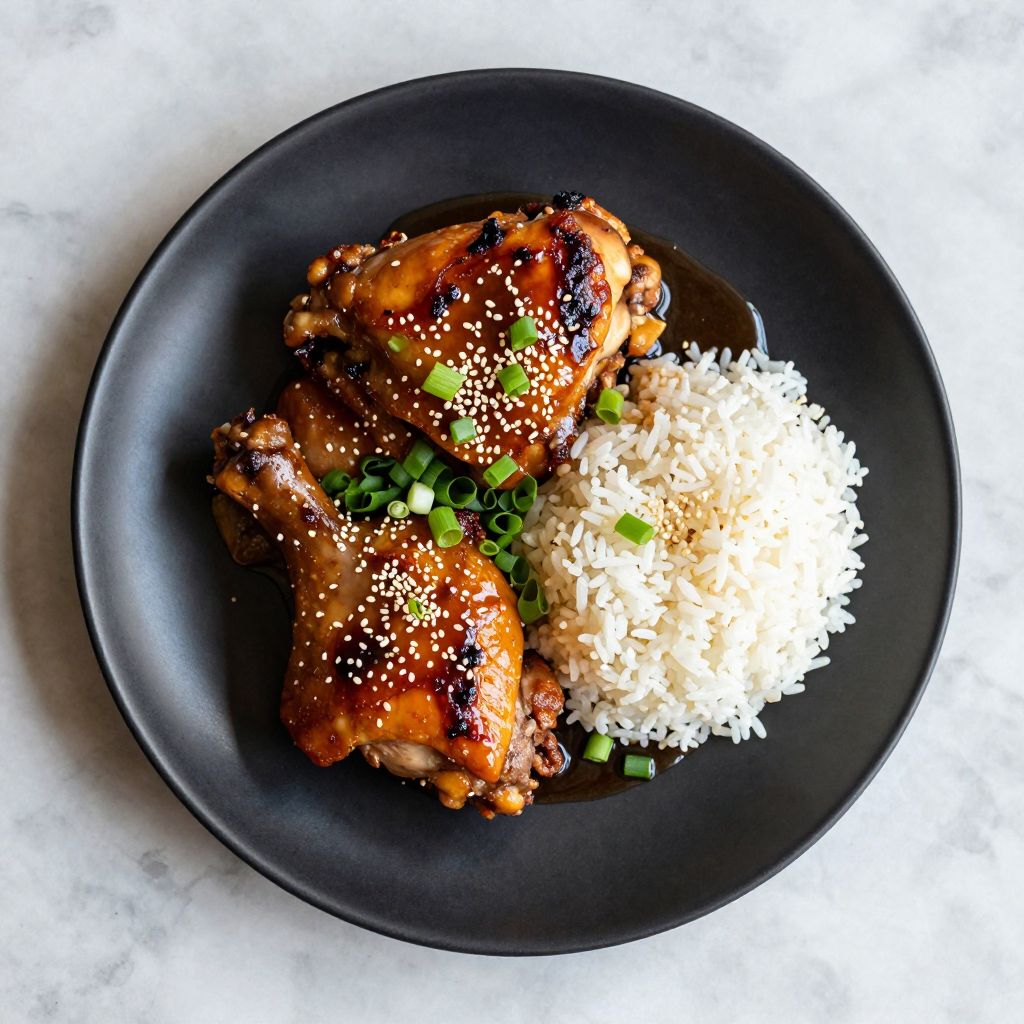
- Steamed jasmine rice: The fragrant, slightly sticky grains are perfect sauce vehicles and complement the Asian fusion flavors
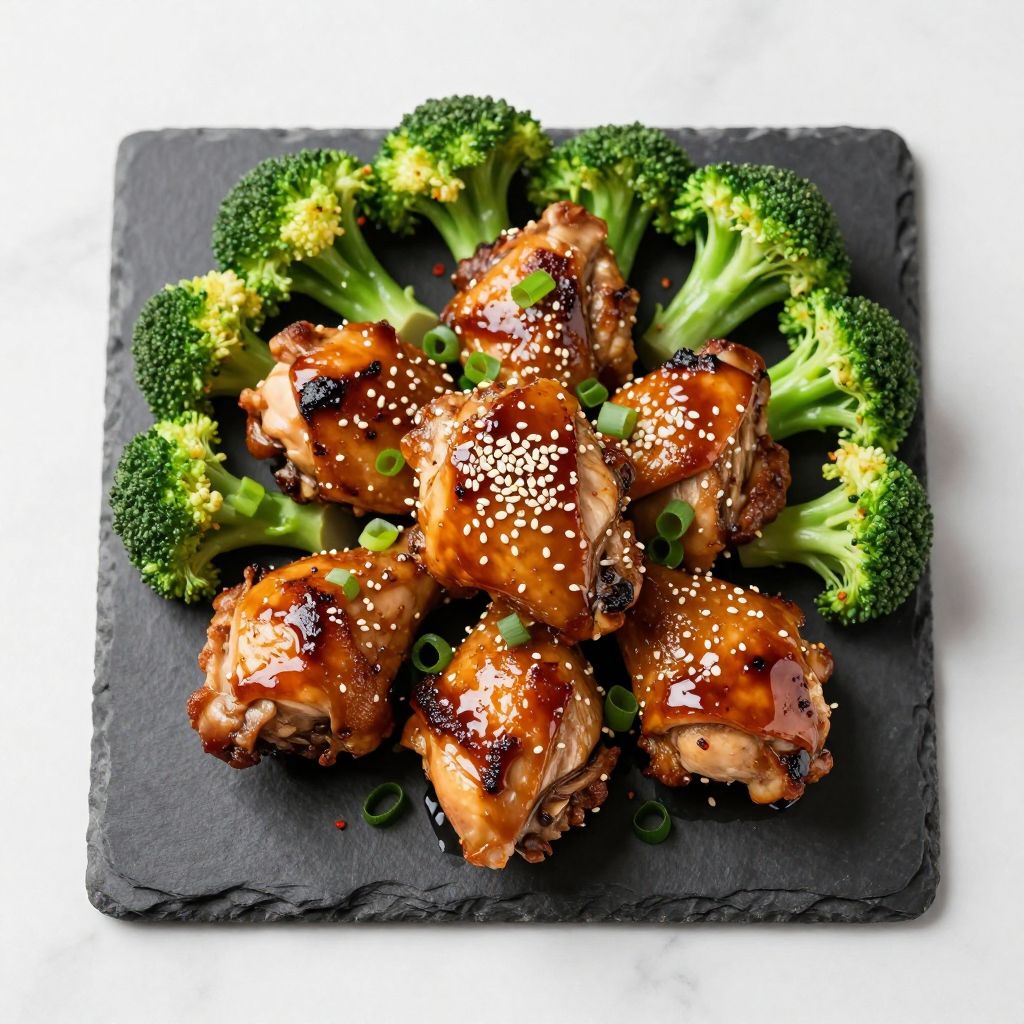
- Steamed broccoli: Adds color and freshness that cuts through the rich sweetness of the glaze
- Quick pickled cucumbers: The acidity and crunch provide contrast that keeps every bite interesting
- Egg fried rice: Transforms this into a complete one bowl meal with protein from the eggs
- Roasted green beans: Charred edges and tender interiors add textural variety to the plate
Drink Pairings
A slightly sweet off dry Riesling matches the sauce’s sweetness while its acidity cuts through the richness. The floral notes complement the ginger and the crispness refreshes the palate between bites.
- Wine: Gewürztraminer or off dry Riesling with bright acidity and stone fruit notes
- Beer: Amber lager or Vienna style lager with caramel malt character that echoes the brown sugar
- Non alcoholic: Ginger beer over ice with a lime wedge provides similar sweet heat balance
- Hot drink: Jasmine green tea cleanses the palate and complements the Asian fusion profile
Flavour Variations Worth Trying
- Spicy Szechuan Bourbon: Double the red pepper flakes and add 1 tablespoon chili crisp at the end. The heat builds slowly and lingers with a numbing tingle.
- Orange Bourbon: Replace half the apple cider vinegar with fresh orange juice and add 1 teaspoon orange zest. The citrus brightens everything and adds aromatic complexity.
- Honey Garlic Bourbon: Swap brown sugar for honey and triple the garlic. The honey adds floral notes while extra garlic creates a more savory profile.
- Pineapple Bourbon: Add 1 cup fresh pineapple chunks during the last 3 minutes. The fruit caramelizes slightly and adds tropical sweetness with acidity.
- Smoky Bourbon: Add 1 teaspoon smoked paprika and a few drops of liquid smoke. The smokiness mimics outdoor grilling and deepens the whiskey notes.
How to Adapt This Recipe for Your Diet
- Gluten free: Use tamari or coconut aminos instead of soy sauce and verify your bourbon is gluten free (most are). The dish will taste nearly identical.
- Dairy free: This recipe is naturally dairy free. No modifications needed.
- Vegetarian or vegan: Substitute extra firm tofu pressed for 30 minutes and cut into cubes. Sear until golden and reduce sauce simmering time to 4 minutes.
- Low carb or keto: Replace brown sugar with a monk fruit brown sugar substitute and skip the cornstarch coating. Use xanthan gum (1/4 teaspoon) to thicken the sauce.
- High protein: Increase chicken to 2.5 pounds and serve over cauliflower rice. Each serving delivers over 45 grams of protein.
How to Store and Reheat
In the Refrigerator
Store bourbon chicken in an airtight glass container with the sauce covering the chicken pieces. It keeps for 4 days at 40 degrees Fahrenheit or below.
- Let the dish cool completely before refrigerating to prevent condensation and soggy chicken
- Store rice separately to prevent it from absorbing all the sauce and becoming mushy
In the Freezer
Bourbon chicken freezes exceptionally well for up to 3 months. The sauce protects the chicken from freezer burn and the flavors stay intact.
- Freeze in flat freezer bags for quick thawing and easy stacking
- Portion into individual servings before freezing for convenient lunch prep
Reheating
The stovetop method produces the best results by allowing the sauce to re-emulsify and the chicken to warm evenly. Add a splash of water to prevent the sauce from becoming too thick.
- Oven: Cover with foil and reheat at 325 degrees for 15 to 20 minutes until heated through
- Stovetop: Warm over medium low heat with 2 tablespoons water, stirring occasionally for 8 to 10 minutes
- Microwave: Heat in 90 second intervals at 70 percent power, stirring between intervals; this method works but may make edges rubbery
Cost Breakdown
Making bourbon chicken at home costs about a third of ordering it from a restaurant and uses ingredients you likely already have. The bourbon is the biggest expense but one bottle makes this recipe at least 10 times.
| Ingredient | Estimated Cost |
|---|---|
| Chicken thighs (2 lbs) | $5.50 |
| Bourbon (1/2 cup) | $2.00 |
| Soy sauce | $0.40 |
| Brown sugar | $0.25 |
| Garlic and ginger | $0.50 |
| Pantry staples | $0.35 |
| Total Per Serving | $2.25 |
Nutrition Information
| Nutrient | Amount |
|---|---|
| Calories | 385 |
| Total Fat | 14g |
| Saturated Fat | 3g |
| Trans Fat | 0g |
| Cholesterol | 165mg |
| Sodium | 890mg |
| Total Carbohydrates | 24g |
| Dietary Fiber | 0g |
| Total Sugars | 18g |
| Added Sugars | 16g |
| Protein | 38g |
| Vitamin D | 0mcg |
| Calcium | 25mg |
| Iron | 2mg |
| Potassium | 420mg |
Nutritional values are estimates based on standard ingredients and may vary depending on specific brands, portion sizes, and any modifications made to the recipe.
Frequently Asked Questions
Can I make bourbon chicken without alcohol?
Yes, substitute the bourbon with equal parts apple juice and a teaspoon of vanilla extract. The flavor will be sweeter and less complex, but still delicious.
Can I prep bourbon chicken the night before?
You can mix the sauce and cut the chicken ahead of time, but do not coat with cornstarch until ready to cook. The coating gets gummy if it sits too long.
How long does bourbon chicken last in the fridge?
Properly stored in an airtight container, bourbon chicken stays fresh for 4 days. The flavors actually improve after a day as the sauce penetrates the meat.
Why is my sauce not thickening properly?
The cornstarch slurry needs to reach a simmer to activate. Make sure your heat is high enough and give it a full 2 minutes of bubbling while stirring.
Can I double this recipe for a crowd?
Absolutely, but work in smaller batches for searing to maintain high heat. Use a larger pan for the sauce stage or work in two pans and combine at the end.
Why does my chicken release so much liquid?
This happens when chicken is not dried thoroughly or the pan is overcrowded. Pat each piece completely dry and give every piece space in the pan.
Can I use this sauce on grilled chicken instead?
Yes, grill the chicken separately and brush with the sauce during the last few minutes. Simmer remaining sauce until thick and serve on the side for dipping.
My Final Word
This bourbon chicken recipe delivers that nostalgic mall food court flavor but better because you made it yourself with real ingredients. The sticky sweet glaze, the tender thighs, the hit of bourbon in every bite: it all comes together in about 35 minutes of actual work.
I have made this dish more times than I can count, and it never fails to disappear from the table. The recipe is forgiving enough for beginners but produces results that make you look like you know what you are doing.
Give it a try this week and let me know how it turns out. Drop a comment below or tag Recipe Papa on social media with your version. I always love seeing how people make these recipes their own.
Bourbon Chicken
Ingredients
Equipment
Method
- Pat the chicken thigh pieces completely dry with paper towels. Season evenly with salt and pepper, then toss with 2 tablespoons cornstarch until every piece is lightly coated.
- Whisk together the bourbon, soy sauce, brown sugar, apple cider vinegar, ketchup, and water in a medium bowl until the sugar dissolves. Set aside.
- Mix 1 tablespoon cornstarch with 2 tablespoons cold water in a small bowl and stir until completely smooth. Set aside.
- Heat 2 tablespoons of vegetable oil in a large skillet over medium high heat until shimmering. Add half the chicken pieces in a single layer and cook undisturbed for 3 minutes until golden brown on the bottom.
- Flip each piece and cook for another 2 to 3 minutes until golden on the second side. Transfer to a clean plate and repeat with remaining oil and chicken.
- Reduce heat to medium and add the minced garlic, ginger, and red pepper flakes to the same skillet. Stir constantly for 45 to 60 seconds until fragrant but not browned.
- Pour the prepared sauce mixture into the skillet and scrape up any browned bits from the bottom. Bring to a simmer and let it bubble for 2 minutes.
- Add all the seared chicken pieces back to the skillet along with any collected juices. Stir to coat every piece with sauce.
- Reduce heat to medium low and simmer for 6 to 8 minutes, stirring occasionally, until the chicken reaches an internal temperature of 165°F.
- Stir the cornstarch slurry, then pour it into the simmering sauce while stirring constantly. Cook for 1 to 2 minutes until the sauce thickens and turns glossy.
- Taste and adjust seasoning if needed. If sauce is too thick, add a splash of water. If too thin, simmer another minute.
- Remove from heat and let rest for 5 minutes. Garnish with sliced green onions and sesame seeds before serving.


