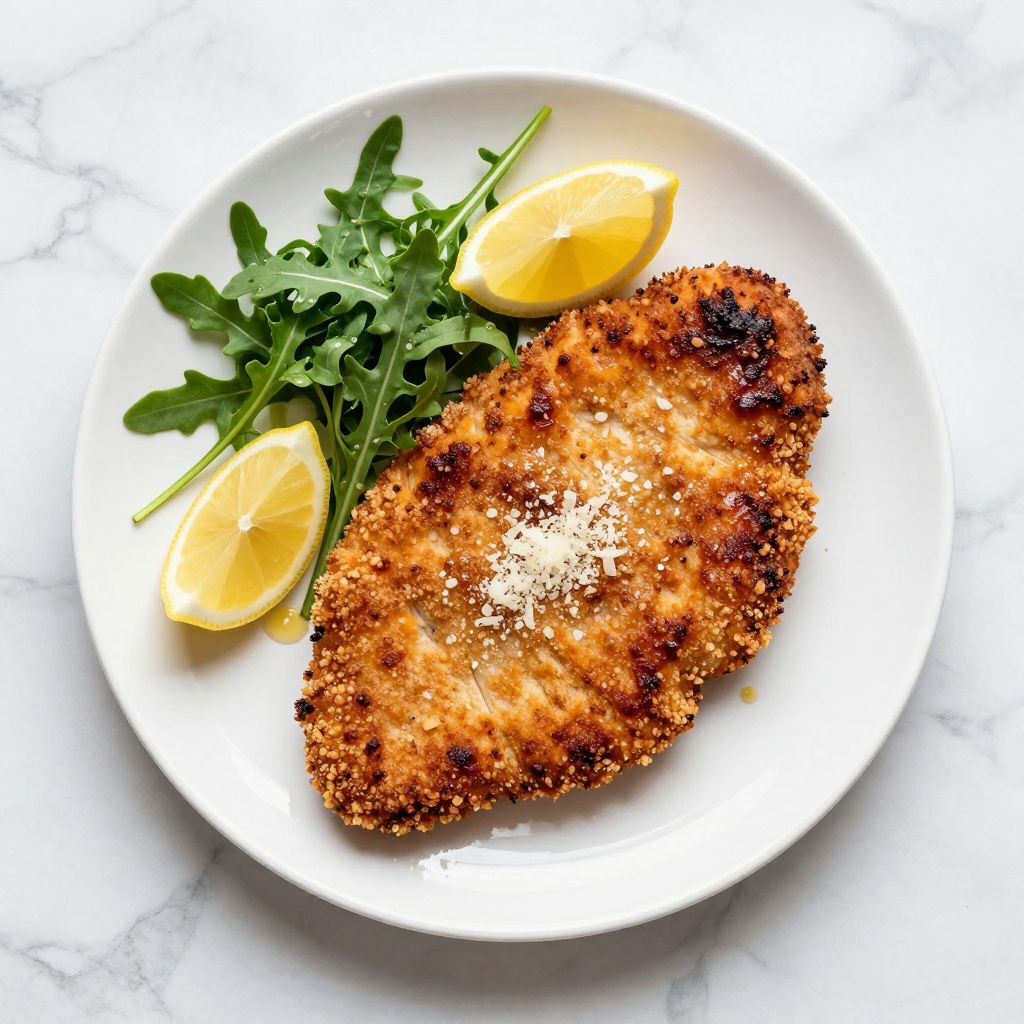
Chicken cutlets deliver what every weeknight dinner promises but rarely provides: crispy, golden perfection in under thirty minutes. These thin, breaded cutlets hit the table faster than you can preheat an oven for frozen nuggets.
I have made this recipe more times than I can count, and it never fails to disappear. Let me show you exactly how to get that shatteringly crisp coating every single time.
What Makes This Recipe Worth Your Time
This chicken cutlet recipe outperforms restaurant versions because you control the freshness of your oil and the thickness of your coating. The result is a cutlet that stays crispy for minutes after plating, not seconds.
- Thirty minutes from fridge to table, including prep and cooking
- Kid approved flavor that adults actually want to eat too
- Versatile base for dozens of meals from sandwiches to parmigiana
- Budget friendly protein that stretches two chicken breasts into four servings
- Meal prep champion that reheats without turning soggy
A Little Background on This Dish
The chicken cutlet traces its roots to the Italian cotoletta and the Austrian schnitzel, both of which used the same breading technique to stretch expensive meat further. Italian immigrants brought this method to America, where chicken replaced the traditional veal as the more affordable option.
In delis and diners across the Northeast, the chicken cutlet became a staple, pounded thin and fried until golden. The technique spread nationwide because it solves a universal problem: how to make chicken breast interesting.
My Experience With This Recipe
I started making chicken cutlets when my kids declared boneless chicken breasts “too boring” for the hundredth time. The first few attempts produced cutlets that looked great but turned rubbery and tough within minutes of leaving the pan.
My biggest mistake was skipping the resting step after breading. I would bread the chicken and immediately drop it in the oil, which caused the coating to slide right off in patches. Once I figured out that ten minutes of rest lets the breading adhere properly, everything clicked.
The first time I nailed it, the kitchen smelled like my favorite Italian deli growing up, and the crunch when we bit through that first cutlet was audible across the table. That sound told me the recipe was finally ready to share.
Before You Start: Key Things to Know
This recipe suits confident beginners and experienced home cooks alike. The biggest challenge is maintaining consistent oil temperature while frying multiple batches.
- Difficulty level: Easy to moderate, depending on your comfort with frying
- Active time vs passive time: 20 minutes active, 10 minutes passive for resting
- Most important equipment: A reliable instant read thermometer for oil temperature
- Step requiring most attention: Frying, where you must watch for color and flip at the right moment
Recipe at a Glance
- Recipe Name: Classic Chicken Cutlets
- Yield: 4 servings
- Prep Time: 15 minutes
- Cook Time: 12 minutes
- Total Time: 27 minutes
- Resting Time: 10 minutes after breading
- Difficulty: Easy
- Course: Main dish
- Cuisine: American, Italian American
- Calories per Serving: 385
How to Source the Best Ingredients
Ingredient quality makes a noticeable difference in the final cutlet, especially with the chicken and the breadcrumbs. Fresh, properly handled chicken produces a tender interior, while stale breadcrumbs give you a dull, cardboard coating.
- Chicken breasts: Look for pale pink flesh with no gray spots or strong odor. Choose breasts that are similar in size for even cooking.
- Breadcrumbs: Buy plain, unseasoned breadcrumbs and check the date. Fresh breadcrumbs should smell faintly wheaty, not dusty or stale.
- Eggs: Use the freshest eggs available. The whites should be thick and hold together, not watery and spread out.
- Parmesan cheese: Buy a wedge and grate it yourself. Pre grated cheese contains anti caking agents that affect how it adheres to the cutlet.
Ingredients for Chicken Cutlets
For the Chicken
- 2 large boneless, skinless chicken breasts, about 1.5 pounds total
- 1 teaspoon kosher salt
- 1/2 teaspoon black pepper, freshly ground
For the Breading Station
- 1 cup all purpose flour
- 3 large eggs, beaten
- 2 tablespoons whole milk
- 1 1/2 cups plain breadcrumbs
- 1/2 cup Parmesan cheese, finely grated
- 1 teaspoon garlic powder
- 1 teaspoon dried oregano
- 1/2 teaspoon paprika
For Frying
- 1 cup vegetable oil or canola oil
- Lemon wedges for serving
Smart Substitutions and Swaps
- Chicken breasts: Provide the lean protein base. Substitute chicken thighs pounded thin, but expect a slightly richer flavor and add 1 to 2 minutes to cooking time.
- Breadcrumbs: Create the crispy exterior coating. Substitute panko for an airier, crunchier texture, or crushed crackers for a buttery twist.
- Parmesan: Adds savory depth and helps browning. Substitute Pecorino Romano for a sharper taste or nutritional yeast for a dairy free option.
- Eggs: Bind the flour to the breadcrumbs. Substitute buttermilk alone for a lighter coating or a flax egg mixture for a vegan version.
- All purpose flour: Creates the base layer for adhesion. Substitute rice flour for a gluten free option with similar results.
- Vegetable oil: Provides neutral frying medium. Substitute peanut oil for higher smoke point or olive oil for flavor, though olive oil may smoke at high temperatures.
Tools and Equipment You Will Need
Setting up all your equipment before you start prevents frantic searching mid recipe. A proper mise en place keeps your hands free and your timing tight.
- Meat mallet or rolling pin (for pounding chicken to even thickness)
- Plastic wrap or parchment paper
- Three shallow dishes or pie plates (for the breading station)
- Large cast iron or stainless steel skillet (retains heat better than nonstick for consistent frying)
- Instant read thermometer (critical for monitoring oil temperature)
- Wire rack set over a baking sheet (keeps cutlets crispy while draining)
- Tongs or fish spatula
- Paper towels
How to Make Chicken Cutlets
Read through all the steps before you start and set up your breading station first. Your eggs should be at room temperature for better adhesion, and your oil should be heating while you bread the chicken.
Step 1: Prepare the Chicken Breasts
Place one chicken breast on a cutting board. Hold your knife parallel to the board and slice through the breast horizontally to create two thin cutlets of equal thickness.
Butterflying the breast this way gives you twice as many cutlets from the same amount of chicken and ensures faster, more even cooking. It also creates a larger surface area for that crispy coating.
You should end up with two pieces from each breast, roughly 1/2 inch thick before pounding.
Step 2: Pound the Cutlets Thin
Place a cutlet between two sheets of plastic wrap. Using a meat mallet or the bottom of a heavy skillet, pound from the center outward until the cutlet reaches 1/4 inch thickness.
Pounding breaks down the muscle fibers and creates a uniform thickness that cooks at the same rate across the entire surface. This prevents the thick center from being undercooked while the edges turn to leather.
The cutlet should feel uniformly thin across your fingers with no thick spots. The edges may look slightly ragged, which is fine.
Step 3: Season the Chicken
Lay all four cutlets on a clean work surface. Season both sides evenly with kosher salt and black pepper, pressing the seasoning gently into the meat.
Seasoning before breading ensures the flavor penetrates the chicken rather than just sitting on the coating. Salt also draws out a small amount of moisture, which helps the flour adhere.
Step 4: Set Up the Breading Station
Arrange three shallow dishes in a row. Place the flour in the first dish, the beaten eggs mixed with milk in the second, and the breadcrumbs combined with Parmesan, garlic powder, oregano, and paprika in the third.
The three stage breading system creates layers that lock together during frying. Flour absorbs surface moisture, egg provides the glue, and seasoned breadcrumbs deliver the crunch and flavor.
Stir the breadcrumb mixture thoroughly so every spoonful contains cheese and seasonings.
Step 5: Dredge in Flour
Using one hand (designate this your dry hand), dredge a cutlet in flour, coating both sides completely. Shake off excess flour until only a thin, even layer remains.
Too much flour creates a gummy layer between the chicken and the coating. The flour should be barely visible, like a dusting of powder on the surface.
Step 6: Coat in Egg
Transfer the floured cutlet to the egg mixture using your dry hand. Switch to your other hand (your wet hand) and turn the cutlet to coat both sides thoroughly, letting excess drip back into the dish.
The egg needs to cover every floury spot to create a complete seal. Any gaps in egg coverage will become bald spots on your finished cutlet where the breading falls away.
The cutlet should look glossy and wet with no dry patches visible.
Step 7: Press into Breadcrumbs
Lay the egg coated cutlet into the breadcrumb mixture. Use your dry hand to press breadcrumbs firmly onto the surface, flip, and press again. Pack the crumbs on densely.
Pressing creates mechanical adhesion between the crumbs and the egg layer. A gentle coating will fall off during frying, while a firmly pressed coating stays put.
You should not see any egg peeking through the breading. The surface should look uniformly coated and slightly rough.
Step 8: Rest the Breaded Cutlets
Place breaded cutlets on a wire rack and let them rest for 10 minutes at room temperature. Do not skip this step.
Resting allows the breading to set and the egg to begin drying slightly, which creates a stronger bond. Cutlets fried immediately after breading almost always lose patches of coating in the oil.
The coating should look slightly matte rather than wet and shiny after resting.
Step 9: Heat the Oil
Add oil to a large skillet to a depth of about 1/4 inch. Heat over medium high until the oil reaches 350 degrees Fahrenheit on an instant read thermometer.
Proper oil temperature is the single most important factor in crispy cutlets. Too cool and the breading absorbs oil and turns greasy. Too hot and the outside burns before the chicken cooks through.
Test readiness by dropping a small pinch of breading into the oil. It should sizzle immediately and float to the surface within seconds.
Step 10: Fry the First Batch
Carefully lay two cutlets into the hot oil, placing them away from you to prevent splashing. Do not move them for 3 minutes.
Leaving the cutlets undisturbed allows a crust to form. Moving them too early tears the breading and creates bare spots that turn tough and chewy.
Listen for a steady, active sizzle. If the sound quiets significantly, your oil has cooled too much.
Step 11: Flip and Finish
After 3 minutes, check the underside by lifting an edge with tongs. When deep golden brown, flip and cook the second side for 2 to 3 minutes more.
The second side cooks slightly faster because the chicken is partially cooked and the oil has been absorbed into the breading. Watch the color closely.
The internal temperature should reach 165 degrees Fahrenheit. The cutlet should feel firm but springy when pressed gently with tongs.
Step 12: Drain and Rest
Transfer fried cutlets to a wire rack set over a baking sheet. Season immediately with a light sprinkle of salt while the oil is still hot on the surface.
A wire rack allows air to circulate beneath the cutlets, preventing the bottom from getting soggy in its own steam. Paper towels trap moisture and soften the crust.
Let cutlets rest for 2 minutes before serving to allow juices to redistribute.
Pro Tip: Keep your first batch warm in a 200 degree oven on a wire rack while frying the second batch. This holds the crispness without overcooking.
The Science Behind the Technique
The three stage breading creates a moisture barrier that protects the chicken during frying. Flour absorbs surface moisture and creates a dry base, egg proteins coagulate during cooking to form a flexible seal, and breadcrumbs undergo the Maillard reaction to create flavor and crunch.
When the breaded cutlet hits hot oil, water in the coating rapidly converts to steam and escapes outward. This outward pressure prevents oil from soaking into the breading, which is why proper oil temperature matters so much.
Chef Note: The sizzle you hear during frying is literally the sound of moisture escaping and keeping oil out of your food.
Tips for Getting It Right Every Time
- Keep one hand dry during breading to prevent clumpy fingers and wasted breading mixture.
- Let the oil recover between batches by waiting 60 seconds for the temperature to climb back to 350 degrees.
- Use enough oil to come halfway up the cutlet. Too little oil means uneven browning and more flipping.
- Do not crowd the pan with more than two cutlets at once. Overcrowding drops oil temperature dramatically.
- Press the breading firmly rather than just dusting it on. Gentle coating falls off during frying.
- Season immediately after frying while the surface is hot and sticky. Salt will not adhere to cooled cutlets.
Mistakes That Will Ruin Your Dish
- Skipping the rest after breading causes the coating to slide off in the oil, leaving bare spots that turn tough and chewy.
- Frying in cold oil makes the breading absorb grease like a sponge, resulting in soggy, heavy cutlets.
- Cutting into the cutlet to check doneness releases all the juices and dries out the meat. Use a thermometer instead.
- Pounding unevenly creates thick spots that stay raw while thin edges overcook and turn rubbery.
- Using stale breadcrumbs produces a dull, cardboard tasting coating that no amount of seasoning can save.
Make Ahead and Meal Prep Tips
Chicken cutlets work wonderfully for meal prep because they reheat better than most fried foods. The key is proper storage that protects the coating from moisture.
- Breaded, uncooked cutlets can be prepared up to 24 hours ahead and refrigerated on a wire rack, covered loosely with plastic.
- Fried cutlets can be cooled completely and refrigerated in a single layer for up to 3 days.
- The breading mixture can be combined and stored in an airtight container at room temperature for up to 1 week.
- Frozen breaded cutlets can go straight from freezer to oil, adding 2 minutes to the cooking time per side.
What to Serve With Chicken Cutlets
Chicken cutlets fit best in a casual weeknight dinner or a relaxed weekend lunch. They pair well with light, fresh sides that contrast the richness of the fried coating.
- Arugula salad with lemon and shaved Parmesan provides peppery freshness that cuts through the richness.
- Roasted broccoli with garlic adds a savory vegetable that crisps up while your cutlets rest.
- Buttered egg noodles make this feel like a complete comfort food dinner in under 30 minutes.
- Marinara sauce transforms these into a base for chicken parmigiana with mozzarella on top.
- Coleslaw brings cool crunch that contrasts the hot, crispy cutlet perfectly.
Drink Pairings
A crisp Italian white wine like Pinot Grigio complements chicken cutlets beautifully, with bright acidity that cleanses the palate between bites. The wine’s mineral notes enhance the savory Parmesan in the breading.
- Wine: Pinot Grigio or a dry Soave, served cold, with citrus notes that echo the lemon garnish.
- Beer: A pilsner or light lager, with crisp carbonation that cuts through the fried coating.
- Non alcoholic: Sparkling water with lemon or a tart lemonade to refresh between bites.
- Hot drink: A cup of hot tea with dinner may seem unusual, but unsweetened green tea pairs surprisingly well with fried foods.
Flavour Variations Worth Trying
- Milanese Style: Add extra Parmesan and a pinch of lemon zest to the breadcrumb mixture. The result tastes brighter and more distinctly Italian.
- Spicy Nashville: Brush hot cutlets with cayenne butter immediately after frying. The coating absorbs the heat and turns orange.
- Japanese Katsu: Replace regular breadcrumbs with panko and serve with tonkatsu sauce. The texture becomes lighter and more shatteringly crisp.
- Herb Crusted: Add 2 tablespoons of fresh chopped herbs (parsley, thyme, rosemary) to the breading. The herbs crisp up and release their oils during frying.
- Everything Bagel: Mix 3 tablespoons of everything bagel seasoning into the breadcrumbs. The coating becomes savory with pops of onion and garlic.
How to Adapt This Recipe for Your Diet
- Gluten free: Substitute rice flour for all purpose flour and use certified gluten free breadcrumbs. The texture remains similar with slightly less browning.
- Dairy free: Omit the Parmesan and add 1 extra teaspoon of garlic powder plus 1/2 teaspoon of nutritional yeast for savory depth.
- Vegan: Substitute extra firm tofu slabs for chicken, use flax eggs, and omit cheese. Press tofu thoroughly first for better texture.
- Low carb: Replace breadcrumbs with crushed pork rinds or a mixture of almond flour and Parmesan. The cutlets brown faster, so reduce cooking time.
- High protein: Use this recipe as written; chicken breast is already high protein. Serve with Greek yogurt sauce for additional protein.
How to Store and Reheat
In the Refrigerator
Store cooked cutlets in a single layer in an airtight container for up to 3 days. Placing a paper towel under and over the cutlets absorbs excess moisture.
- Never stack warm cutlets or condensation will make them soggy.
- Cool completely on a wire rack before transferring to storage.
In the Freezer
Chicken cutlets freeze well for up to 2 months when wrapped properly. Flash freeze on a baking sheet first, then transfer to freezer bags.
- Separate cutlets with parchment paper to prevent sticking.
- Remove as much air as possible from freezer bags to prevent freezer burn.
Reheating
The oven produces the best results for reheating chicken cutlets, restoring crispness that microwave methods destroy. Preheat to 400 degrees Fahrenheit and reheat for 8 to 10 minutes.
- Oven method: Place cutlets on a wire rack over a baking sheet at 400 degrees for 10 minutes. This produces the crispiest results.
- Stovetop method: Add 1 tablespoon of oil to a skillet over medium heat and crisp each side for 2 minutes. Works well but requires attention.
- Microwave method: Reheat at 50% power for 90 seconds. The coating will soften significantly, so use only when time is critical.
Cost Breakdown
Making chicken cutlets at home costs roughly one third of what a deli charges and gives you control over quality and freshness. The ingredients are pantry staples that you likely already have on hand.
| Ingredient | Estimated Cost |
|---|---|
| Chicken breasts (1.5 lbs) | $5.25 |
| Breadcrumbs | $0.60 |
| Eggs (3 large) | $0.75 |
| Parmesan cheese | $1.00 |
| Flour and seasonings | $0.40 |
| Vegetable oil | $0.50 |
| Total Per Serving | $2.13 |
Nutrition Information
| Nutrient | Amount |
|---|---|
| Calories | 385 |
| Total Fat | 16g |
| Saturated Fat | 3g |
| Trans Fat | 0g |
| Cholesterol | 165mg |
| Sodium | 580mg |
| Total Carbohydrates | 22g |
| Dietary Fiber | 1g |
| Total Sugars | 2g |
| Added Sugars | 0g |
| Protein | 38g |
| Vitamin D | 0mcg |
| Calcium | 120mg |
| Iron | 2mg |
| Potassium | 420mg |
These values are estimates based on standard ingredients and portion sizes. Actual nutrition will vary based on specific brands and exact amounts used.
Frequently Asked Questions
Can I use chicken thighs instead of breasts?
Yes, boneless skinless thighs work well when pounded thin. They have more fat and flavor but need an extra minute or two per side to cook through.
Can I bread the cutlets ahead of time?
You can bread cutlets up to 24 hours in advance and store them uncovered on a wire rack in the refrigerator. The coating actually adheres better after an overnight rest.
How long do cooked cutlets last in the refrigerator?
Properly stored in a single layer, cooked chicken cutlets stay good for 3 days. They lose some crispness but regain it when reheated in the oven.
Why is my breading falling off during frying?
The most common cause is skipping the resting period after breading. Ten minutes of rest allows the coating to set and bond properly.
How do I double this recipe?
Double all ingredients and fry in more batches, keeping finished cutlets warm in a 200 degree oven. Do not try to fry more than two cutlets at once or the oil temperature drops too much.
Why are my cutlets greasy instead of crispy?
Your oil temperature was too low when the cutlets went in. Use a thermometer and wait until the oil reaches a full 350 degrees before frying each batch.
Can I bake these instead of frying?
Yes, bake at 425 degrees for 20 minutes, flipping halfway through. Spray the cutlets lightly with oil before baking for better browning, but expect a less crispy result than frying.
My Final Word
A great chicken cutlet should crunch when you cut it and stay juicy when you chew. This recipe delivers both, every time, with ingredients you already have in your kitchen.
I tested this version dozens of times before writing it down. If you follow the steps, especially the resting after breading and the oil temperature, you will get restaurant quality cutlets at home.
Make these once and I promise they will become a regular in your rotation. Let me know how yours turn out in the comments, or tag Recipe Papa on social media with your crispy creations.
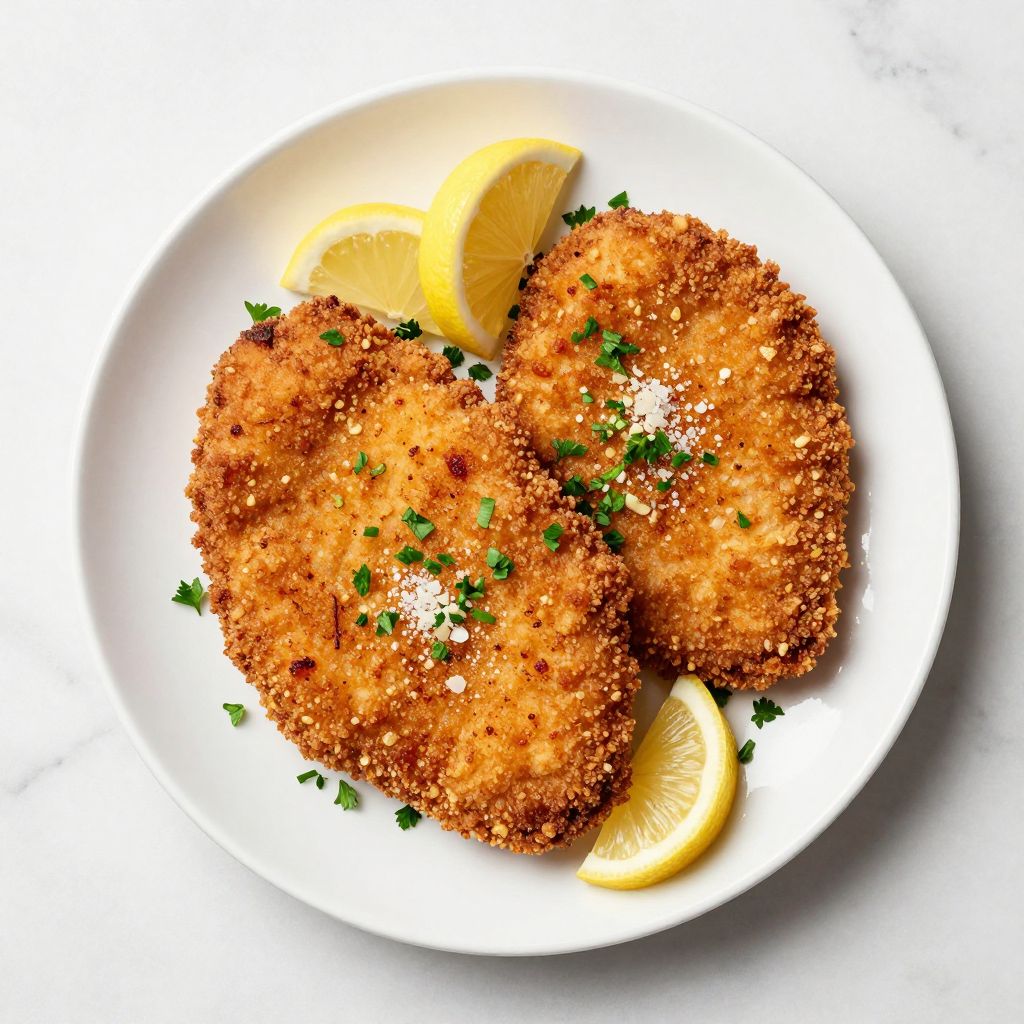
Classic Chicken Cutlets
Ingredients
Equipment
Method
- Place one chicken breast on a cutting board. Hold your knife parallel to the board and slice through the breast horizontally to create two thin cutlets of equal thickness. Repeat with the second breast to yield 4 cutlets.
- Place a cutlet between two sheets of plastic wrap. Using a meat mallet or the bottom of a heavy skillet, pound from the center outward until the cutlet reaches 1/4 inch thickness. Repeat with remaining cutlets.
- Lay all four cutlets on a clean work surface. Season both sides evenly with kosher salt and black pepper, pressing the seasoning gently into the meat.
- Set up the breading station: Place the flour in the first shallow dish, the beaten eggs mixed with milk in the second, and the breadcrumbs combined with Parmesan, garlic powder, oregano, and paprika in the third dish.
- Using your dry hand, dredge a cutlet in flour, coating both sides completely. Shake off excess flour until only a thin, even layer remains.
- Transfer the floured cutlet to the egg mixture. Using your wet hand, turn the cutlet to coat both sides thoroughly, letting excess drip back into the dish.
- Lay the egg coated cutlet into the breadcrumb mixture. Use your dry hand to press breadcrumbs firmly onto the surface, flip, and press again. Repeat with remaining cutlets.
- Place breaded cutlets on a wire rack and let them rest for 10 minutes at room temperature. Do not skip this step.
- Add oil to a large skillet to a depth of about 1/4 inch. Heat over medium high until the oil reaches 350 degrees Fahrenheit on an instant read thermometer.
- Carefully lay two cutlets into the hot oil, placing them away from you to prevent splashing. Do not move them for 3 minutes.
- After 3 minutes, check the underside by lifting an edge with tongs. When deep golden brown, flip and cook the second side for 2 to 3 minutes more until internal temperature reaches 165 degrees Fahrenheit.
- Transfer fried cutlets to a wire rack set over a baking sheet. Season immediately with a light sprinkle of salt while the oil is still hot on the surface. Repeat with remaining cutlets.
- Let cutlets rest for 2 minutes before serving with lemon wedges.


