Peanut butter fudge delivers that rich, melt-in-your-mouth sweetness you crave with just a handful of pantry staples. This old-fashioned confection comes together in under 30 minutes and sets into creamy, sliceable squares that disappear faster than you can hide them.
Whether you need a quick gift for the holidays or a no-fuss dessert for a potluck, this recipe earns its place in your permanent rotation. Let me walk you through exactly how to nail it every single time.
What Makes This Recipe Worth Your Time
This peanut butter fudge sets up smooth and creamy without any candy thermometer gymnastics or temperamental chocolate to manage. You get foolproof results with ingredients you probably already own.
- Five ingredients are all you need, and three of them are already in your pantry right now
- No candy thermometer required because this recipe uses a simple stovetop method with visual cues instead of precise temperatures
- Sets in under two hours at room temperature, or thirty minutes in the fridge if you are impatient like me
- Stays fresh for two weeks when stored properly, making it ideal for gifting or prepping ahead
- Scales easily for a small batch or a full holiday spread without any recipe math headaches
A Little Background on This Dish
Peanut butter fudge traces its roots to the American South, where resourceful home cooks stretched affordable peanut butter into candy that rivaled fancy confections. The recipe gained serious popularity during the Depression era when chocolate was expensive but peanut butter stayed cheap.
What started as a practical solution became a beloved tradition. Today you find variations from Tennessee to Texas, each family swearing their grandmother’s version reigns supreme.
My Experience With This Recipe
I started making peanut butter fudge about fifteen years ago when my kids were small and I needed something fast for a school bake sale. The first batch looked more like peanut butter soup because I pulled it off the heat too soon.
It took me three attempts to learn that the boiling time matters more than anything else in this recipe. Undercook it by thirty seconds and you get grainy mush; overcook it and you get something resembling a peanut butter brick.
The fourth batch came out with that perfect creamy texture that cuts clean and melts on your tongue. My youngest grabbed a piece straight off the cooling rack and declared it better than store bought, which from a seven year old is basically a Michelin star.
Before You Start: Key Things to Know
This recipe suits beginners who can manage basic stovetop cooking. The biggest challenge is nailing the boil time, but I will give you clear visual cues so you know exactly when to pull the pot.
- Difficulty level: Easy, perfect for first time candy makers or baking with kids
- Active time versus passive time: About 15 minutes of active cooking, then 90 minutes of hands off setting time
- Most important equipment: A heavy bottomed saucepan that distributes heat evenly and prevents scorching
- Step requiring most attention: The boiling stage, where you must watch constantly and stir without stopping
Recipe at a Glance
- Recipe Name: Peanut Butter Fudge
- Yield: 36 pieces (serves 18)
- Prep Time: 10 minutes
- Cook Time: 8 minutes
- Total Time: 18 minutes active
- Resting Time: 90 minutes to 2 hours
- Difficulty: Easy
- Course: Dessert, Confection
- Cuisine: American, Southern
- Calories per Serving: 195
How to Source the Best Ingredients
Ingredient quality shows up directly in the final texture and flavor of your fudge. With only five components, each one pulls serious weight.
- Peanut butter: Use a commercial brand like Jif or Skippy that contains stabilizers; natural peanut butter with oil separation will not set properly
- Butter: Choose unsalted so you control the salt level; look for butter with at least 80 percent fat content for best texture
- Sugar: Standard granulated white sugar works best; do not substitute brown sugar or raw sugar as they change the texture completely
- Milk: Whole milk gives the richest result; avoid skim or plant milks which lack the fat needed for proper setting
- Vanilla extract: Use pure vanilla extract, not imitation; you will taste the difference in something this simple
Ingredients for Peanut Butter Fudge
For the Fudge Base
- 2 cups granulated sugar
- 1/2 cup whole milk
- 1/4 cup unsalted butter, cut into tablespoon sized pieces
- 1 cup creamy peanut butter, at room temperature
- 1 teaspoon pure vanilla extract
- 1/4 teaspoon fine sea salt
Smart Substitutions and Swaps
- Peanut butter: Provides the protein structure and fat that gives fudge its creamy body. Substitute almond butter or sunflower seed butter for a nut free version, but expect a slightly different flavor and softer set.
- Whole milk: Adds moisture and milk solids that help the sugar dissolve smoothly. Replace with heavy cream for richer fudge or evaporated milk for extra caramel notes, using the same quantity.
- Granulated sugar: Creates the crystalline structure that firms up the fudge as it cools. Coconut sugar works but produces darker, molasses tinted fudge with a softer texture.
- Butter: Contributes richness and helps create that melt on your tongue quality. Use coconut oil for dairy free fudge, though it sets slightly firmer and tastes faintly tropical.
- Vanilla extract: Rounds out the sweetness and adds aromatic depth. Swap in maple extract for a breakfast inspired twist or almond extract for more complexity.
Tools and Equipment You Will Need
Having everything ready before you start matters here because once the sugar starts boiling, you cannot walk away. Gather these tools and set them within arm’s reach of your stovetop.
- Heavy bottomed 3 quart saucepan (prevents hot spots that cause scorching)
- Wooden spoon or silicone spatula (heat resistant for constant stirring)
- 8×8 inch baking pan
- Parchment paper
- Measuring cups and spoons
- Sharp knife for cutting
- Instant read thermometer (optional but helpful for beginners)
How to Make Peanut Butter Fudge
Read through all the steps before you begin and measure out every ingredient first. Your peanut butter should be at room temperature so it incorporates smoothly without seizing.
Step 1: Prepare Your Pan
Line an 8×8 inch baking pan with parchment paper, leaving a 2 inch overhang on two opposite sides. Press the parchment firmly into the corners and smooth out any wrinkles.
This overhang acts as handles that let you lift the entire fudge block out for clean, easy cutting. Skipping this step means wrestling sticky fudge out of the pan with a spatula.
The parchment should lie completely flat with no air pockets underneath. Air pockets create uneven spots where fudge sets at different rates.
Step 2: Measure All Ingredients
Measure your sugar, milk, and butter into the saucepan but do not turn on the heat yet. Place the peanut butter, vanilla, and salt in a separate medium bowl right next to the stove.
This mise en place prevents scrambling once the sugar mixture starts boiling. You will have roughly 10 seconds to add the peanut butter when the time comes, so everything must be within reach.
Your peanut butter should be stirred smooth if it has been sitting; any clumps will not incorporate evenly into the hot sugar mixture.
Step 3: Dissolve the Sugar
Set the saucepan over medium heat and stir constantly with a wooden spoon or silicone spatula. Keep stirring until the butter melts completely and the sugar dissolves into the milk.
Dissolving the sugar fully before boiling prevents grainy fudge. Undissolved sugar crystals act as seeds that cause premature crystallization throughout the entire batch.
The mixture should look smooth and slightly glossy with no visible sugar granules on the spoon when you lift it. This takes about 3 minutes of patient stirring.
Step 4: Bring to a Rolling Boil
Increase the heat to medium high and continue stirring. Watch the mixture climb from small bubbles around the edges to large, vigorous bubbles across the entire surface.
A rolling boil means bubbles form continuously even while stirring. This indicates the mixture has reached approximately 234°F, the soft ball stage for candy making.
The bubbles should be large and aggressive, breaking and reforming rapidly across the whole surface. Timid bubbling around the edges does not count.
Step 5: Boil for Exactly Two Minutes
Once you reach a full rolling boil, set a timer for exactly 2 minutes and keep stirring without stopping. Do not walk away or reduce the heat during this stage.
These two minutes concentrate the sugar and evaporate excess moisture, creating the structure that allows fudge to set firm. Cutting it short leaves you with sauce; going too long makes crumbly candy.
The mixture thickens noticeably and becomes slightly darker, with a more caramel like consistency. You will feel increased resistance against your spoon.
Step 6: Remove from Heat Immediately
The moment your timer goes off, yank the pot completely off the burner. Residual heat in a heavy pot continues cooking the sugar, so moving it matters as much as timing the boil.
Speed matters here because sugar continues cooking rapidly above its setting point. Even thirty extra seconds can push your fudge from creamy to crumbly.
Set the pot on a cool burner or a heatproof trivet. The bubbling should subside within about 10 seconds.
Step 7: Add the Peanut Butter
Immediately dump the room temperature peanut butter into the hot sugar mixture. Stir vigorously in a circular motion, scraping the bottom and sides of the pot.
Adding peanut butter while the mixture is still extremely hot allows it to melt and incorporate smoothly. Cold peanut butter seizes on contact and creates an uneven, grainy texture.
The mixture transforms from separated and glossy to unified and matte within about 30 seconds of stirring. Keep going until no streaks remain.
Step 8: Add Vanilla and Salt
Pour in the vanilla extract and sprinkle the salt over the surface. Stir another 30 seconds until both are fully incorporated throughout the fudge.
Vanilla added at the end retains more of its aromatic compounds than vanilla cooked into the sugar mixture. Salt amplifies the peanut flavor and balances the sweetness.
The fudge should smell intensely of peanut butter and vanilla with no raw alcohol smell from the extract. That means the residual heat has cooked off the alcohol.
Step 9: Transfer to the Prepared Pan
Pour the fudge immediately into your parchment lined pan. Use the spatula to scrape every last bit from the pot and spread the mixture to the edges and corners.
Working quickly matters because the fudge begins setting as soon as it stops moving. Fudge left in the pot starts firming up and becomes impossible to spread evenly.
The surface should be smooth and level. Give the pan a few firm taps on the counter to release any air bubbles trapped underneath.
Step 10: Smooth the Top
Use an offset spatula or the back of a spoon dipped in warm water to smooth the surface completely flat. Work quickly before the fudge develops a skin.
A flat, smooth top makes cutting clean squares much easier. Lumpy fudge cracks unevenly and looks homemade in the bad way instead of the charming way.
The surface should have a slight sheen and feel tacky but not sticky when you brush it lightly with a dry finger.
Step 11: Cool to Room Temperature
Leave the pan on the counter, uncovered, for 90 minutes to 2 hours. Do not move it to the fridge yet or the rapid cooling can cause the surface to crack.
Gradual cooling allows the sugar crystals to form slowly and uniformly, creating that classic smooth, creamy fudge texture. Rushed cooling produces a grainy or crumbly result.
The fudge is ready to cut when it feels firm to the touch and pulls away slightly from the edges of the pan.
Step 12: Cut into Squares
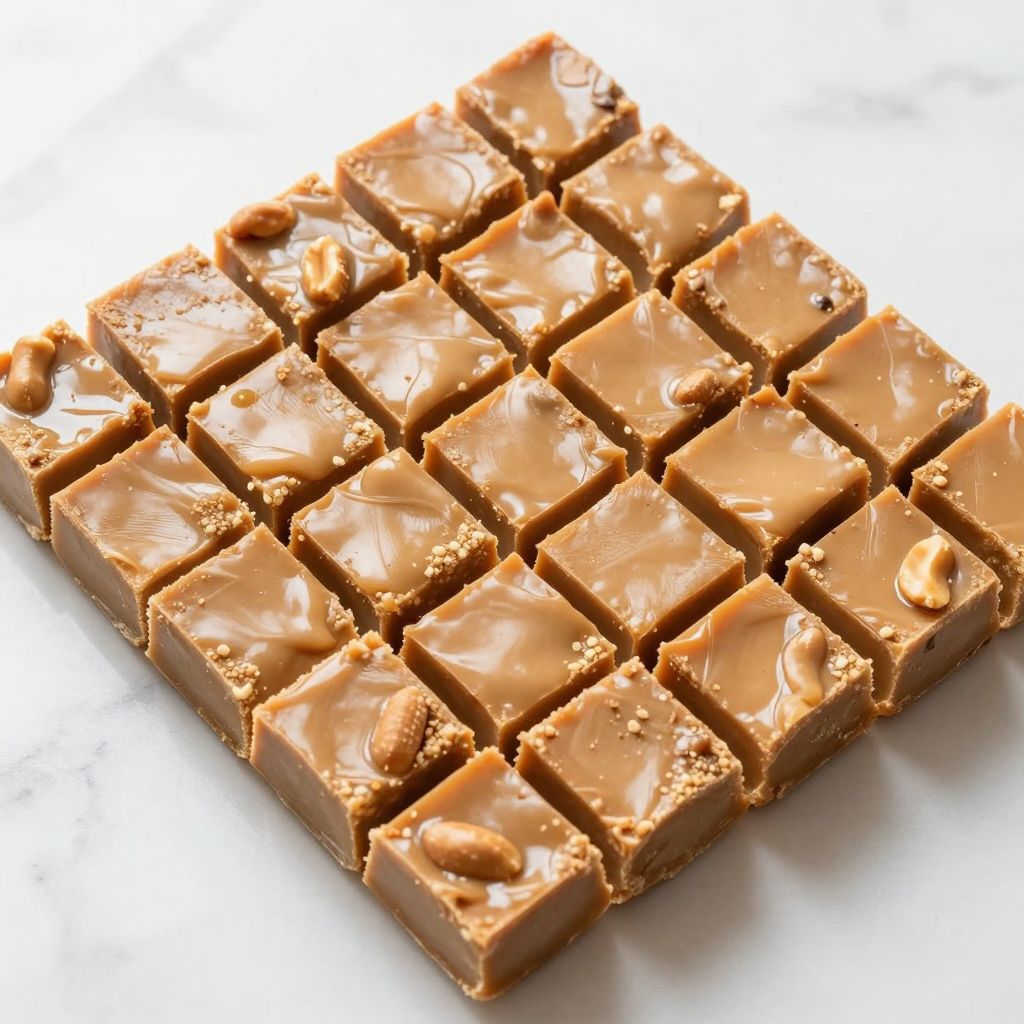
Lift the fudge out of the pan using the parchment handles. Use a large, sharp knife to cut into 36 equal pieces, wiping the blade between cuts for clean edges.
A clean blade prevents drag marks and crumbling. Run the knife under hot water and dry it quickly if the fudge starts sticking.
The fudge should cut cleanly without crumbling or smooshing, holding its shape in neat squares with defined edges.
Pro Tip: If you want Instagram worthy cuts every time, chill the fudge for 30 minutes after the initial set, then use a thin, sharp knife heated under hot water and dried quickly before each slice.
The Science Behind the Technique
The magic of peanut butter fudge comes down to controlled sugar crystallization. When you boil the sugar mixture, you dissolve the sugar completely and then drive off moisture until the concentration hits the soft ball stage around 234°F to 240°F.
Stirring constantly and cooling gradually encourages tiny, uniform sugar crystals to form throughout the mixture. Large crystals create grainy fudge; tiny crystals create that smooth, creamy texture that melts perfectly on your tongue.
Chef Note: The peanut butter acts as an interfering agent, coating sugar molecules and preventing them from forming large crystals, which is why this fudge stays creamier than traditional chocolate fudge.
Tips for Getting It Right Every Time
- Use room temperature peanut butter straight from the jar that has been sitting on the counter for at least an hour; cold peanut butter shocks the hot sugar and causes uneven texture
- Stir constantly during the entire boiling process because stopping for even ten seconds allows hot spots that scorch the sugar
- Trust the timer rather than trying to eyeball the boil; two minutes is precise and forgiving if you hit a true rolling boil first
- Pour immediately after adding the peanut butter because hesitation means fighting against a thickening mass
- Line the pan with parchment no matter how nonstick you think your pan is; fudge finds a way to stick
- Let it cool completely at room temperature before cutting or you will have smeared edges and squished squares
Mistakes That Will Ruin Your Dish
- Using natural peanut butter: The oil separation causes the fudge to turn greasy and refuse to set properly, leaving you with a sticky mess that never firms up
- Undercooking the boil: Pulling the pot off heat before a true two minute rolling boil results in fudge that stays soft, gooey, and impossible to slice
- Overcooking the boil: Going past two and a half minutes pushes the sugar past soft ball stage into firm ball territory, creating dry, crumbly fudge that falls apart
- Stirring after pouring into the pan: Agitating fudge once it starts setting encourages large sugar crystals and produces that gritty, grainy texture nobody wants
- Rushing the cooling process: Putting warm fudge straight into the freezer causes the surface to crack and the interior to stay soft and underset
Make Ahead and Meal Prep Tips
Peanut butter fudge is practically built for make ahead preparation. The flavor actually improves after a day of resting, and it holds up beautifully for gift giving or party prep.
- Uncut fudge block: Can be wrapped tightly in plastic wrap and stored at room temperature for up to one week, then cut fresh when ready to serve
- Pre-cut squares: Layer between wax paper in an airtight container and store at room temperature for up to two weeks or refrigerate for three weeks
- Frozen fudge: Wrap individual pieces in plastic, then store in a freezer bag for up to three months; thaw at room temperature for one hour before serving
- Sugar mixture prep: Measure dry ingredients and wet ingredients separately into containers the night before; combine and cook when ready to make
What to Serve With Peanut Butter Fudge
This fudge shines as part of a dessert spread at holiday gatherings or as a standalone sweet treat with afternoon coffee. The rich peanut flavor pairs beautifully with complementary sweets and beverages.
- Chocolate bark: The contrast between creamy peanut butter fudge and snappy chocolate creates an irresistible combination on any cookie tray
- Vanilla ice cream: Crumble pieces over a scoop for an instant sundae that tastes like a frozen peanut butter cup
- Fresh apple slices: The crisp, tart fruit cuts through the richness and adds a refreshing element to each bite
- Pretzel rods: Dip pretzel rods into leftover warm fudge before it sets for a sweet and salty snack
- Brownie platter: Arrange fudge squares alongside brownies for a chocolate and peanut butter lovers dream dessert table
Drink Pairings
A glass of cold whole milk remains the classic pairing for peanut butter fudge, cutting through the sweetness and complementing the nutty richness perfectly.
- Wine: A tawny port or late harvest Riesling offers sweetness that matches the fudge while adding caramel and honey notes
- Beer: A chocolate stout or peanut butter porter echoes the flavors and adds roasted depth without overwhelming sweetness
- Non-alcoholic: Strong cold brew coffee balances the sugar with pleasant bitterness and enhances the roasted peanut notes
- Hot drink: A mug of hot cocoa turns peanut butter fudge into an instant peanut butter cup experience
Flavour Variations Worth Trying
- Chocolate swirl: Drizzle melted semisweet chocolate over the poured fudge and use a toothpick to create swirls before it sets. The chocolate adds bittersweet contrast and visual appeal.
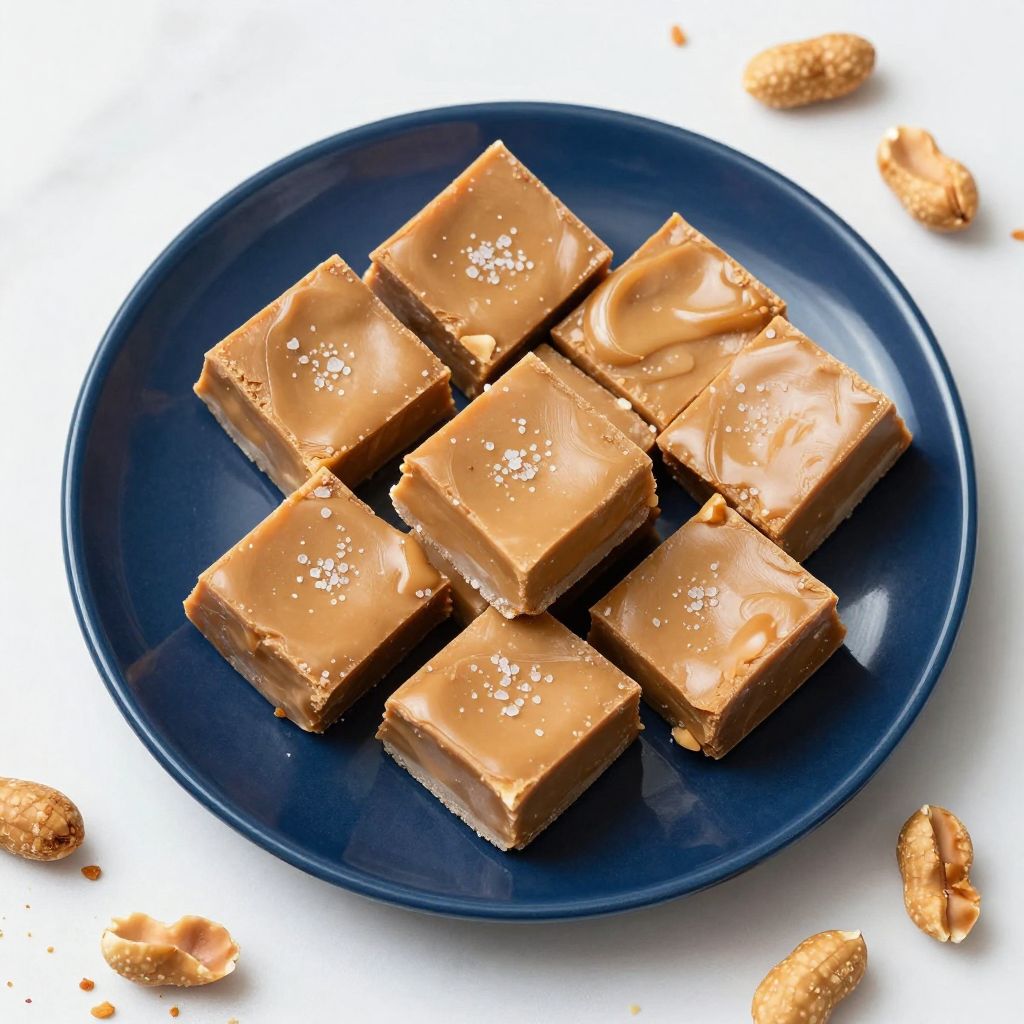
- Sea salt topped: Sprinkle flaky Maldon sea salt over the surface immediately after pouring. The salt crystals add crunch and amplify the peanut flavor dramatically.
- Maple bacon: Stir two tablespoons of maple syrup into the peanut butter and top with crumbled crispy bacon. The result tastes like breakfast and dessert had a delicious collision.
- Crunchy peanut butter: Swap creamy for crunchy peanut butter for a version with textural contrast throughout. Each bite delivers little bursts of peanut crunch.
- Honey roasted: Replace one quarter cup of sugar with honey and add a pinch of cinnamon. The fudge turns golden and tastes like honey roasted peanuts in candy form.
How to Adapt This Recipe for Your Diet
- Gluten free: This recipe is naturally gluten free as written; just verify your peanut butter brand does not process on shared equipment with wheat products
- Dairy free: Replace butter with refined coconut oil and use full fat coconut milk instead of whole milk; the fudge sets slightly firmer with a faint coconut undertone
- Vegan: Combine the dairy free swaps above and verify your sugar is not processed with bone char; the result is virtually identical to the original
- Low carb or keto: Substitute a granulated erythritol and monk fruit blend for sugar and use a keto friendly peanut butter; the texture is softer and the fudge must stay refrigerated
- High protein: Add two scoops of unflavored or vanilla protein powder to the peanut butter before combining with the sugar mixture; adjust milk slightly if the mixture seems too thick
How to Store and Reheat
In the Refrigerator
Store cut fudge in an airtight container with wax paper between layers to prevent sticking. Properly stored, it keeps for up to three weeks in the fridge.
- Bring refrigerated fudge to room temperature for 15 minutes before serving for the best texture
- Keep the container away from strong smelling foods because fudge absorbs odors easily
In the Freezer
Peanut butter fudge freezes exceptionally well, making it ideal for holiday prep or unexpected guest situations. It holds quality for up to three months.
- Wrap individual pieces tightly in plastic wrap before placing in a freezer safe container
- Freeze in single layers first, then stack once solid to prevent pieces from fusing together
Reheating
Fudge does not need reheating; simply bring it to room temperature for optimal texture. If pieces have stuck together or you want a slightly softer consistency, gentle warming works.
- Oven: Not recommended; the dry heat causes fudge to dry out and become crumbly
- Stovetop: Place in a double boiler over barely simmering water for 1 minute just to soften slightly if needed for a recipe application
- Microwave: Use with extreme caution; 5 second bursts at 50 percent power only, as the sugar melts quickly and the fudge can become liquid fast
Cost Breakdown
Making peanut butter fudge at home costs roughly one third of what you would pay for comparable quality at a candy shop or bakery. A batch yields 36 pieces, making each square cost mere pennies.
| Ingredient | Estimated Cost |
|---|---|
| Granulated sugar (2 cups) | $0.50 |
| Whole milk (1/2 cup) | $0.25 |
| Unsalted butter (1/4 cup) | $0.75 |
| Creamy peanut butter (1 cup) | $1.50 |
| Vanilla extract (1 tsp) | $0.30 |
| Sea salt (1/4 tsp) | $0.02 |
| Total Per Serving (2 pieces) | $0.18 |
Nutrition Information
| Nutrient | Amount |
|---|---|
| Calories | 195 |
| Total Fat | 9g |
| Saturated Fat | 3g |
| Trans Fat | 0g |
| Cholesterol | 8mg |
| Sodium | 85mg |
| Total Carbohydrates | 26g |
| Dietary Fiber | 1g |
| Total Sugars | 24g |
| Added Sugars | 22g |
| Protein | 4g |
| Vitamin D | 0mcg |
| Calcium | 15mg |
| Iron | 0.3mg |
| Potassium | 95mg |
Nutritional values are estimates based on standard ingredients and may vary depending on specific brands and exact portion sizes used.
Frequently Asked Questions
Can I use natural peanut butter instead of commercial brands?
No, natural peanut butter with oil separation will not work. The stabilizers in commercial brands like Jif or Skippy are necessary for the fudge to set properly.
Can I make this fudge the day before an event?
Yes, peanut butter fudge tastes even better after resting overnight. Make it a day or two ahead and store at room temperature in an airtight container.
How long does peanut butter fudge last at room temperature?
Properly stored in an airtight container, it lasts up to two weeks at room temperature. In humid climates, refrigeration extends freshness to three weeks.
My fudge came out grainy. What went wrong?
Grainy fudge usually means the sugar was not fully dissolved before boiling or the mixture was stirred after being poured into the pan. Next time, stir until no sugar crystals are visible before increasing heat.
Can I double this recipe?
Yes, you can double it using a larger pan. Use a 9×13 inch pan and add about 30 seconds to the boiling time since more liquid needs to evaporate.
Why did my fudge not set?
The most common cause is pulling the pot off heat before reaching a true rolling boil or not boiling for the full two minutes. Your next batch needs a more vigorous boil or slightly longer cooking time.
Can I add mix ins like chocolate chips or chopped nuts?
Absolutely. Fold in up to one cup of mix ins immediately after adding the peanut butter, then pour into the pan quickly before it starts to set.
My Final Word
This peanut butter fudge delivers everything you want from homemade candy: rich flavor, creamy texture, and the satisfaction of making something special with your own hands. It has earned a permanent spot in my holiday rotation, and I think it will earn one in yours too.
After fifteen years and more batches than I can count, I can tell you this recipe is as reliable as they come. Trust the process, watch for those visual cues, and you will pull off perfect fudge every single time.
Give it a try and let me know how it turns out. Drop a comment below or tag us on social media with your fudge photos. I genuinely love seeing what you make.
Peanut Butter Fudge
Ingredients
Equipment
Method
- Line an 8x8 inch baking pan with parchment paper, leaving a 2 inch overhang on two opposite sides. Press the parchment firmly into the corners and smooth out any wrinkles.
- Measure the sugar, milk, and butter into the saucepan but do not turn on the heat yet. Place the peanut butter, vanilla, and salt in a separate medium bowl right next to the stove.
- Set the saucepan over medium heat and stir constantly with a wooden spoon or silicone spatula until the butter melts completely and the sugar dissolves into the milk, about 3 minutes.
- Increase the heat to medium high and continue stirring. Watch the mixture climb from small bubbles around the edges to large, vigorous bubbles across the entire surface (a rolling boil).
- Once you reach a full rolling boil, set a timer for exactly 2 minutes and keep stirring without stopping. Do not walk away or reduce the heat during this stage.
- The moment your timer goes off, immediately remove the pot from the burner and set it on a cool burner or heatproof trivet.
- Immediately add the room temperature peanut butter to the hot sugar mixture. Stir vigorously in a circular motion, scraping the bottom and sides of the pot until no streaks remain, about 30 seconds.
- Pour in the vanilla extract and sprinkle the salt over the surface. Stir another 30 seconds until both are fully incorporated.
- Pour the fudge immediately into the prepared pan. Use the spatula to scrape every last bit from the pot and spread the mixture to the edges and corners.
- Use an offset spatula or the back of a spoon dipped in warm water to smooth the surface completely flat. Give the pan a few firm taps on the counter to release air bubbles.
- Leave the pan on the counter, uncovered, for 90 minutes to 2 hours until firm to the touch. Do not refrigerate during this initial cooling.
- Lift the fudge out of the pan using the parchment handles. Use a large, sharp knife to cut into 36 equal pieces, wiping the blade between cuts for clean edges.