
Picture this: a crunchy, sweet bite that melts in your mouth, leaving you craving more. That’s exactly what happens when you indulge in these delightful Butterfinger Balls, a nostalgic treat that combines creamy peanut butter with chocolatey goodness.
This recipe is a crowd-pleaser, perfect for parties or just satisfying your sweet tooth. With a delightful crunch and a rich, creamy texture, these little bites are incredibly easy to make and require no baking, making them a great choice for busy parents and food enthusiasts alike.
Why You’ll Love This Recipe
These Butterfinger Balls are irresistible for a reason. They combine a few simple ingredients to create a perfect treat.
- Quick and easy to prepare.
- No baking required!
- Rich peanut butter flavor with a chocolate coating.
- Perfect for sharing or indulging solo.
- Great for any occasion or as a snack.
My Experience Making This Recipe
Making these Butterfinger Balls always feels like a nostalgic trip back to my childhood. The moment I mix the peanut butter and powdered sugar, I can’t help but smile, knowing the deliciousness that awaits.
When I shared them with friends, they disappeared in a flash! The combination of flavors and textures sparked joyful reminiscing about our favorite candy bars.
Recipe Overview
- Recipe Name: Butterfinger Balls
- Servings: 24 balls
- Prep Time: 20 minutes
- Cook Time: 0 minutes
- Total Time: 20 minutes
- Course: Dessert
- Cuisine: American
- Calories per Serving: 150
Equipment You Will Need
- Mixing bowl
- Cookie sheet
- Parchment paper
- Microwave-safe bowl
- Spoon or spatula
- Refrigerator
Ingredients for Butterfinger Balls
- 1 cup creamy peanut butter
- 2 cups powdered sugar
- 1 cup crushed Butterfinger bars
- 1 cup chocolate chips
- 1 tablespoon coconut oil (optional, for melting chocolate)
Ingredient Notes and Substitutions
- Creamy peanut butter: Provides a smooth texture and rich flavor. You can substitute crunchy peanut butter for added texture.
- Powdered sugar: Sweetens the mixture and helps bind it. Granulated sugar can work in a pinch, but the texture will be grainy.
- Crushed Butterfinger bars: Adds that signature flavor and crunch. You can swap with any crushed candy bar for a different taste.
- Chocolate chips: Coats the balls for a delicious finish. Dark chocolate can be used for a richer flavor.
- Coconut oil: Helps the chocolate melt smoothly. You can skip it, but the chocolate may not coat evenly.
How to Make Butterfinger Balls
Step 1: Prepare Your Workspace
Clear a space in your kitchen and gather all your ingredients and tools. A clean workspace helps streamline the process and keeps things organized.
Step 2: Mix Peanut Butter and Sugar
In a mixing bowl, combine the creamy peanut butter and powdered sugar. Stir until the mixture is smooth and well blended, forming a dough-like consistency.
Step 3: Add Crushed Butterfinger Bars
Fold the crushed Butterfinger bars into the peanut butter mixture. This adds that signature crunch and flavor that makes these treats so special.
Step 4: Form into Balls
Using your hands, scoop out a small amount of the mixture and roll it into a ball about 1 inch in diameter. This is where the magic happens, so make sure they are evenly sized for uniformity.
Step 5: Chill the Balls
Place the formed balls onto a cookie sheet lined with parchment paper. Chill them in the refrigerator for at least 30 minutes to firm up.
Step 6: Melt the Chocolate
In a microwave-safe bowl, combine the chocolate chips and coconut oil. Microwave in 30-second intervals, stirring in between, until melted and smooth.
Step 7: Coat the Balls
Dip each chilled ball into the melted chocolate, making sure to coat it evenly. Use a fork to lift them out and allow excess chocolate to drip off.
Step 8: Cool and Set
Return the chocolate-coated balls to the parchment-lined cookie sheet. Chill them again in the refrigerator until the chocolate is set, about 15-20 minutes.
Pro Tip: Make sure the peanut butter mixture is well chilled before dipping to prevent it from melting the chocolate.
Tips for the Best Butterfinger Balls
- Use high-quality chocolate chips for a richer flavor.
- Ensure your peanut butter is well-blended for a smooth consistency.
- Adjust the amount of crushed Butterfinger to your liking — more means more crunch!
- Chill the balls for at least 30 minutes before dipping to maintain shape.
- Experiment with different candy bars for unique flavor profiles.
Common Mistakes to Avoid
- Not chilling the mixture long enough can lead to melting chocolate.
- Using too much powdered sugar can make them overly sweet and dry.
- Skipping the parchment paper can result in sticking and mess.
- Overheating the chocolate can make it grainy and unappealing.
- Not rolling the balls evenly can lead to uneven cooking and presentation.
Serving Suggestions
These Butterfinger Balls are a delightful treat on their own, but they can also be paired with various drinks for a complete experience.
- Serve with a glass of cold milk.
- Pair with a steaming cup of coffee for a perfect afternoon snack.
- Enjoy them alongside vanilla ice cream for an indulgent dessert.
- Bring them to parties as a sweet shareable treat.
- Pack them in lunchboxes for a fun surprise.
Variations to Try
- Use dark chocolate instead of milk chocolate for a richer flavor.
- Add a pinch of sea salt on top for a sweet and salty contrast.
- Replace Butterfinger with crushed Oreos for a different twist.
- Incorporate shredded coconut for a tropical touch.
- Add a splash of vanilla extract to the peanut butter mixture for depth of flavor.
Dietary Adaptations
- Gluten-free: All ingredients are naturally gluten-free, making this treat accessible.
- Dairy-free: Use dairy-free chocolate chips for a dairy-free version.
- Vegan: Substituting with vegan chocolate and ensuring peanut butter is vegan-friendly works well.
- Low-carb/keto: Swap powdered sugar with a keto-friendly sweetener to reduce carbs.
Storage and Reheating
Refrigerator
Store the Butterfinger Balls in an airtight container in the refrigerator for up to a week.
- Layer with parchment paper to prevent sticking.
- Keep away from strong-smelling foods to avoid flavor transfer.
Freezer
For longer storage, freeze the balls in an airtight container for up to three months.
- Thaw in the refrigerator before enjoying.
- Wrap individually for quick grabs when cravings hit.
Reheating
These treats are best enjoyed chilled or at room temperature. Reheat is not necessary.
- Microwave for a few seconds if you prefer a softer texture.
- Be careful not to overheat, as chocolate can melt messily.
Nutrition Information
| Nutrient | Amount |
|---|---|
| Calories | 150 |
| Total Fat | 8g |
| Saturated Fat | 3g |
| Carbohydrates | 18g |
| Fiber | 1g |
| Sugar | 14g |
| Protein | 3g |
| Sodium | 50mg |
| Cholesterol | 0mg |
This nutrition information is an estimate and may vary based on ingredients used.
Frequently Asked Questions
Can I make these ahead of time?
Yes, you can prepare them a few days in advance and store in the refrigerator until ready to serve.
What can I substitute for the crushed Butterfinger?
You can use any crushed candy bar or even crushed cookies for a different flavor profile.
How do I store leftover Butterfinger Balls?
Store them in an airtight container in the refrigerator or freezer for longer shelf life.
What if my chocolate is too thick to coat the balls?
Add a little coconut oil or shortening to thin it out for easier dipping.
Can I use natural peanut butter?
Sure, but it may be a bit more oily, so be prepared for a different texture.
Final Thoughts
These Butterfinger Balls are a sweet blast from the past that anyone can enjoy. They are simple to make and perfect for satisfying that candy craving.
So, roll up your sleeves and give this recipe a try; you won’t be disappointed with the results!
If you’re looking for more sweet inspiration, check out this Butterfinger Cake Recipe or try these fun Rolo Pretzel Bites.
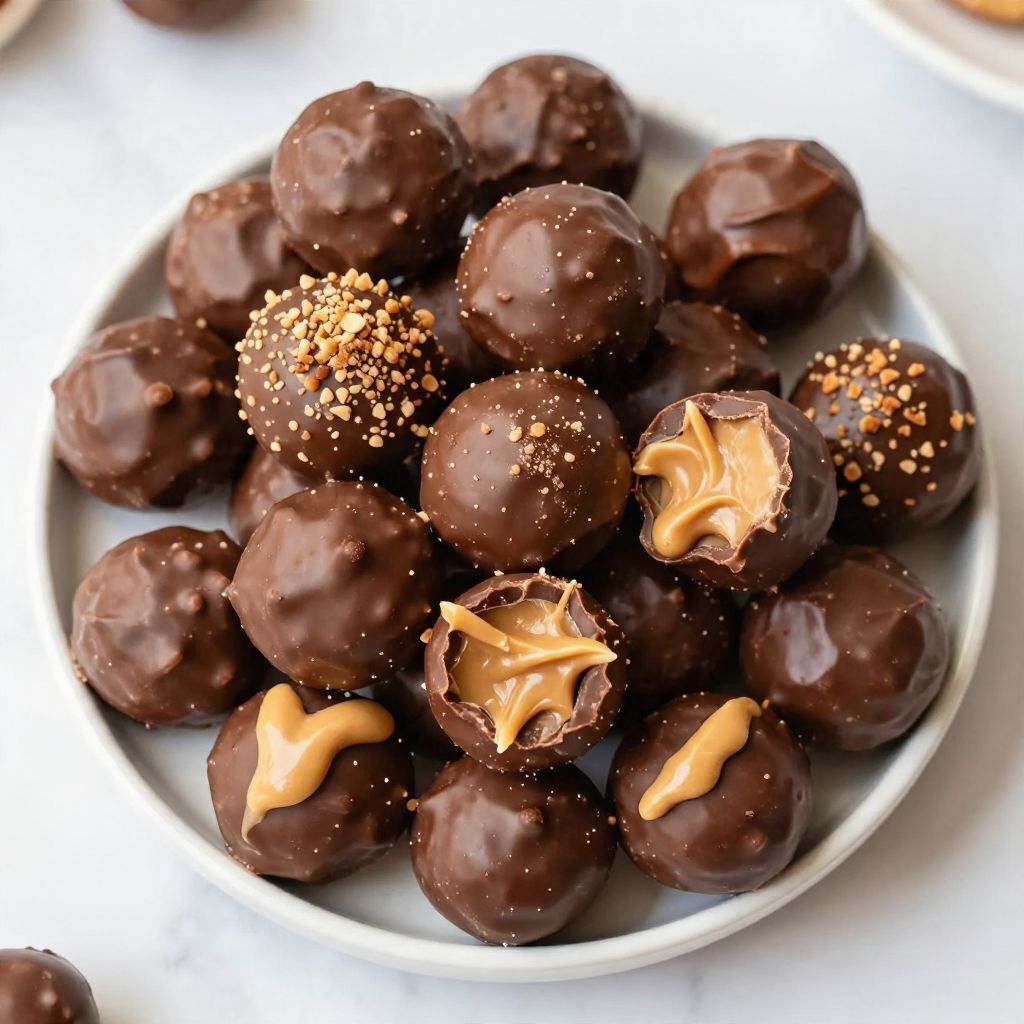
Butterfinger Balls
Ingredients
Equipment
Method
- Clear a workspace and gather all ingredients and tools.
- In a mixing bowl, combine the creamy peanut butter and powdered sugar. Stir until smooth and well blended.
- Fold in the crushed Butterfinger bars into the peanut butter mixture.
- Scoop small amounts of the mixture and roll into 1-inch balls.
- Place the balls onto a cookie sheet lined with parchment paper and chill in the refrigerator for at least 30 minutes.
- In a microwave-safe bowl, combine the chocolate chips and coconut oil. Microwave in 30-second intervals, stirring in between, until melted and smooth.
- Dip each chilled ball into the melted chocolate, making sure to coat evenly.
- Return the chocolate-coated balls to the parchment-lined cookie sheet and chill in the refrigerator for 15-20 minutes until the chocolate is set.