
There’s something so delightful about the crunch of a good Special K Bars. These treats are a nostalgic nod to the days of simple snacks that satisfy both your sweet tooth and your need for a little crunch. They are quick to whip up, making them perfect for busy afternoons or unexpected guests. With a sweet, chewy texture paired with a satisfying crunch, these bars are a versatile go-to for any occasion. Let’s gather the ingredients and get cooking!
Why You’ll Love This Recipe
These bars are a hit for many reasons.
- Quick and easy to prepare, perfect for busy days.
- A delightful combination of sweet and crunchy textures.
- Customizable with your favorite mix-ins.
- Great for snacks, lunchboxes, or dessert.
- They hold up well, making them ideal for sharing.
My Experience Making This Recipe
The first time I made these bars, I was reminded of my childhood, when they were a popular snack in our household. The aroma of melted marshmallows filled my kitchen, and before I knew it, I was eager to take a bite.
As I cut into the bars, the satisfying crunch was music to my ears. My friends and family couldn’t get enough, and I knew this was a recipe I would keep on repeat.
Recipe Overview
- Recipe Name: Special K Bars
- Servings: 12
- Prep Time: 15 minutes
- Cook Time: 0 minutes
- Total Time: 15 minutes
- Course: Snack/Dessert
- Cuisine: American
- Calories per Serving: 150
Equipment You Will Need
- Large mixing bowl
- Medium saucepan
- Spatula
- 9×13 inch baking dish
- Parchment paper (optional)
Ingredients for Special K Bars
- 3 cups Special K cereal
- 1 cup granulated sugar
- 1 cup light corn syrup
- 1 cup creamy peanut butter
- 1 teaspoon vanilla extract
- 1 cup chocolate chips (optional)
Ingredient Notes and Substitutions
- Special K cereal: Provides the signature crunch. You can use any puffed rice cereal as a substitute.
- Granulated sugar: Adds sweetness. Honey or maple syrup can be used for a natural sweetener.
- Light corn syrup: Helps bind the bars. Agave syrup can work as an alternative.
- Creamy peanut butter: Offers flavor and binding. Almond butter is a great swap for a different taste.
- Chocolate chips: For a sweet finish. Feel free to omit or use butterscotch chips instead.
How to Make Special K Bars
Step 1: Prepare the Baking Dish
Start by greasing a 9×13 inch baking dish or line it with parchment paper. This will help the bars come out easily once set.
Step 2: Combine Sugar and Corn Syrup
In a medium saucepan, combine the granulated sugar and light corn syrup. Heat over medium heat, stirring until the sugar dissolves and the mixture starts to boil.
Step 3: Add Peanut Butter
Once boiling, remove the pan from the heat and stir in the creamy peanut butter. This will give the bars their rich flavor and chewy texture.
Step 4: Mix in Vanilla Extract
Add the vanilla extract to the mixture. This will enhance the overall flavor profile of your bars.
Step 5: Combine with Cereal
In a large mixing bowl, pour the melted mixture over the Special K cereal. Stir until all the cereal is evenly coated for a consistent flavor.
Step 6: Press into Baking Dish
Transfer the cereal mixture to the prepared baking dish. Use a spatula to press it down firmly, ensuring the bars hold their shape.
Step 7: Add Chocolate Chips (Optional)
If using chocolate chips, sprinkle them over the top and gently press them into the mixture. This adds a delightful layer of sweetness.
Step 8: Let Cool and Set
Allow the bars to cool at room temperature for at least an hour. This helps them firm up, making them easier to cut.
Pro Tip: For extra flavor, try adding a pinch of salt to the peanut butter mixture. It elevates the sweetness beautifully.
Tips for the Best Special K Bars
- Make sure to pack the cereal mixture tightly in the baking dish for firm bars.
- Let the bars cool completely before cutting to avoid crumbling.
- Experiment with different mix-ins like nuts or dried fruits for variety.
- Use a sharp knife to cut the bars for clean edges.
- Store in an airtight container to keep them fresh longer.
Common Mistakes to Avoid
- Not greasing the baking dish: This can lead to a sticky situation when trying to remove the bars.
- Overheating the sugar mixture: Boiling too long can make the bars too hard.
- Using too much cereal: Stick to the recommended amount for the right texture.
- Cutting too soon: This can result in crumbled bars instead of neat squares.
Serving Suggestions
These bars are perfect for on-the-go snacking or as a sweet treat after dinner. Here are some pairing ideas:
- Serve with a glass of cold milk.
- Pair with fresh fruit for a balanced snack.
- Enjoy alongside a cup of hot tea or coffee.
- Wrap individually for a lunchbox treat.
Variations to Try
- Add chopped nuts for extra crunch and protein.
- Incorporate dried fruits for a chewy texture and added flavor.
- Try using different nut butters for a unique twist.
- Substitute the chocolate chips with white chocolate for a different sweetness.
Dietary Adaptations
- Gluten-free: Use a certified gluten-free cereal.
- Dairy-free: Ensure chocolate chips are dairy-free or omit them.
- Vegan: Use maple syrup instead of corn syrup and a plant-based butter.
- Low-carb/keto: Substitute with a low-carb cereal alternative.
Storage and Reheating
Refrigerator
Store the bars in an airtight container in the refrigerator to keep them fresh.
- They can last up to two weeks.
Freezer
For longer storage, freeze the bars in an airtight container.
- They can be frozen for up to three months.
Reheating
To enjoy them warm, microwave for a few seconds until just heated through.
- Be careful not to overheat, as they can become too soft.
Nutrition Information
| Nutrient | Amount |
|---|---|
| Calories | 150 |
| Total Fat | 7g |
| Saturated Fat | 1g |
| Carbohydrates | 20g |
| Fiber | 1g |
| Sugar | 10g |
| Protein | 3g |
| Sodium | 50mg |
| Cholesterol | 0mg |
This information is approximate and can vary based on specific ingredients used.
Frequently Asked Questions
Can I make these bars ahead of time?
Absolutely! They store well in the fridge or freezer, making them great for meal prep.
What can I use instead of corn syrup?
You can substitute with honey or agave syrup for a similar consistency.
Why are my bars too crumbly?
If the mixture wasn’t pressed firmly enough, the bars may not hold together well.
Can I use crunchy peanut butter?
Yes, crunchy peanut butter will add an extra layer of texture.
How do I store leftover bars?
Keep them in an airtight container in the refrigerator for up to two weeks.
Final Thoughts
Making your own Special K Bars is not just a fun kitchen project; it’s a delicious way to satisfy cravings. With endless possibilities for customization, these bars can easily become your new favorite treat.
I encourage you to give this recipe a try. Explore more delicious ideas like peanut butter fudge or a tasty trail mix recipe to keep your snack game strong!
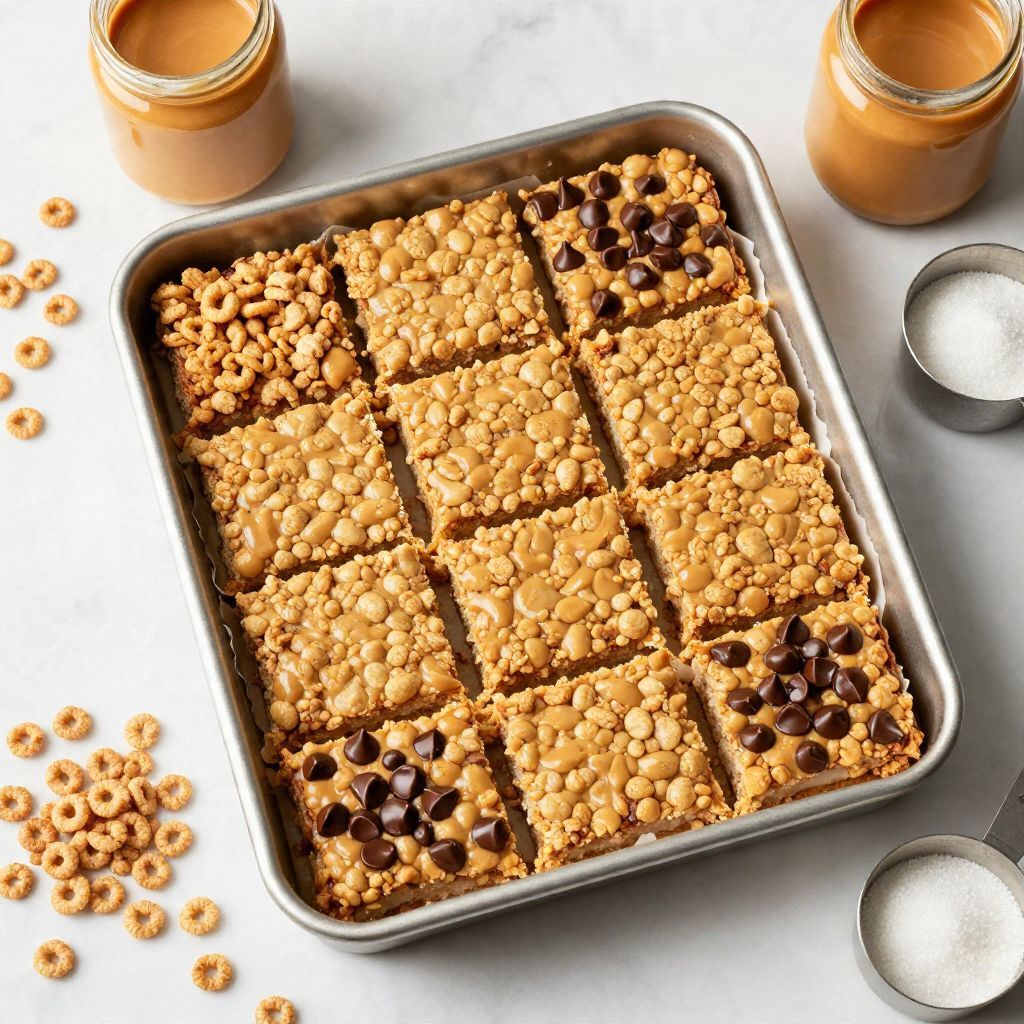
Special K Bars
Ingredients
Equipment
Method
- Grease a 9x13 inch baking dish or line it with parchment paper.
- In a medium saucepan, combine the granulated sugar and light corn syrup. Heat over medium heat, stirring until the sugar dissolves and the mixture starts to boil.
- Remove the pan from the heat and stir in the creamy peanut butter.
- Add the vanilla extract to the mixture.
- In a large mixing bowl, pour the melted mixture over the Special K cereal. Stir until all the cereal is evenly coated.
- Transfer the cereal mixture to the prepared baking dish and press it down firmly.
- If using chocolate chips, sprinkle them over the top and gently press them into the mixture.
- Allow the bars to cool at room temperature for at least an hour.