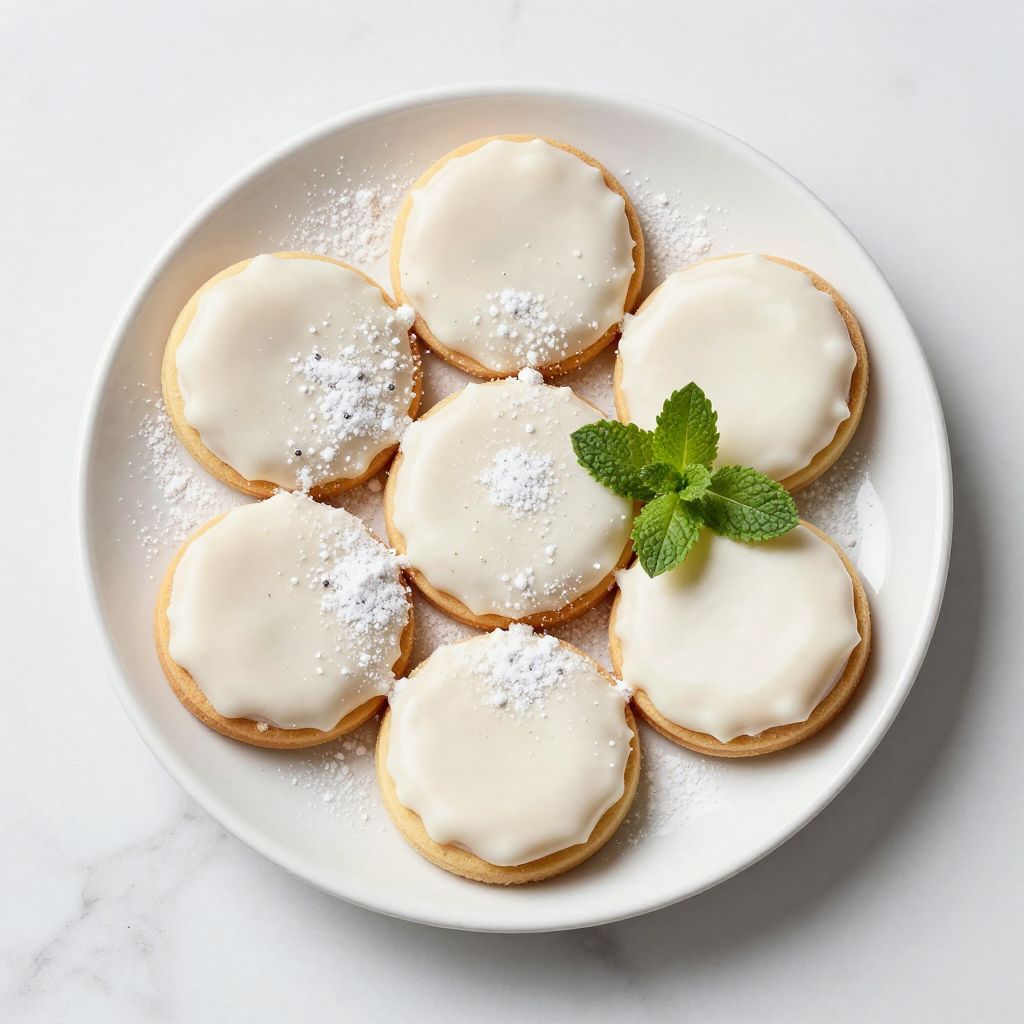
There’s something magical about watching plain cookies transform into glossy, elegant treats the moment you brush on a coat of powdered sugar icing.
This recipe is a baker’s secret weapon because it’s ridiculously fast, foolproof, and works on nearly everything from sugar cookies to cinnamon rolls to pound cake.
The beauty lies in its simplicity: just a few pantry staples whisk together into silky-smooth icing that sets beautifully without the fuss of royal icing or the richness of buttercream.
Whether you’re decorating for a holiday, finishing off a homemade treat, or saving a store-bought dessert, this icing delivers restaurant-quality results in under five minutes.
Why You’ll Love This Recipe
This powdered sugar icing checks every box for home bakers and busy parents alike.
- Ready in under five minutes with just a whisk and a bowl.
- Works beautifully on cookies, cakes, donuts, cinnamon rolls, and pastries.
- Smooth, glossy finish that dries to a light set, not rock-hard.
- Endlessly customizable with extracts, citrus zest, or food coloring.
- Uses ingredients you likely already have in your pantry.
My Experience Making This Recipe
I discovered how transformative this icing could be while decorating a batch of lemon sugar cookies for a bake sale years ago. A friend suggested I skip the buttercream and try a simple powdered sugar glaze instead, and I was skeptical until I drizzled it on.
The icing flowed like silk, set within an hour to a light crunch, and the cookies tasted brighter and less heavy than buttercream-topped versions. My kids went back for thirds, and I’ve been making this icing ever since.
What impressed me most was how forgiving it is: too thick? Add a splash of milk. Too thin? Dust in more powdered sugar. It’s the kind of recipe that builds confidence in the kitchen.
Recipe Overview
- Recipe Name: Powdered Sugar Icing
- Servings: Makes approximately 1 cup (enough for 24-36 cookies)
- Prep Time: 5 minutes
- Cook Time: 0 minutes
- Total Time: 5 minutes
- Course: Dessert
- Cuisine: American
- Calories per Serving: 30 (per tablespoon)
Equipment You Will Need
- Medium mixing bowl
- Whisk or fork
- Measuring spoons and cups
- Small spoon or icing brush for application
- Sifter or fine-mesh strainer (optional but helpful)
Ingredients for Powdered Sugar Icing
- Powdered sugar: 2 cups, sifted
- Milk: 3 tablespoons, whole or 2%
- Butter: 2 tablespoons, melted and cooled slightly
- Vanilla extract: 1/2 teaspoon
- Pinch of salt: 1/8 teaspoon
Ingredient Notes and Substitutions
- Powdered sugar: Sifting removes lumps and creates a smooth, lump-free icing that spreads evenly. You can substitute confectioner’s sugar or icing sugar (they’re the same thing), but always sift it first. Unsifted powdered sugar will yield a grainy, thick icing that frustrates you.
- Milk: Whole milk creates the smoothest icing, but 2% works fine too. Heavy cream makes it richer but slightly less fluid. For dairy-free baking, use unsweetened oat or almond milk instead, though the flavor will be slightly different.
- Butter: Adds richness and helps the icing set with a subtle sheen. You can replace it with coconut oil for a dairy-free version, or omit it entirely if you prefer a lighter, more pourable glaze, though the icing will be less silky.
- Vanilla extract: Deepens the flavor without adding bulk. Replace with lemon, almond, or peppermint extract for different flavor profiles, using the same 1/2 teaspoon amount.
- Salt: Balances sweetness and prevents the icing from tasting one-dimensional. Don’t skip this tiny amount.
How to Make Powdered Sugar Icing
Step 1: Sift Your Powdered Sugar
Pour 2 cups of powdered sugar into a fine-mesh sifter or strainer held over a medium mixing bowl. Sift the sugar directly into the bowl, breaking up any lumps as you go.
Sifting is non-negotiable here because lumpy powdered sugar will sabotage your smooth icing and leave you with a grainy texture that looks homemade in the wrong way.
Step 2: Measure the Milk and Butter
Pour 3 tablespoons of milk into a small measuring cup and melt 2 tablespoons of butter in the microwave (about 20-30 seconds) or on the stovetop. Allow the butter to cool for just a minute so it’s warm but not hot.
Measuring by tablespoon rather than eyeballing ensures your icing has the right consistency every single time.
Step 3: Combine Wet Ingredients
Pour the milk and melted butter into the sifted powdered sugar. Add 1/2 teaspoon of vanilla extract and 1/8 teaspoon of salt to the mixture.
Combining your wet ingredients separately helps them distribute evenly throughout the dry sugar and prevents pockets of unmixed vanilla.
Step 4: Whisk Until Smooth
Using a whisk or fork, beat the icing vigorously for about 1-2 minutes until all lumps disappear and the texture becomes silky and smooth. The icing should be thick enough to coat the back of a spoon but still pourable.
Whisking aerates the icing slightly and ensures butter, milk, and sugar bind together perfectly with no grittiness.
Step 5: Assess the Consistency
Dip a small spoon into the icing and let it drip back into the bowl. Thin lines should form, and the drips should fall back quickly without pooling on the surface.
If the icing is too thick and doesn’t drip, add milk one teaspoon at a time. If it’s too thin and runs off your cookies, whisk in more powdered sugar one tablespoon at a time until it reaches the right consistency.
Step 6: Use Immediately or Cover
Apply the icing to your cooled baked goods right away using a small spoon, icing brush, or by dipping. If you need to pause, cover the bowl with a damp paper towel to prevent the surface from drying out.
Powdered sugar icing sets quickly, so work efficiently. The icing will firm up as it sits, making it harder to spread smoothly after 30 minutes.
Step 7: Allow to Set
Place iced cookies or baked goods on a cooling rack or parchment paper and let them sit for 1-2 hours at room temperature. The icing will dry to a light, delicate set that’s pleasant to bite through rather than crunchy or rock-hard.
Avoid stacking or covering the items while the icing is setting or you’ll smudge your beautiful work.
Step 8: Store Properly
Once set, store your iced treats in an airtight container at room temperature for up to five days. Layer them between parchment paper if stacking to prevent sticking.
Proper storage keeps your treats fresh and prevents the icing from cracking or peeling off.
Pro Tip: Sift your powdered sugar directly into the bowl and whisk for a full 2 minutes to guarantee silky-smooth icing with zero graininess.
Tips for the Best Powdered Sugar Icing
- Always sift your powdered sugar, even if the bag claims it’s pre-sifted. You’ll taste the difference in smoothness.
- Add liquid gradually and whisk well between each addition so you don’t overshoot and end up with runny icing.
- Use melted butter instead of softened butter because it blends more evenly without creating tiny butter specks.
- Flavor your icing with citrus zest, espresso powder, or food coloring for endless variations that impress.
- Apply icing to completely cooled baked goods or it will melt and slide right off.
Common Mistakes to Avoid
- Using unsifted powdered sugar results in grainy, gritty icing that looks and feels off. Sift it without fail.
- Adding all the liquid at once makes the icing too thin and forces you to add tons of powdered sugar to fix it. Add liquid a teaspoon at a time.
- Applying icing to warm cookies melts the icing and creates a runny mess. Wait until baked goods are completely cool.
- Skipping the salt makes the icing taste cloyingly sweet with no depth. This tiny ingredient is essential.
- Overmixing after the icing reaches the right consistency can incorporate air bubbles that create an airy, less smooth texture.
Serving Suggestions
Powdered sugar icing pairs beautifully with nearly every baked treat you can imagine.
- Classic sugar cookies decorated with pastel-colored icing for holidays or celebrations.
- Lemon pound cake drizzled with lemon-flavored icing for brightness and elegance.
- Cinnamon rolls glazed while still warm for a glossy, gooey topping.
- Store-bought donuts elevated with homemade icing and sprinkles.
- Soft shortbread cookies with a thin coat of vanilla icing and a pinch of fleur de sel.
Variations to Try
- Lemon Icing: Replace vanilla with 1/2 teaspoon lemon extract and add 1/2 teaspoon of fresh lemon zest for a bright, tangy icing that complements fruit-based desserts beautifully.
- Almond Icing: Use almond extract instead of vanilla for a delicate, slightly floral icing that pairs perfectly with tea cakes and shortbread.
- Chocolate Icing: Whisk 2 tablespoons of cocoa powder into your sifted powdered sugar and add an extra teaspoon of milk to keep the consistency smooth.
- Peppermint Icing: Swap vanilla for peppermint extract and add a few drops of food coloring for a festive, minty glaze that transforms sugar cookies into holiday treats.
- Cream Cheese Icing: Replace the milk and butter with 3 tablespoons of softened cream cheese and reduce powdered sugar to 1.5 cups for a tangy, rich icing with a slight set.
Dietary Adaptations
- Gluten-Free: This icing is naturally gluten-free as long as you use powdered sugar without additives. Always check your powdered sugar label to confirm.
- Dairy-Free: Use unsweetened oat or almond milk plus coconut oil instead of butter for a creamy, dairy-free version. The flavor will be slightly lighter but equally delicious.
- Vegan: Replace butter with vegan butter and use plant-based milk to create a fully vegan icing. Whisk well to ensure the vegan butter incorporates smoothly.
- Low-Carb/Keto: Swap powdered sugar for a keto-friendly powdered sweetener like monk fruit or allulose in equal amounts. The texture may be slightly different, and you may need to adjust liquid slightly.
Storage and Reheating
Refrigerator
Store leftover icing in an airtight container for up to two weeks. The icing will thicken as it cools, so you may need to whisk in a splash of milk to restore the original consistency before using.
- Bring to room temperature for 15-30 minutes before applying.
- Whisk gently to loosen the texture if it’s become stiff.
Freezer
Powdered sugar icing freezes well for up to three months if stored in a freezer-safe container or zip-top bag.
- Thaw overnight in the refrigerator before using.
- The texture may separate slightly upon thawing, so whisk well to recombine.
Reheating
No reheating is necessary. Simply bring frozen or refrigerated icing to room temperature and whisk until smooth, adding a teaspoon of milk if needed to restore the proper consistency.
- Never heat this icing on the stovetop or microwave as the powdered sugar can become grainy.
- Whisking at room temperature restores smoothness without damaging the texture.
Nutrition Information
| Nutrient | Amount |
|---|---|
| Calories | 30 |
| Total Fat | 1g |
| Saturated Fat | 0.5g |
| Carbohydrates | 5g |
| Fiber | 0g |
| Sugar | 5g |
| Protein | 0g |
| Sodium | 20mg |
| Cholesterol | 2mg |
Nutrition information is based on one tablespoon of icing. Actual values may vary slightly based on specific ingredient brands and preparation methods.
Frequently Asked Questions
Can I Make This Icing Ahead of Time?
Yes, you can make it up to two weeks in advance and store it in an airtight container in the refrigerator. Bring it to room temperature and whisk in a splash of milk before using if it thickens too much.
Why Does My Icing Look Lumpy?
Lumpy icing means your powdered sugar wasn’t sifted properly before mixing. Pass it through a fine-mesh strainer or sifter again, and whisk the lumps out thoroughly with your wet ingredients.
How Can I Make the Icing Thicker for Piping?
Whisk in more powdered sugar one tablespoon at a time until the icing reaches a consistency thick enough to hold its shape. It should be spreadable but not pourable.
Can I Color This Icing with Food Coloring?
Absolutely. Add a drop or two of gel or liquid food coloring and whisk thoroughly until the color distributes evenly. Gel food coloring won’t thin out the icing like liquid coloring does.
What’s the Difference Between This Icing and Royal Icing?
This powdered sugar icing is simpler and sets to a light finish that’s pleasant to bite through, while royal icing contains egg whites and sets rock-hard. This recipe is perfect for everyday decorating and is fully cooked with pasteurized ingredients.
Can I Use This Icing on Warm Baked Goods?
No, the icing will melt and slide off if applied to warm cookies or cakes. Always wait until baked goods are completely cooled to room temperature first.
Final Thoughts
Powdered sugar icing is a kitchen staple that transforms ordinary baked goods into something special with minimal effort. Once you master this simple recipe, you’ll find yourself reaching for it constantly because it delivers beautiful, delicious results every single time.
Whip up a batch today and see how a 5-minute glaze can elevate your homemade treats from good to impressive, no fancy piping skills or expensive equipment required.
Powdered Sugar Icing
Ingredients
Equipment
Method
- Pour 2 cups of powdered sugar into a fine-mesh sifter or strainer held over a medium mixing bowl. Sift the sugar directly into the bowl, breaking up any lumps as you go.
- Pour 3 tablespoons of milk into a small measuring cup and melt 2 tablespoons of butter in the microwave for about 20-30 seconds or on the stovetop. Allow the butter to cool for just a minute so it's warm but not hot.
- Pour the milk and melted butter into the sifted powdered sugar. Add 1/2 teaspoon of vanilla extract and 1/8 teaspoon of salt to the mixture.
- Using a whisk or fork, beat the icing vigorously for about 1-2 minutes until all lumps disappear and the texture becomes silky and smooth. The icing should be thick enough to coat the back of a spoon but still pourable.
- Dip a small spoon into the icing and let it drip back into the bowl. If the icing is too thick and doesn't drip, add milk one teaspoon at a time. If it's too thin and runs off, whisk in more powdered sugar one tablespoon at a time until it reaches the right consistency.
- Apply the icing to your cooled baked goods right away using a small spoon, icing brush, or by dipping. If you need to pause, cover the bowl with a damp paper towel to prevent the surface from drying out.
- Place iced cookies or baked goods on a cooling rack or parchment paper and let them sit for 1-2 hours at room temperature to allow the icing to set.
- Once set, store your iced treats in an airtight container at room temperature for up to five days. Layer them between parchment paper if stacking to prevent sticking.


