The first time you split a vanilla bean and see those thousands of tiny seeds glisten, you understand why vanilla commands such a high price. Making your own vanilla bean paste transforms those premium pods into a luxurious ingredient that outperforms store-bought versions at a fraction of the cost.
This homemade paste delivers intense vanilla flavor with visible specks throughout your baked goods and desserts. You control the quality of every ingredient, avoiding the corn syrup and artificial additives found in commercial versions.
The process takes just 15 minutes of active work, and the result keeps for months in your pantry. Ready to make bakery-quality vanilla paste that will elevate everything from buttercream to creme brulee?
Why You’ll Love This Recipe
This vanilla bean paste recipe gives you restaurant-quality results with pantry staples and whole vanilla beans. The thick, spreadable consistency makes measuring easier than extract, and those beautiful flecks prove you used the real thing.
- Costs about 60% less than buying premium vanilla paste from specialty stores
- Contains only three ingredients with no artificial additives or high-fructose corn syrup
- Keeps for up to one year when stored properly in a cool, dark place
- Provides more intense flavor than extract with those gorgeous vanilla bean specks
- Works perfectly in both baked goods and no-bake desserts without alcohol aftertaste
My Experience Making This Recipe
I started making vanilla bean paste after spending $18 on a tiny jar that disappeared within two weeks of holiday baking. The homemade version smelled so much richer that I questioned whether my expensive jar had been diluted.
My first batch used six vanilla beans, and the paste turned out thicker than I expected, almost like a dark molasses consistency. I adjusted the simple syrup ratio in my second batch and found the sweet spot that spreads easily from a spoon.
The real test came when I used it in vanilla buttercream for my niece’s birthday cake. Guests kept asking what made the frosting taste so incredible, and those visible specks made the cake look professionally decorated without any extra effort from me.
Recipe Overview
- Recipe Name: Homemade Vanilla Bean Paste
- Servings: Makes approximately 1 cup
- Prep Time: 15 minutes
- Cook Time: 10 minutes
- Total Time: 25 minutes
- Course: Condiment/Baking Ingredient
- Cuisine: Universal
- Calories per Serving: 35 calories per teaspoon
Equipment You Will Need
- Small saucepan for making simple syrup
- Sharp paring knife for splitting vanilla beans
- Small spoon or back of a knife for scraping seeds
- Food processor or high-speed blender
- Fine-mesh strainer (optional, for ultra-smooth paste)
- Sterilized glass jar with tight-fitting lid for storage
- Measuring cups and spoons
- Cutting board
Ingredients for Vanilla Bean Paste
- 6 whole vanilla beans (preferably Grade A Madagascar or Tahitian beans)
- 1/2 cup granulated sugar
- 1/2 cup water
- 1 tablespoon vodka or bourbon (optional, for preservation)
Ingredient Notes and Substitutions
- Vanilla beans: Grade A beans have higher moisture content, making them easier to blend into a smooth paste. You can use Grade B beans, but add an extra tablespoon of simple syrup to compensate for dryness.
- Granulated sugar: This creates the base syrup that suspends the vanilla seeds and provides body to the paste. Honey or agave nectar can replace sugar, but they will darken the paste and add their own flavor notes.
- Water: Combines with sugar to create a simple syrup that gives the paste its spreadable consistency. No substitution needed, as water is neutral and necessary.
- Vodka or bourbon: Acts as a natural preservative and extends shelf life to one year instead of six months. You can omit this if making a smaller batch to use within a few months, or substitute with vanilla extract.
How to Make Vanilla Bean Paste
Step 1: Prepare the Simple Syrup
Combine the sugar and water in a small saucepan over medium heat. Stir occasionally until the sugar completely dissolves and the mixture becomes clear, about 5 minutes.
Do not let the syrup boil rapidly, as this can cause the sugar to crystallize when cooled. A gentle simmer ensures smooth integration with the vanilla beans later.
Step 2: Cool the Simple Syrup
Remove the saucepan from heat and let the simple syrup cool to room temperature, approximately 15 to 20 minutes. You can speed this process by transferring the syrup to a heat-safe bowl and placing it in the refrigerator for 10 minutes.
Hot syrup will cook the vanilla seeds and destroy some of the delicate flavor compounds. Room temperature syrup preserves the maximum flavor and aroma from your vanilla beans.
Step 3: Split and Scrape the Vanilla Beans
Place one vanilla bean on a cutting board and use a sharp paring knife to slice it lengthwise from top to bottom. Open the bean like a book and use the back of your knife or a small spoon to scrape out all the tiny seeds inside.
Collect both the seeds and the scraped pods, as the pods still contain significant flavor. Repeat this process with all six vanilla beans, saving every precious seed and pod.
Step 4: Chop the Vanilla Bean Pods
Use kitchen scissors or your paring knife to cut the scraped vanilla bean pods into small pieces, about 1/4 inch long. Smaller pieces blend more easily and release more flavor into the final paste.
The pods contain vanillin and other flavor compounds that would be wasted if discarded. Chopping them finely ensures they break down completely during blending.
Step 5: Blend the Vanilla Components
Add the vanilla seeds, chopped pods, and cooled simple syrup to your food processor or high-speed blender. If using alcohol, add it now.
Blend on high speed for 2 to 3 minutes, stopping to scrape down the sides as needed. The mixture should become thick and dark with visible flecks, resembling wet coffee grounds.
Step 6: Continue Blending for Smoothness
Keep blending for an additional 1 to 2 minutes until the pod pieces become very fine and the paste reaches a uniform consistency. The texture should resemble smooth peanut butter with visible vanilla bean specks throughout.
If your blender struggles, add one more tablespoon of simple syrup to help the blades move freely. A high-powered blender works best, but a food processor will get the job done with a bit more time.
Step 7: Strain if Desired
For an ultra-smooth paste without any larger pod pieces, pour the mixture through a fine-mesh strainer into a bowl. Use the back of a spoon to press the paste through, extracting maximum flavor while removing fibrous bits.
I skip this step because I like the rustic texture and those larger flecks prove the paste contains real vanilla beans. Straining is purely a matter of personal preference and presentation.
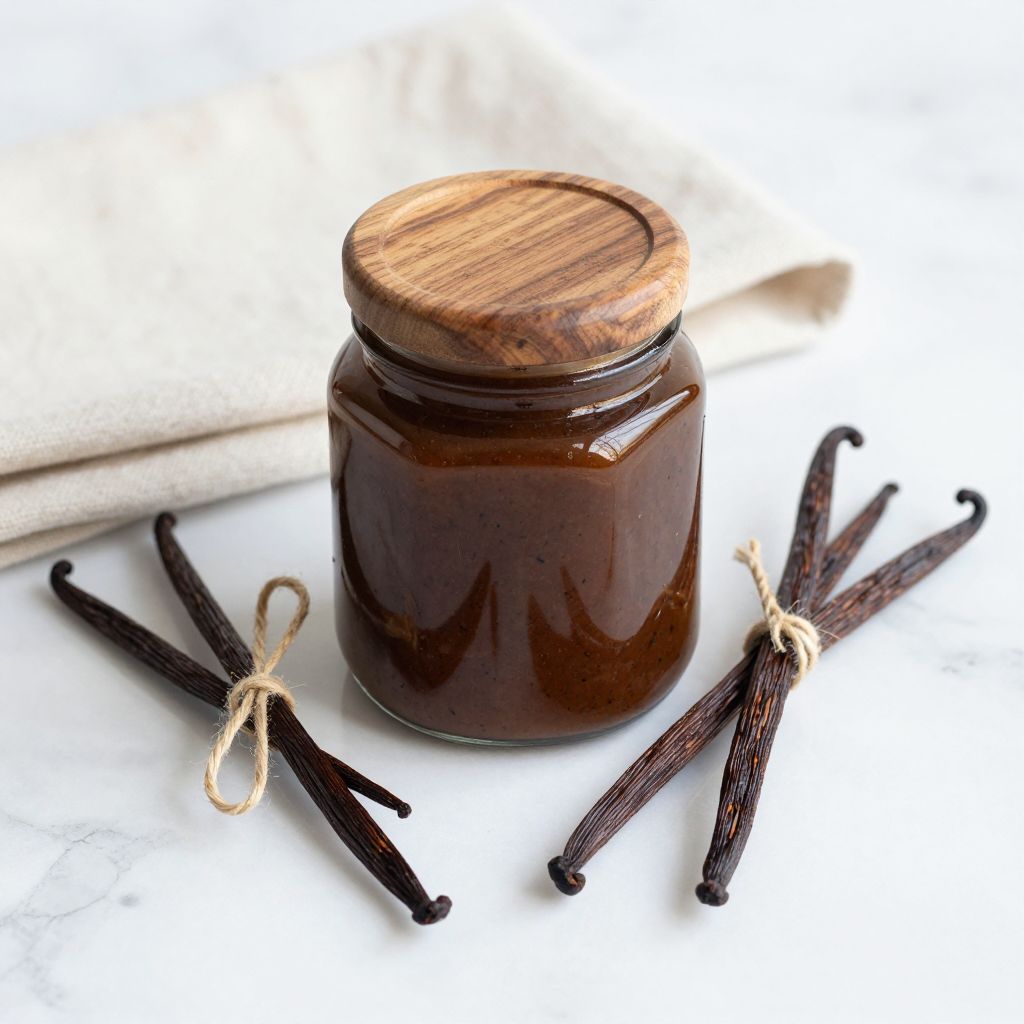
Step 8: Store the Vanilla Paste
Transfer the finished vanilla bean paste to a sterilized glass jar with an airtight lid. Press down gently to remove any air pockets, and wipe the rim clean before sealing.
Store the jar in a cool, dark place like your pantry, away from direct heat or sunlight. The paste thickens slightly as it rests, reaching perfect consistency after 24 hours.
Pro Tip: Always use a clean, dry spoon when scooping out vanilla paste to prevent introducing moisture or bacteria that could cause spoilage. The paste will naturally darken over time, which actually indicates the vanilla is continuing to infuse and deepen in flavor.
Tips for the Best Vanilla Bean Paste
- Buy vanilla beans in bulk online to save money, but make sure they feel pliable and slightly oily when they arrive. Dry, brittle beans indicate old stock that will produce weak flavor.
- Label your jar with the date and type of vanilla beans used, since different varieties have distinct flavor profiles that you might want to replicate or avoid. Tahitian beans taste more floral, while Madagascar beans offer classic vanilla flavor.
- If your paste becomes too thick after storage, stir in simple syrup one teaspoon at a time until you reach the desired consistency. Too thin? Let the jar sit uncapped for an hour to allow slight evaporation.
- Use the paste within three days of opening if you omitted the alcohol preservative, or make smaller batches with three beans instead of six. Fresh paste always tastes better than old paste.
- Shake or stir the jar before each use, as the vanilla seeds can settle to the bottom during storage. This ensures even distribution of those beautiful flecks in your recipes.
- Save the strained vanilla pod pieces if you choose to strain, and add them to a jar of sugar to make vanilla sugar. Nothing goes to waste, and you get a bonus ingredient.
Common Mistakes to Avoid
- Using beans that are too dry or old will result in weak, lackluster paste no matter how perfectly you follow the recipe. Fresh, pliable beans should feel slightly sticky and smell intensely fragrant when opened.
- Adding hot simple syrup directly to the vanilla beans can cook the delicate seeds and volatile compounds, creating a bitter, cooked flavor instead of bright vanilla notes. Always cool your syrup first.
- Under-blending leaves large, tough pod pieces that create an unpleasant texture in your baked goods. Blend longer than you think necessary for a truly smooth, professional paste.
- Storing the paste in a clear container on your countertop exposes it to light and heat, which degrades vanilla flavor quickly. Dark glass in a cool spot preserves quality for months.
- Using measuring cups that still have water droplets introduces moisture that can cause mold growth. Dry all equipment thoroughly before making and storing your paste.
Serving Suggestions
Vanilla bean paste works anywhere you would use vanilla extract, but it shines brightest in recipes where those gorgeous specks can be seen. Use it in light-colored desserts and creamy preparations where the visual impact matches the flavor intensity.
- Swirl into buttercream frosting, whipped cream, or cream cheese frosting for bakery-quality finish with visible vanilla specks
- Add to homemade ice cream base, panna cotta, or custards where the seeds distribute beautifully throughout
- Mix into sugar cookie dough or shortbread batter for elevated flavor without changing the dough’s moisture content
- Stir into morning coffee, hot chocolate, or chai lattes for an indulgent upgrade to everyday beverages
- Blend into cheesecake batter, French toast custard, or pancake batter for rich vanilla flavor in breakfast treats
Variations to Try
- Bourbon vanilla paste: Replace the vodka with bourbon and increase it to 2 tablespoons for a deeper, slightly smoky vanilla flavor that pairs beautifully with chocolate desserts and pecan pies. The bourbon adds complexity without making the paste taste boozy.
- Mixed bean paste: Use 3 Madagascar beans and 3 Tahitian beans for a complex flavor profile that combines classic vanilla with floral, fruity notes. This creates a more sophisticated paste perfect for special occasion baking.
- Honey vanilla paste: Replace the sugar with honey for a paste that adds subtle caramel notes and natural antimicrobial properties. The paste will be darker and slightly thinner but equally delicious.
- Spiced vanilla paste: Add 1/4 teaspoon of cinnamon and a pinch of nutmeg during blending for a warm, chai-inspired vanilla paste. This variation works wonderfully in fall baking and morning oatmeal.
- Coconut vanilla paste: Replace 2 tablespoons of the water with coconut cream for a tropical twist that enhances pineapple upside-down cake, coconut macaroons, and tropical fruit desserts. The coconut fat also helps preserve the paste naturally.
Dietary Adaptations
- Gluten-free: This recipe is naturally gluten-free with no modifications needed, making it safe for those with celiac disease or gluten sensitivity. Just verify your vanilla beans were not processed in a facility with gluten contamination.
- Dairy-free: The recipe contains no dairy products, so it works perfectly for lactose-intolerant individuals and vegan baking applications. No substitutions required.
- Vegan: This vanilla paste is completely plant-based and vegan-friendly as written. Some commercial vanilla pastes contain honey, but this homemade version uses only sugar, water, and vanilla.
- Low-carb/keto: Replace the sugar with an equal amount of allulose or monk fruit sweetener for a keto-friendly paste with only 2 net carbs per teaspoon instead of 9. The texture will be slightly thinner but still usable.
Storage and Reheating
Refrigerator
Store opened vanilla bean paste in the refrigerator if you live in a hot, humid climate or did not use alcohol as a preservative. The paste will thicken when cold but returns to spreadable consistency at room temperature.
- Keeps for 6 months in the refrigerator when stored in an airtight glass container
- Let the paste sit at room temperature for 10 minutes before using for easier measuring
- Check for mold or off odors before using if stored longer than 4 months
Freezer
Freezing vanilla bean paste is not recommended as it can cause separation and texture changes when thawed. The sugar content prevents the paste from freezing solid, creating an icy, grainy consistency.
- If you must freeze, portion the paste into ice cube trays for individual servings
- Thaw frozen portions in the refrigerator overnight and stir vigorously before using
- Frozen paste works better in cooked applications than in no-bake desserts
Reheating
Vanilla bean paste should never be reheated, as heat degrades the delicate vanilla compounds and creates bitter flavors. Always add the paste to recipes at the temperature specified in that particular recipe.
- For cold recipes, use the paste directly from the jar without any warming
- For baked goods, add the paste to room-temperature ingredients before baking
- If the paste is too thick to pour, let it sit at room temperature for 15 minutes rather than heating it
Nutrition Information
| Nutrient | Amount |
|---|---|
| Calories | 35 |
| Total Fat | 0g |
| Saturated Fat | 0g |
| Carbohydrates | 9g |
| Fiber | 0g |
| Sugar | 8g |
| Protein | 0g |
| Sodium | 1mg |
| Cholesterol | 0mg |
Nutritional values are estimates based on one teaspoon serving size and may vary depending on specific brands and measurements used. This paste contains primarily sugar and vanilla, with minimal nutritional value beyond flavoring your recipes.
Frequently Asked Questions
Can I use imitation vanilla beans or extract instead of real vanilla beans?
Real vanilla beans are non-negotiable for authentic vanilla bean paste, as the seeds and pods provide the texture and complex flavor that defines this ingredient. Imitation vanilla lacks the depth and those signature specks that make this paste special.
How far in advance can I make vanilla bean paste?
Make the paste up to one year in advance if you include alcohol as a preservative and store it properly in a cool, dark place. The flavor actually improves over the first month as the vanilla continues to infuse into the syrup.
Why did my vanilla paste turn watery after a few weeks?
Watery paste usually indicates that moisture contaminated the jar from a wet spoon or humid storage conditions. Always use a dry utensil and store the jar in a low-humidity environment to maintain proper consistency.
Can I reduce the sugar content to make a less sweet paste?
Reducing sugar below the specified amount will create a thinner paste that separates and spoils more quickly, as sugar acts as both a thickener and preservative. For less sweetness, use the paste more sparingly in your recipes rather than altering the formula.
What should I do with vanilla beans that have already been used once in milk or cream?
Used vanilla beans work perfectly in this recipe if they still smell fragrant and feel pliable. Rinse them thoroughly, pat dry completely, and use 8 to 10 used beans instead of 6 fresh ones to compensate for diminished potency.
How does homemade vanilla paste compare to store-bought in recipes?
Homemade paste typically delivers more intense vanilla flavor and fresher taste than commercial versions, which often contain corn syrup and stabilizers. Use homemade paste in a 1:1 ratio as a replacement for store-bought paste in any recipe.
Can I make vanilla bean paste without a food processor or blender?
You can make a chunkier version by finely mincing the vanilla pods
Homemade Vanilla Bean Paste
Ingredients
Equipment
Method
- Combine the sugar and water in a small saucepan over medium heat. Stir occasionally until the sugar completely dissolves and the mixture becomes clear, about 5 minutes. Do not let the syrup boil rapidly.
- Remove the saucepan from heat and let the simple syrup cool to room temperature, approximately 15 to 20 minutes. You can speed this process by transferring the syrup to a heat-safe bowl and placing it in the refrigerator for 10 minutes.
- Place one vanilla bean on a cutting board and use a sharp paring knife to slice it lengthwise from top to bottom. Open the bean like a book and use the back of your knife or a small spoon to scrape out all the tiny seeds inside. Collect both the seeds and the scraped pods. Repeat this process with all six vanilla beans.
- Use kitchen scissors or your paring knife to cut the scraped vanilla bean pods into small pieces, about 1/4 inch long.
- Add the vanilla seeds, chopped pods, and cooled simple syrup to your food processor or high-speed blender. If using alcohol, add it now.
- Blend on high speed for 2 to 3 minutes, stopping to scrape down the sides as needed. The mixture should become thick and dark with visible flecks, resembling wet coffee grounds.
- Keep blending for an additional 1 to 2 minutes until the pod pieces become very fine and the paste reaches a uniform consistency. The texture should resemble smooth peanut butter with visible vanilla bean specks throughout.
- For an ultra-smooth paste without any larger pod pieces, pour the mixture through a fine-mesh strainer into a bowl. Use the back of a spoon to press the paste through, extracting maximum flavor while removing fibrous bits. This step is optional.
- Transfer the finished vanilla bean paste to a sterilized glass jar with an airtight lid. Press down gently to remove any air pockets, and wipe the rim clean before sealing. Store the jar in a cool, dark place like your pantry, away from direct heat or sunlight.


