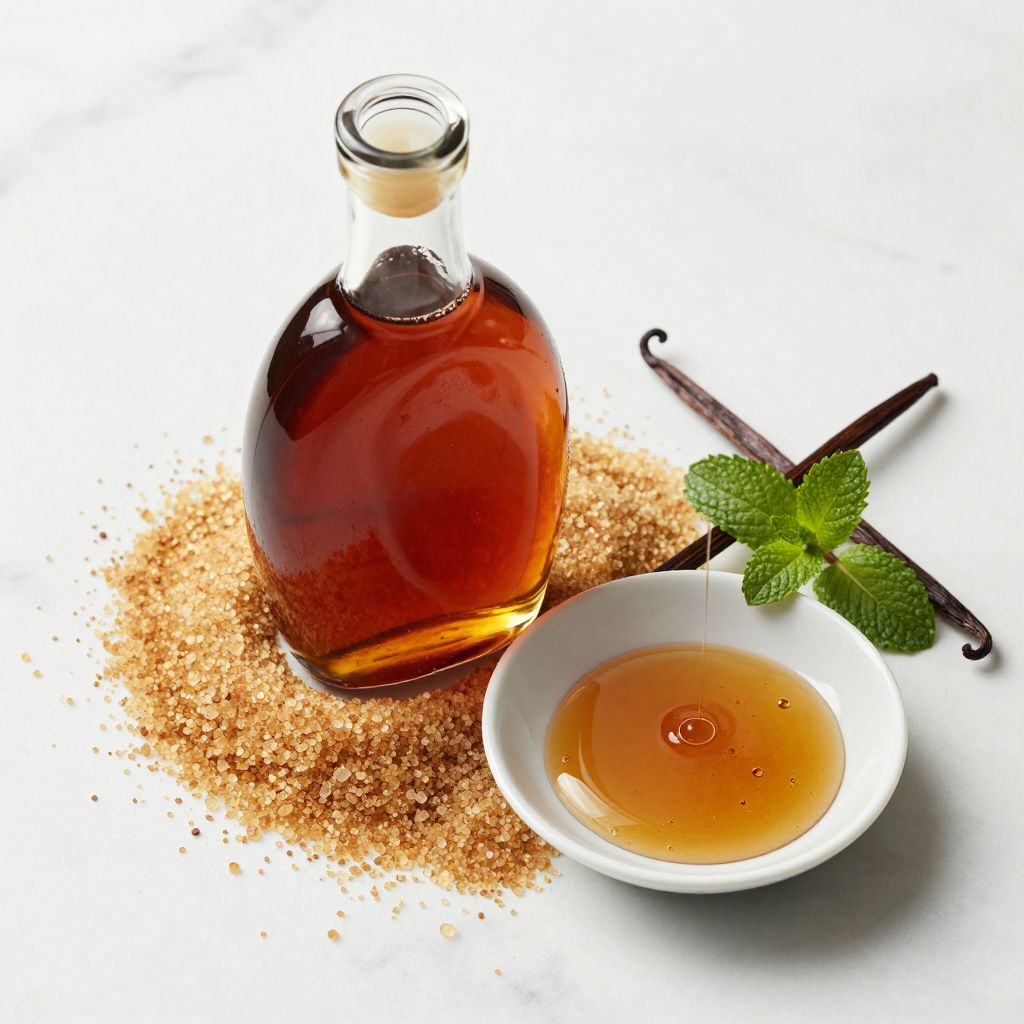
Picture this: a glossy amber liquid that catches the light like liquid gold, ready to transform your morning coffee, stack of pancakes, or cocktail into something extraordinary. Brown sugar syrup is one of those pantry staples you never knew you needed until you make it once, and then you wonder how you ever lived without it.
This recipe takes just 10 minutes and uses only three ingredients you probably already have in your kitchen. The deep caramel notes from the brown sugar add complexity that regular simple syrup just can’t match, making everything from iced lattes to baked goods taste like they came from a fancy cafe.
Why You’ll Love This Recipe
This syrup delivers restaurant quality results without any fuss or special equipment. It keeps for weeks in the fridge, making it a smart make ahead solution for anyone who loves sweetening drinks or drizzling over desserts.
- Takes only 10 minutes from start to finish with minimal active time
- Uses just three simple ingredients you likely have on hand
- Creates a rich, complex sweetness that white sugar can’t replicate
- Stores beautifully for up to one month in the refrigerator
- Works perfectly in both hot and cold beverages without any grittiness
My Experience Making This Recipe
I first made this syrup on a whim when I ran out of my usual simple syrup for iced coffee. The moment I stirred that brown sugar into the simmering water, my kitchen filled with the most incredible butterscotch aroma that made me pause mid stir.
The first batch disappeared in three days because I kept finding excuses to use it. I drizzled it over vanilla ice cream, stirred it into oatmeal, and mixed it into Old Fashioneds that tasted better than anything I’d ordered at a bar.
Now I keep a jar in my fridge at all times, and guests always ask what makes my coffee drinks taste so good. The secret is this ridiculously simple syrup that takes less effort than brewing the coffee itself.
Recipe Overview
- Recipe Name: Brown Sugar Syrup
- Servings: Makes about 1.5 cups (24 tablespoons)
- Prep Time: 2 minutes
- Cook Time: 8 minutes
- Total Time: 10 minutes
- Course: Condiment, Beverage Enhancer
- Cuisine: American
- Calories per Serving: 50 calories per tablespoon
Equipment You Will Need
- Medium saucepan (at least 2 quart capacity)
- Wooden spoon or heat resistant spatula
- Measuring cups
- Fine mesh strainer (optional but helpful)
- Glass jar or bottle with airtight lid for storage
- Funnel (makes transferring syrup much easier)
Ingredients for Brown Sugar Syrup
- 1 cup packed light brown sugar or dark brown sugar
- 1 cup filtered water
- 1/4 teaspoon pure vanilla extract (optional but recommended)
Ingredient Notes and Substitutions
- Light brown sugar: Provides a mild molasses flavor with caramel undertones that works in most applications. You can swap in dark brown sugar for a more intense, robust molasses flavor that shines in cocktails and coffee drinks.
- Filtered water: Ensures a clean taste without any mineral or chlorine interference with the sugar. Tap water works in a pinch, but filtered or bottled water produces the clearest, best tasting syrup.
- Vanilla extract: Adds a subtle warmth and rounds out the flavor beautifully without being identifiable. You can skip it entirely if you want pure brown sugar flavor, or replace it with a small cinnamon stick during cooking for a spiced variation.
How to Make Brown Sugar Syrup
Step 1: Combine Sugar and Water
Add the brown sugar and water to your medium saucepan. Break up any large clumps of brown sugar with your wooden spoon before turning on the heat, as this prevents uneven dissolving later.
Step 2: Begin Heating Over Medium Heat
Place the saucepan over medium heat and stir gently to start incorporating the sugar into the water. Medium heat is key here because high heat can cause the sugar to caramelize or burn before it fully dissolves, creating a bitter taste and grainy texture.
Step 3: Stir Until Sugar Dissolves Completely
Continue stirring frequently as the mixture heats up, scraping down any sugar crystals that form on the sides of the pan. You’ll notice the mixture becoming clearer as the sugar dissolves, though it will never be as transparent as white sugar syrup due to the molasses content.
Step 4: Bring to a Gentle Simmer
Once all the sugar has dissolved, increase the heat slightly to bring the mixture to a gentle simmer with small bubbles around the edges. Simmer for 3 to 4 minutes without stirring to allow the syrup to thicken slightly and develop a glossy consistency.
Step 5: Check for Proper Consistency
The syrup should coat the back of your spoon and feel slightly thicker than water but still pourable. Remember that the syrup will thicken more as it cools, so don’t overreduce it or you’ll end up with something closer to caramel sauce.
Step 6: Remove from Heat and Add Vanilla
Take the saucepan off the heat and stir in the vanilla extract if using. Adding vanilla after cooking preserves its delicate flavor compounds that can evaporate or become bitter with prolonged heat exposure.
Step 7: Strain the Syrup
Pour the hot syrup through a fine mesh strainer into a heat safe measuring cup or bowl. This optional step removes any undissolved sugar particles or impurities, giving you a perfectly smooth final product.
Step 8: Cool and Store
Let the syrup cool to room temperature before transferring it to your storage container using a funnel. The syrup will thicken as it cools, reaching its final consistency after about 30 minutes at room temperature.
Pro Tip: Make a double or triple batch at once since the effort is exactly the same and the syrup stores beautifully for a month. You’ll be glad to have extra on hand when you’re rushing to make morning coffee or need to sweeten a last minute cocktail.
Tips for the Best Brown Sugar Syrup
- Pack your brown sugar firmly into the measuring cup to get an accurate measurement. Loosely measured brown sugar will create a thinner, less flavorful syrup that doesn’t have enough body.
- Resist the urge to walk away from the stove during the initial dissolving phase. Stirring frequently prevents hot spots that can cause crystallization or scorching on the bottom of the pan.
- Use a clean spoon each time you dip into your stored syrup to prevent bacterial contamination. Even a small amount of coffee residue or other food can shorten the shelf life significantly.
- Cool the syrup completely before sealing your storage container to prevent condensation buildup inside the lid. Excess moisture can dilute the syrup and promote mold growth over time.
- Label your container with the date you made it so you can track freshness. While the syrup lasts up to a month refrigerated, knowing the date helps you use it at peak quality.
- Keep the heat at medium or medium low throughout cooking to maintain control. High heat might seem faster, but it risks burning the sugar and creating an acrid flavor that ruins the entire batch.
Common Mistakes to Avoid
- Boiling the syrup too aggressively creates excessive evaporation that makes it too thick and can cause the sugar to caramelize beyond the syrup stage. Gentle simmering gives you much better control over the final consistency.
- Adding vanilla while the syrup is still boiling causes the alcohol to flash off and takes much of the vanilla flavor with it. Wait until you remove the pan from heat for maximum vanilla impact.
- Using old, hardened brown sugar produces lumps that take forever to dissolve and can leave grainy bits in your finished syrup. If your brown sugar is rock hard, soften it first by microwaving with a damp paper towel for 20 seconds.
- Skipping the cooling step and bottling hot syrup creates a sticky mess and can crack glass containers from thermal shock. Patience here saves you from ruined jars and wasted syrup on your counter.
- Storing the syrup at room temperature invites mold growth within days since this is essentially sugar water without preservatives. Always refrigerate after cooling unless you plan to use it all within 48 hours.
Serving Suggestions
This versatile syrup works beautifully in any application where you’d use regular simple syrup but want more depth and character. The molasses notes complement both coffee based drinks and spirits with brown liquors particularly well.
- Stir into hot or iced coffee for a coffeehouse quality sweetener that adds complexity beyond plain sugar
- Mix into bourbon or whiskey cocktails like Old Fashioneds, Whiskey Sours, or Mint Juleps for enhanced caramel notes
- Drizzle over pancakes, waffles, or French toast as a gourmet alternative to maple syrup
- Use as a glaze for ham, pork chops, or roasted carrots during the last few minutes of cooking
- Sweeten homemade lemonade or iced tea with a tablespoon or two for a subtle molasses undertone
Variations to Try
- Cinnamon Brown Sugar Syrup: Add one cinnamon stick during simmering and remove it before storing for a warming spice note perfect for fall beverages. The cinnamon pairs beautifully with apple cider, chai tea, and pumpkin flavored drinks.
- Ginger Brown Sugar Syrup: Simmer with 5 or 6 thin slices of fresh ginger for a spicy kick that livens up cocktails and Asian inspired dishes. Strain out the ginger pieces before bottling for a smooth texture with lingering heat.
- Orange Brown Sugar Syrup: Add three wide strips of orange peel during cooking for a citrus brightness that cuts through the syrup’s richness. This variation is fantastic in rum drinks, drizzled over pound cake, or mixed into sparkling water.
- Maple Brown Sugar Syrup: Replace 1/4 cup of the water with real maple syrup for a double hit of complex sweetness. The combination creates an almost toffee like flavor that’s incredible on ice cream or in coffee.
- Cardamom Brown Sugar Syrup: Crush 5 green cardamom pods and add them during simmering for an aromatic, slightly floral quality. This Middle Eastern inspired variation transforms regular coffee into something special and works wonderfully in milk based desserts.
Dietary Adaptations
- Gluten Free: This recipe is naturally gluten free as written with no modifications needed. Just verify that your vanilla extract doesn’t contain any gluten based additives, though pure vanilla extract is almost always safe.
- Dairy Free: Already completely dairy free since it contains only sugar, water, and vanilla extract. This makes it a safe choice for anyone with lactose intolerance or dairy allergies.
- Vegan: The recipe is vegan as long as you verify that your brown sugar wasn’t processed using bone char, which some brands use. Many organic brown sugars are guaranteed bone char free, or you can make your own by mixing white vegan sugar with molasses.
- Low Carb or Keto: Traditional brown sugar syrup is not compatible with these diets due to its high sugar content. You can create a keto version by using brown sugar substitute (erythritol with molasses flavoring) instead, though the texture will be slightly thinner.
Storage and Reheating
Refrigerator
Store your brown sugar syrup in an airtight glass jar or bottle in the refrigerator where it will keep for up to one month. The cold temperature preserves freshness and prevents fermentation that can occur with sugar based liquids at room temperature.
- Always use clean utensils when scooping out syrup to prevent contamination
- Check for any cloudiness or off smells before using older syrup, though this is rare
- The syrup may thicken slightly when cold but will thin out again at room temperature
Freezer
You can freeze brown sugar syrup for up to three months in a freezer safe container, leaving an inch of headspace for expansion. The high sugar content means it won’t freeze solid but will become very thick and slushy.
- Portion into ice cube trays for pre measured amounts you can pop out as needed
- Thaw overnight in the refrigerator or run the container under warm water
- Shake or stir well after thawing since separation can occur
Reheating
You don’t typically need to reheat refrigerated syrup since it pours easily even when cold. If your syrup has become too thick from over reduction, you can thin it with a tablespoon of warm water.
- Microwave in 10 second bursts if you prefer warm syrup for hot beverages
- Stir thoroughly after any reheating to ensure even consistency
- Never reheat more than you’ll use immediately to maintain quality
Nutrition Information
| Nutrient | Amount |
|---|---|
| Calories | 50 |
| Total Fat | 0g |
| Saturated Fat | 0g |
| Carbohydrates | 13g |
| Fiber | 0g |
| Sugar | 13g |
| Protein | 0g |
| Sodium | 4mg |
| Cholesterol | 0mg |
Nutrition information is calculated based on one tablespoon serving size and may vary depending on specific ingredients used. Brown sugar contains trace minerals like calcium, potassium, and iron from its molasses content, though amounts per serving are nutritionally insignificant.
Frequently Asked Questions
Can I use coconut sugar or other alternative sweeteners instead of brown sugar?
Yes, coconut sugar works well and creates a similar caramel flavor with slight tropical notes, though it costs more and produces a slightly grainier texture. Other alternatives like date sugar or muscovado will also work but will change the flavor profile and may not dissolve as smoothly.
How do I know when my syrup has reached the right consistency?
The syrup should coat the back of a spoon and slowly drip off rather than running off quickly like water. Remember it will thicken more as it cools, so err on the side of slightly thinner rather than reducing it too much.
Can I make this syrup ahead of time for a party or event?
Absolutely, this syrup is perfect for making ahead since it keeps for up to a month refrigerated. Make it up to four weeks in advance and store it in an attractive bottle for easy pouring at your event.
Why did my syrup crystallize or become grainy after storing?
Crystallization happens when sugar molecules reorganize, often triggered by temperature fluctuations or contamination from a dirty spoon. Gently reheat the syrup with a teaspoon of water and stir until smooth, then make sure to always use clean utensils.
What’s the difference between using light brown sugar versus dark brown sugar?
Light brown sugar contains about 3.5% molasses and creates a milder, more versatile syrup, while dark brown sugar has around 6.5% molasses for a more intense, robust flavor. Dark brown sugar syrup works especially well in cocktails and with strong flavored coffee, while light is more adaptable for general use.
Can I reduce the sugar amount to make a less sweet version?
You can use a 1:2 sugar to water ratio instead of 1:1 for a thinner, less sweet syrup, but it won’t keep as long since sugar acts as a preservative. The reduced sugar version will last about two weeks refrigerated instead of a full month.
Is there a way to make this syrup thicker without overcooking it?
Try using a 2:1 ratio of sugar to water for a rich simple syrup consistency that’s almost like light caramel sauce. This concentrated version is perfect for drizzling over desserts but might be too thick for stirring into cold beverages.
Final Thoughts
This brown sugar syrup proves that the simplest recipes often deliver the most impressive results with minimal effort. Once you experience the depth and complexity it brings to your drinks and desserts, you’ll wonder why you ever settled for plain sugar or basic simple syrup.
Give this recipe a try the next time you’re making coffee or cocktails, and prepare to field questions about your secret ingredient. The answer is beautifully simple: three ingredients, ten minutes, and a little bit of kitchen magic that anyone can master.
Brown Sugar Syrup
This brown sugar syrup takes just 10 minutes and uses only three ingredients you probably already have in your kitchen. The deep caramel notes from the brown sugar add complexity that regular simple syrup just can’t match, making everything from iced lattes to baked goods taste like they came from a fancy cafe.
- Medium saucepan (at least 2 quart capacity)
- Wooden spoon or heat-resistant spatula
- Measuring cups
- Fine mesh strainer
- Glass jar or bottle with airtight lid for storage
- Funnel
Main
- 1 cup packed light brown sugar or dark brown sugar
- 1 cup filtered water
- 1/4 teaspoon pure vanilla extract (optional but recommended)
- Add the brown sugar and water to your medium saucepan. Break up any large clumps of brown sugar with your wooden spoon before turning on the heat, as this prevents uneven dissolving later.
- Place the saucepan over medium heat and stir gently to start incorporating the sugar into the water. Medium heat is key here because high heat can cause the sugar to caramelize or burn before it fully dissolves.
- Continue stirring frequently as the mixture heats up, scraping down any sugar crystals that form on the sides of the pan. You’ll notice the mixture becoming clearer as the sugar dissolves, though it will never be as transparent as white sugar syrup due to the molasses content.
- Once all the sugar has dissolved, increase the heat slightly to bring the mixture to a gentle simmer with small bubbles around the edges. Simmer for 3 to 4 minutes without stirring to allow the syrup to thicken slightly and develop a glossy consistency.
- Check the consistency by coating the back of your spoon. The syrup should feel slightly thicker than water but still pourable. Remember that the syrup will thicken more as it cools.
- Take the saucepan off the heat and stir in the vanilla extract if using. Adding vanilla after cooking preserves its delicate flavor compounds.
- Pour the hot syrup through a fine mesh strainer into a heat safe measuring cup or bowl. This optional step removes any undissolved sugar particles or impurities, giving you a perfectly smooth final product.
- Let the syrup cool to room temperature before transferring it to your storage container using a funnel. The syrup will thicken as it cools, reaching its final consistency after about 30 minutes at room temperature.
Store your brown sugar syrup in an airtight glass jar or bottle in the refrigerator where it will keep for up to one month. The cold temperature preserves freshness and prevents fermentation. Always use clean utensils when scooping out syrup to prevent contamination. The syrup may thicken slightly when cold but will thin out again at room temperature. You can freeze brown sugar syrup for up to three months in a freezer safe container, leaving an inch of headspace for expansion.