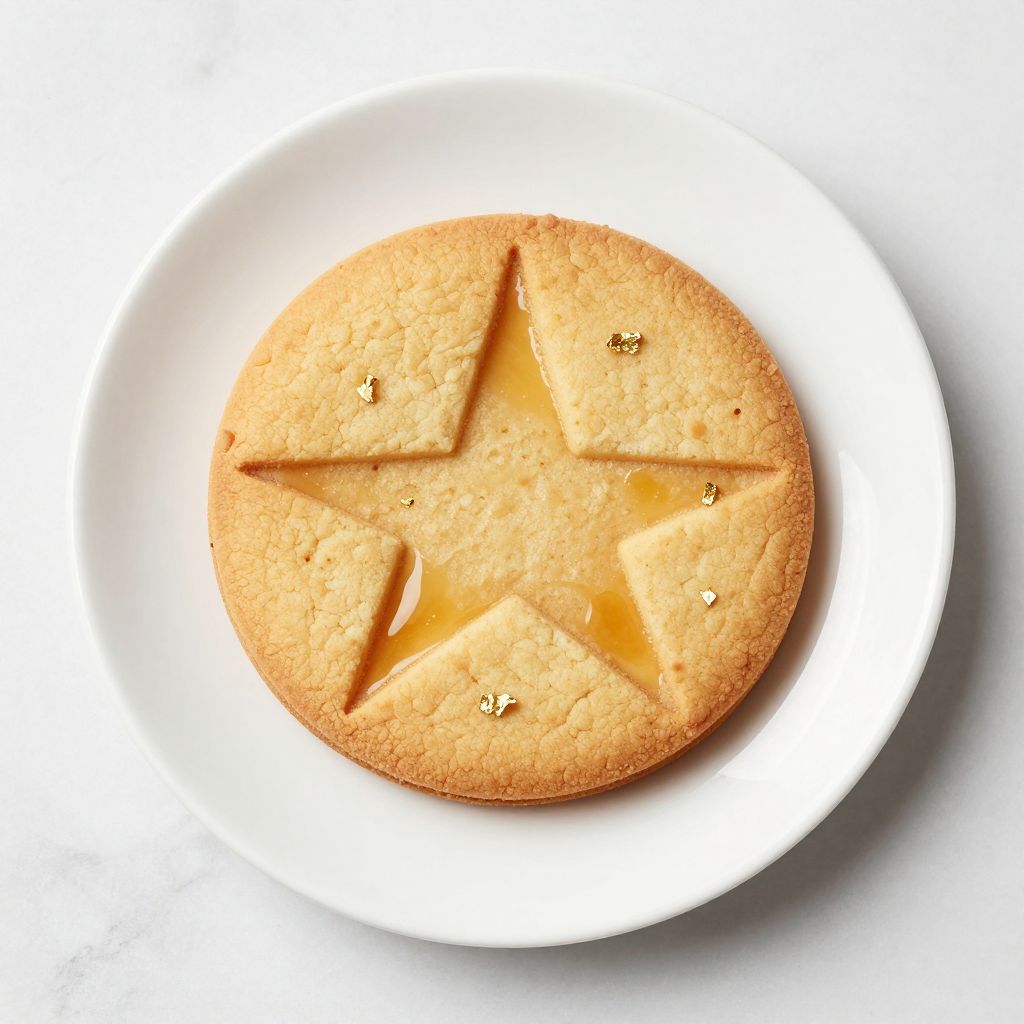
The internet went wild when that haunting children’s game turned deadly in the global phenomenon, and suddenly everyone wanted to recreate the delicate dalgona candy from their own kitchens. That crispy, golden sugar cookie with its precarious shapes became an instant cultural icon, and making it at home is surprisingly simple.
This Squid Game cookie recipe delivers that same brittle, caramelized sweetness with a satisfying snap. You only need two ingredients and about fifteen minutes to create these thin, glass-like treats that taste like honeycomb toffee.
Why You’ll Love This Recipe
This recipe captures the authentic taste and texture of Korean dalgona candy with minimal ingredients and effort. The challenge of cutting out shapes makes it interactive and fun for groups.
- Only two ingredients needed: sugar and baking soda
- Ready in under 15 minutes from start to finish
- Creates that authentic caramelized, honeycomb flavor
- Fun party activity that sparks friendly competition
- Naturally gluten-free and dairy-free
My Experience Making This Recipe
The first time I melted sugar in a ladle over my gas stove, I felt like a mad scientist watching it transform from white granules into liquid gold. The moment I added the baking soda and saw it foam up like magic, I understood why this candy captivated millions of viewers.
My friends gathered around as I pressed circles and stars into each cookie, and we took turns trying to extract the shapes without breaking them. Some cracked immediately, others came out perfectly, but everyone kept reaching for more because the sweet, slightly bitter caramel flavor is genuinely addictive.
The cookies shattered with that satisfying crack between our teeth, releasing waves of toasted sugar flavor. Even the “failed” attempts with broken shapes disappeared within minutes.
Recipe Overview
- Recipe Name: Squid Game Dalgona Cookie
- Servings: 4 cookies
- Prep Time: 5 minutes
- Cook Time: 5 minutes
- Total Time: 10 minutes
- Course: Snack, Dessert
- Cuisine: Korean
- Calories per Serving: 210
Equipment You Will Need
- Metal ladle or small metal measuring cup
- Gas stove, camping burner, or portable butane stove
- Wooden chopstick or metal skewer for stirring
- Parchment paper or silicone baking mat
- Flat metal spatula or press
- Cookie cutters or metal shape stamps (circle, star, triangle, umbrella)
- Needle or toothpick for testing doneness
- Heat-resistant surface or baking sheet
Ingredients for Squid Game Cookie Recipe
- 2 tablespoons granulated white sugar (per cookie)
- 1 small pinch baking soda (about 1/8 teaspoon per cookie)
Ingredient Notes and Substitutions
- Granulated white sugar: This creates the caramel base that melts smoothly and develops that signature golden color. You cannot substitute brown sugar, powdered sugar, or alternative sweeteners as they will not caramelize properly or will burn.
- Baking soda: This reacts with the hot sugar to create carbon dioxide bubbles, giving the cookie its airy, honeycomb texture. There is no substitute for baking soda in this recipe as baking powder contains additional ingredients that will affect the taste and texture.
How to Make Squid Game Cookie Recipe
Step 1: Prepare Your Workspace
Set up your parchment paper on a heat-resistant surface and have your spatula and cookie cutter ready within arm’s reach. Working quickly is key once the sugar melts, so having everything prepared prevents the mixture from hardening before you can shape it.
Step 2: Melt the Sugar
Place 2 tablespoons of sugar in your metal ladle and hold it about 2 inches above medium-low heat, moving it in gentle circular motions. The sugar will start melting around the edges first, then gradually liquefy into a clear amber syrup after about 2 to 3 minutes.
Step 3: Monitor the Caramelization
Continue heating until the melted sugar turns a light golden brown color, similar to honey. Removing it at this exact moment prevents burning, which happens fast and turns the sugar bitter and dark.
Step 4: Add the Baking Soda
Remove the ladle from heat and immediately sprinkle in a tiny pinch of baking soda while stirring rapidly with your chopstick or skewer. The mixture will foam up dramatically and lighten in color, creating that characteristic airy texture.
Step 5: Pour and Flatten
Quickly pour the foaming mixture onto your prepared parchment paper in a small mound. Place another piece of parchment on top and press down firmly with your flat spatula or the bottom of a metal press to flatten it into a thin, even circle about 3 to 4 inches wide.
Step 6: Imprint Your Shape
While the cookie is still warm but starting to set (about 10 to 15 seconds after pressing), gently press your cookie cutter or shape stamp into the center, creating a clear outline without cutting all the way through. The imprint should be visible but not so deep that it weakens the structure.
Step 7: Cool Completely
Let the cookie cool and harden completely on the parchment for about 3 to 5 minutes. Trying to move it too soon will cause it to stick or break since it needs time to solidify from its molten state.
Step 8: Test and Serve
Once cooled, carefully peel the cookie off the parchment paper. You can attempt to poke out the shape with a needle, just like in the show, or simply enjoy it whole.
Pro Tip: Use slightly less baking soda than you think you need. Too much creates excessive bubbles that make the cookie too fragile and impossible to cut without breaking.
Tips for the Best Squid Game Cookie Recipe
- Keep the heat at medium-low to prevent the sugar from burning before it fully melts. Patience during melting creates a smoother, more evenly caramelized result.
- Stir the baking soda in quickly but thoroughly to distribute the bubbles evenly throughout the mixture. Uneven mixing creates weak spots that crack easily.
- Press the cookie as thin as possible without creating holes, as thinner cookies are easier to work with and have better texture. Thick cookies become too hard and jawbreaker-like.
- Make one cookie at a time rather than batching, as the mixture hardens within seconds. Rushing multiple cookies leads to failures and wasted ingredients.
- Clean your ladle completely between batches by heating it empty to burn off residue. Old caramel stuck to the ladle interferes with even melting.
- Practice with simple shapes like circles first before attempting complex designs like umbrellas. Building your technique prevents frustration with intricate patterns.
Common Mistakes to Avoid
- Using too much baking soda creates a bitter, soapy taste and makes the cookie so porous it crumbles immediately. A tiny pinch is all you need for the right texture.
- Overheating the sugar until it turns dark brown produces a burnt, acrid flavor that ruins the entire cookie. Pull it from heat when it just reaches light amber.
- Pressing the shape stamp too hard cuts completely through and defeats the purpose of the challenge. The goal is a gentle imprint you can carefully extract.
- Not working fast enough after adding baking soda allows the mixture to harden in the ladle. Speed is critical from the moment you add the leavening agent.
- Using an electric stove makes temperature control difficult and often results in uneven melting or burning. Gas or portable butane burners provide better heat control.
Serving Suggestions
These cookies work beautifully as part of a themed party or game night where guests compete to extract their shapes. Serve them alongside Korean snacks and beverages for an authentic experience.
- Pair with traditional Korean barley tea or hot green tea to balance the intense sweetness
- Serve as part of a Squid Game viewing party with other Korean street food snacks
- Crush broken pieces over vanilla ice cream for a honeycomb candy topping
- Package individual cookies in clear cellophane bags as party favors
- Set up a competition station with needles and a timer for authentic gameplay
Variations to Try
- Add a tiny drop of vanilla extract to the melted sugar before adding baking soda for subtle flavor depth. This creates a more complex caramel note without overwhelming the traditional taste.
- Mix in a pinch of sea salt with the baking soda for salted caramel dalgona with sophisticated flavor balance. The salt cuts through the sweetness and adds savory complexity.
- Drizzle melted chocolate over cooled cookies for a modern twist on the traditional recipe. Dark chocolate pairs especially well with the caramelized sugar.
- Press crushed freeze-dried strawberries into the hot surface before it cools for fruity flavor and pink color. This adds visual appeal and a tart contrast.
- Create mini versions using only 1 tablespoon of sugar for bite-sized pieces perfect for kids. Smaller cookies are less fragile and easier to handle.
Dietary Adaptations
- Gluten-free: This recipe is naturally gluten-free as it contains no flour or grain products. No modifications needed.
- Dairy-free: This recipe is naturally dairy-free with no butter, milk, or cream involved. No modifications needed.
- Vegan: This recipe is naturally vegan as both sugar and baking soda are plant-based. Verify your sugar brand uses bone char-free processing if strict vegan.
- Low-carb/Keto: This recipe cannot be adapted for low-carb diets as sugar is the essential ingredient that caramelizes. Allulose might work but will not achieve the same texture or flavor.
Storage and Reheating
Refrigerator
Store cooled cookies in an airtight container at room temperature rather than refrigerating them. Refrigeration introduces moisture that makes them sticky and soft.
- Layer cookies between parchment paper to prevent sticking
- Keep container in a cool, dry place away from humidity
- Consume within 2 to 3 days for best texture
Freezer
Freezing is not recommended for these delicate sugar cookies as ice crystals form and ruin the crispy texture. The cookies become sticky and lose their characteristic snap when thawed.
- If you must freeze, wrap individually in plastic wrap and foil
- Freeze for up to 1 month maximum
- Expect significant texture degradation
Reheating
These cookies are meant to be eaten at room temperature and should not be reheated. If they become slightly soft from humidity, you can attempt to crisp them briefly.
- Place in a 200°F oven for 2 to 3 minutes to drive off moisture
- Cool completely before eating
- Watch carefully to prevent melting or burning
Nutrition Information
| Nutrient | Amount |
|---|---|
| Calories | 210 |
| Total Fat | 0g |
| Saturated Fat | 0g |
| Carbohydrates | 53g |
| Fiber | 0g |
| Sugar | 52g |
| Protein | 0g |
| Sodium | 75mg |
| Cholesterol | 0mg |
Nutritional values are approximate and calculated based on standard ingredient measurements. Individual values may vary based on specific brands and exact portions used.
Frequently Asked Questions
Can I make these cookies without a gas stove?
You can use a portable butane camping stove or torch lighter held under the ladle, but electric stoves make temperature control very difficult. Gas provides the most reliable and even heat for melting sugar properly.
Why did my cookie turn out too hard to bite?
You likely used too little baking soda or didn’t stir it in thoroughly enough, resulting in dense caramel instead of airy honeycomb texture. Make sure to use a full small pinch and mix vigorously when adding it.
Can I make the dough ahead and shape it later?
No, this recipe must be made and shaped immediately as the sugar mixture hardens within seconds of cooling. There is no dough stage that can be refrigerated or saved for later use.
What should I do if the sugar starts burning?
Remove the ladle from heat immediately and start over with fresh sugar, as burnt caramel cannot be saved. Lower your heat next time and melt the sugar more slowly with patient stirring.
How do I get the shape out without breaking the cookie?
Use a sturdy needle or safety pin and work slowly around the edges of your stamped shape, gently pressing rather than stabbing. Patience and light pressure prevent cracks better than speed.
Why does my cookie taste bitter?
Too much baking soda creates a bitter, alkaline taste that overpowers the caramel sweetness. Use just a tiny pinch, barely enough to create foam.
Final Thoughts
This Squid Game cookie recipe brings a viral sensation right into your kitchen with minimal fuss and maximum fun. The simple chemistry of caramelized sugar and baking soda creates something far more interesting than the sum of its two humble parts.
Whether you’re hosting a themed party or just curious about the treat that captivated viewers worldwide, these crispy, golden cookies deliver authentic flavor and entertainment. Give it a try and see if you have the steady hand to extract your shape without a crack.
Squid Game Dalgona Cookie

This Squid Game cookie recipe delivers that same brittle, caramelized sweetness with a satisfying snap. You only need two ingredients and about fifteen minutes to create these thin, glass-like treats that taste like honeycomb toffee.
- Metal ladle or small metal measuring cup
- Gas stove, camping burner, or portable butane stove
- Wooden chopstick or metal skewer for stirring
- Parchment paper or silicone baking mat
- Flat metal spatula or press
- Cookie cutters or metal shape stamps
- Needle or toothpick
- Heat-resistant surface or baking sheet
Main
- 2 tablespoons granulated white sugar (per cookie)
- 1 small pinch baking soda (about 1/8 teaspoon per cookie)
- Set up your parchment paper on a heat-resistant surface and have your spatula and cookie cutter ready within arm’s reach. Working quickly is key once the sugar melts, so having everything prepared prevents the mixture from hardening before you can shape it.
- Place 2 tablespoons of sugar in your metal ladle and hold it about 2 inches above medium-low heat, moving it in gentle circular motions. The sugar will start melting around the edges first, then gradually liquefy into a clear amber syrup after about 2 to 3 minutes.
- Continue heating until the melted sugar turns a light golden brown color, similar to honey. Removing it at this exact moment prevents burning, which happens fast and turns the sugar bitter and dark.
- Remove the ladle from heat and immediately sprinkle in a tiny pinch of baking soda while stirring rapidly with your chopstick or skewer. The mixture will foam up dramatically and lighten in color, creating that characteristic airy texture.
- Quickly pour the foaming mixture onto your prepared parchment paper in a small mound. Place another piece of parchment on top and press down firmly with your flat spatula or the bottom of a metal press to flatten it into a thin, even circle about 3 to 4 inches wide.
- While the cookie is still warm but starting to set (about 10 to 15 seconds after pressing), gently press your cookie cutter or shape stamp into the center, creating a clear outline without cutting all the way through. The imprint should be visible but not so deep that it weakens the structure.
- Let the cookie cool and harden completely on the parchment for about 3 to 5 minutes. Trying to move it too soon will cause it to stick or break since it needs time to solidify from its molten state.
- Once cooled, carefully peel the cookie off the parchment paper. You can attempt to poke out the shape with a needle, just like in the show, or simply enjoy it whole.
Use slightly less baking soda than you think you need. Too much creates excessive bubbles that make the cookie too fragile and impossible to cut without breaking. Keep the heat at medium-low to prevent the sugar from burning before it fully melts. Make one cookie at a time rather than batching, as the mixture hardens within seconds.